Guest bedroom makeover

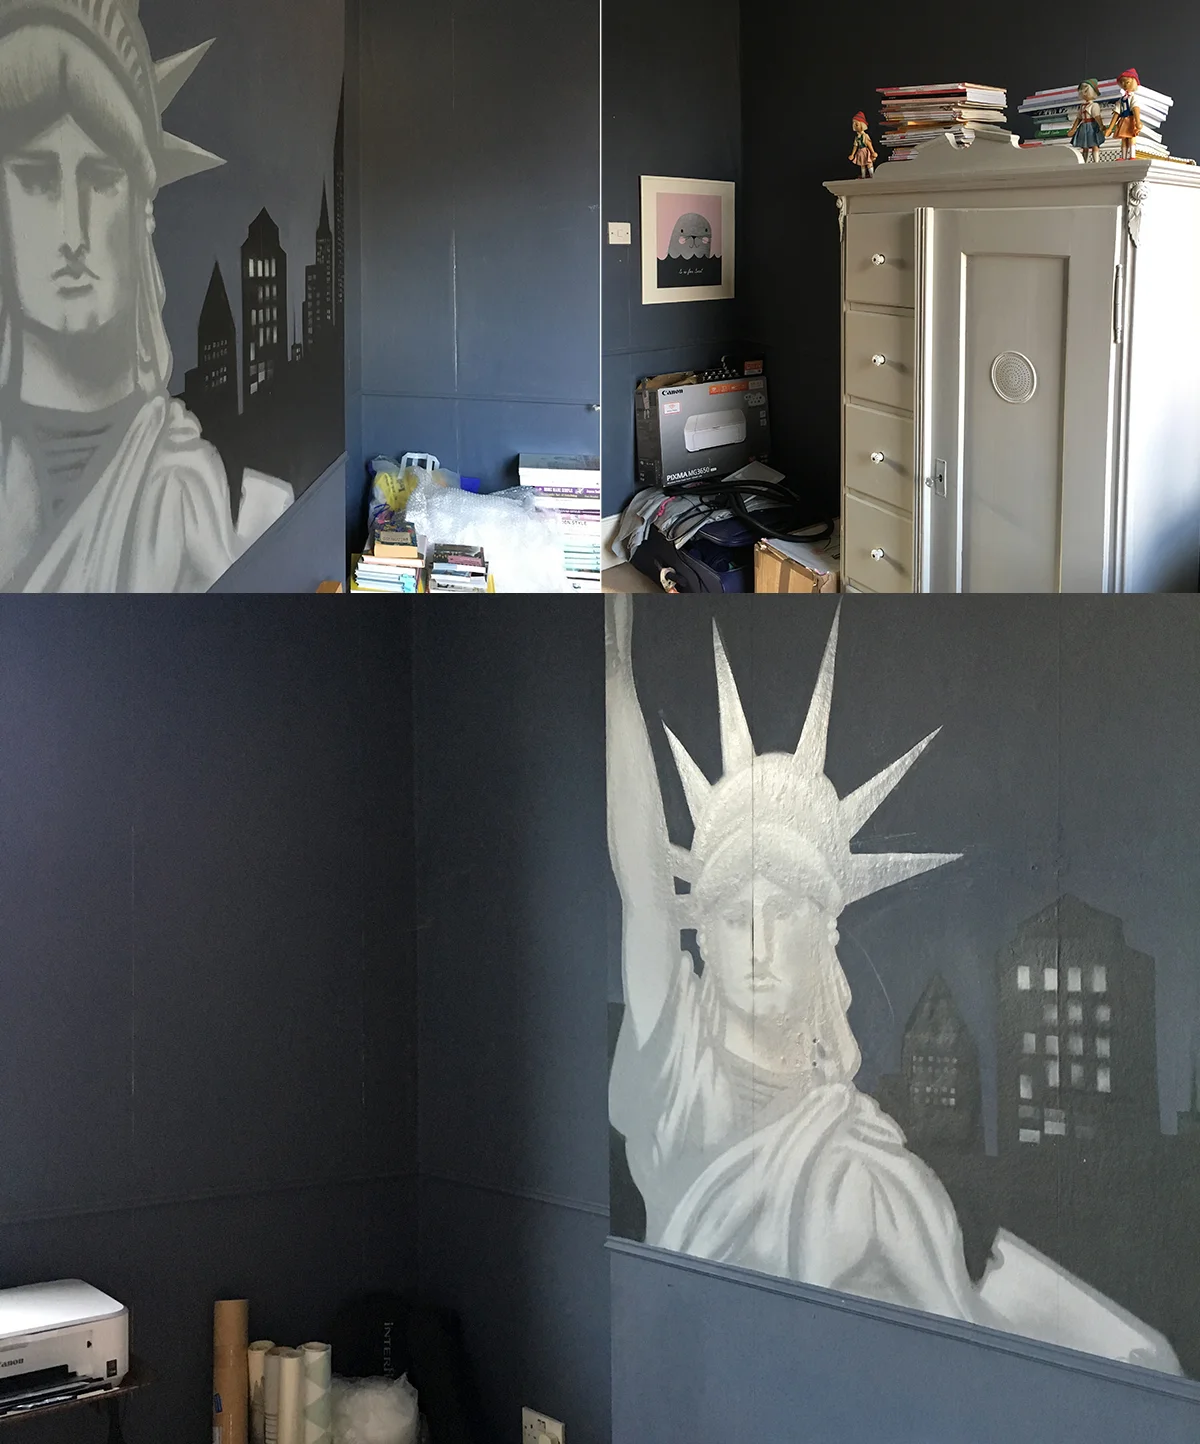
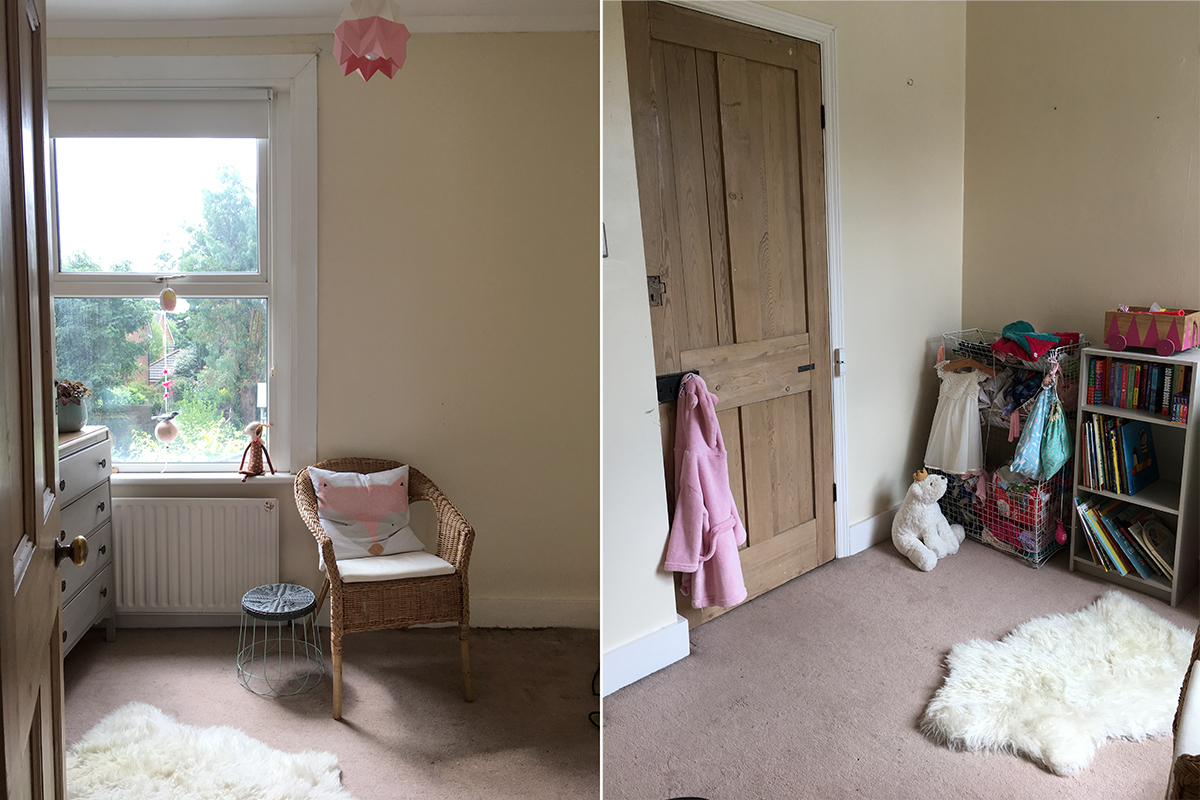
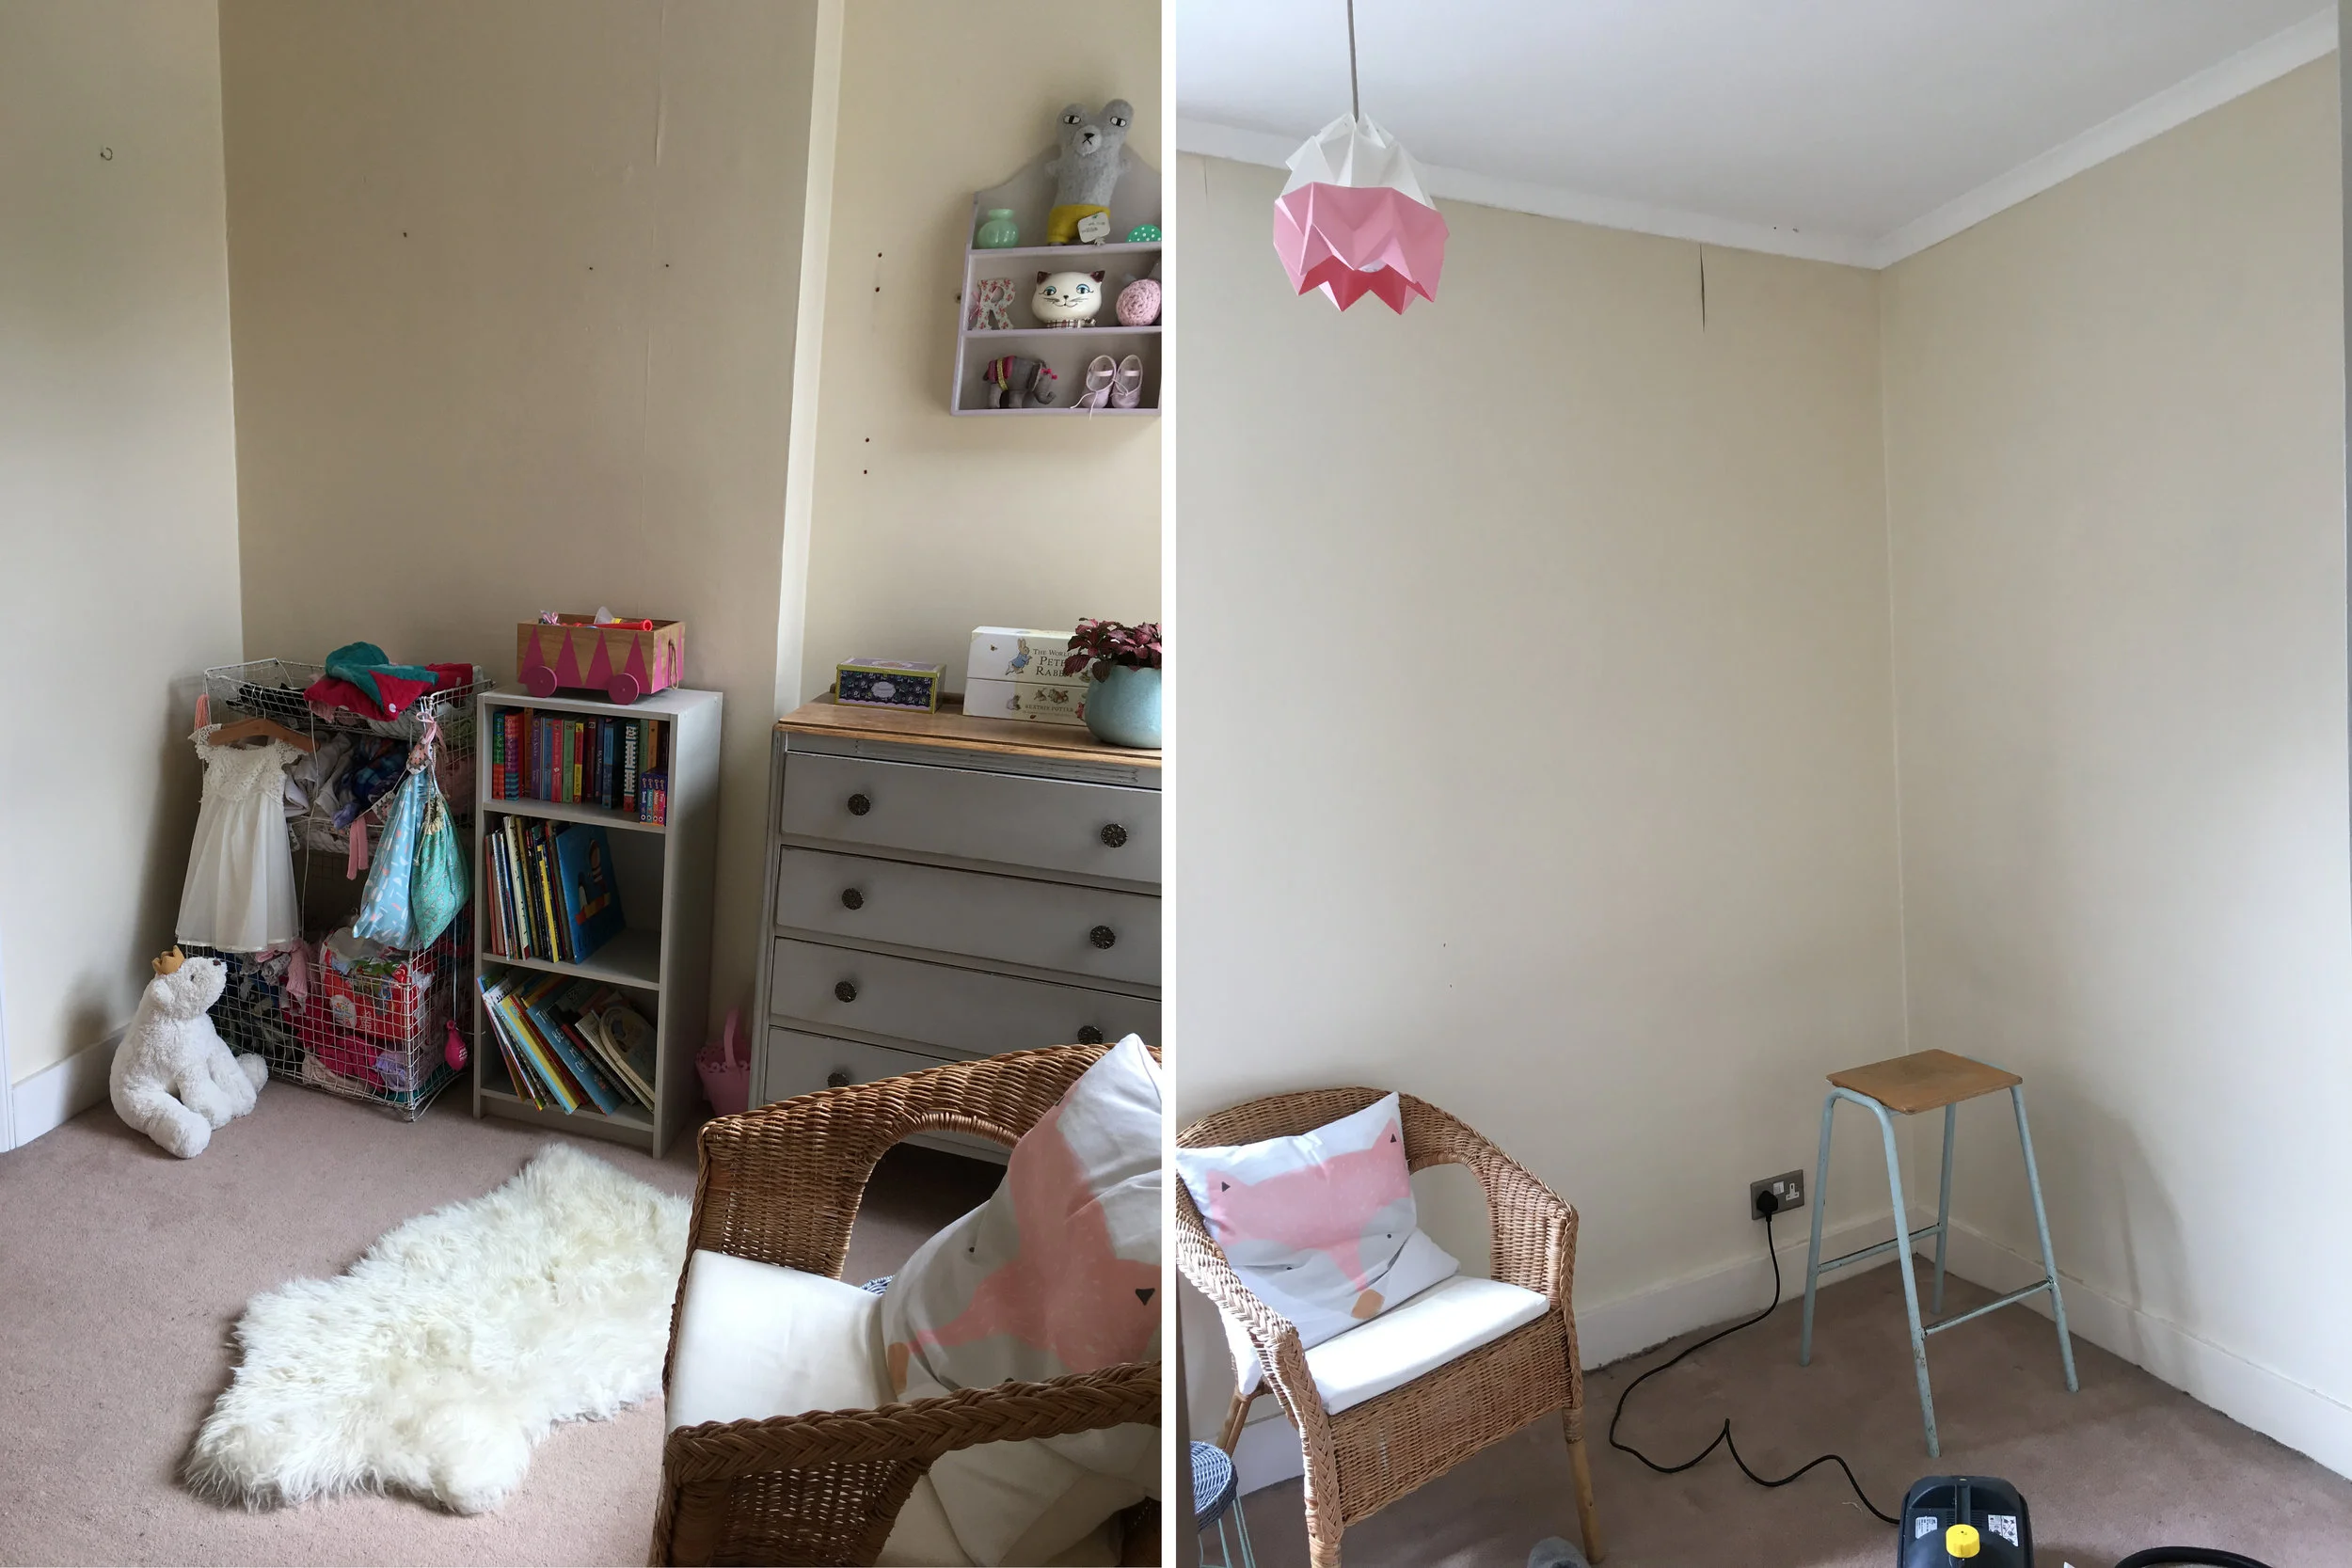
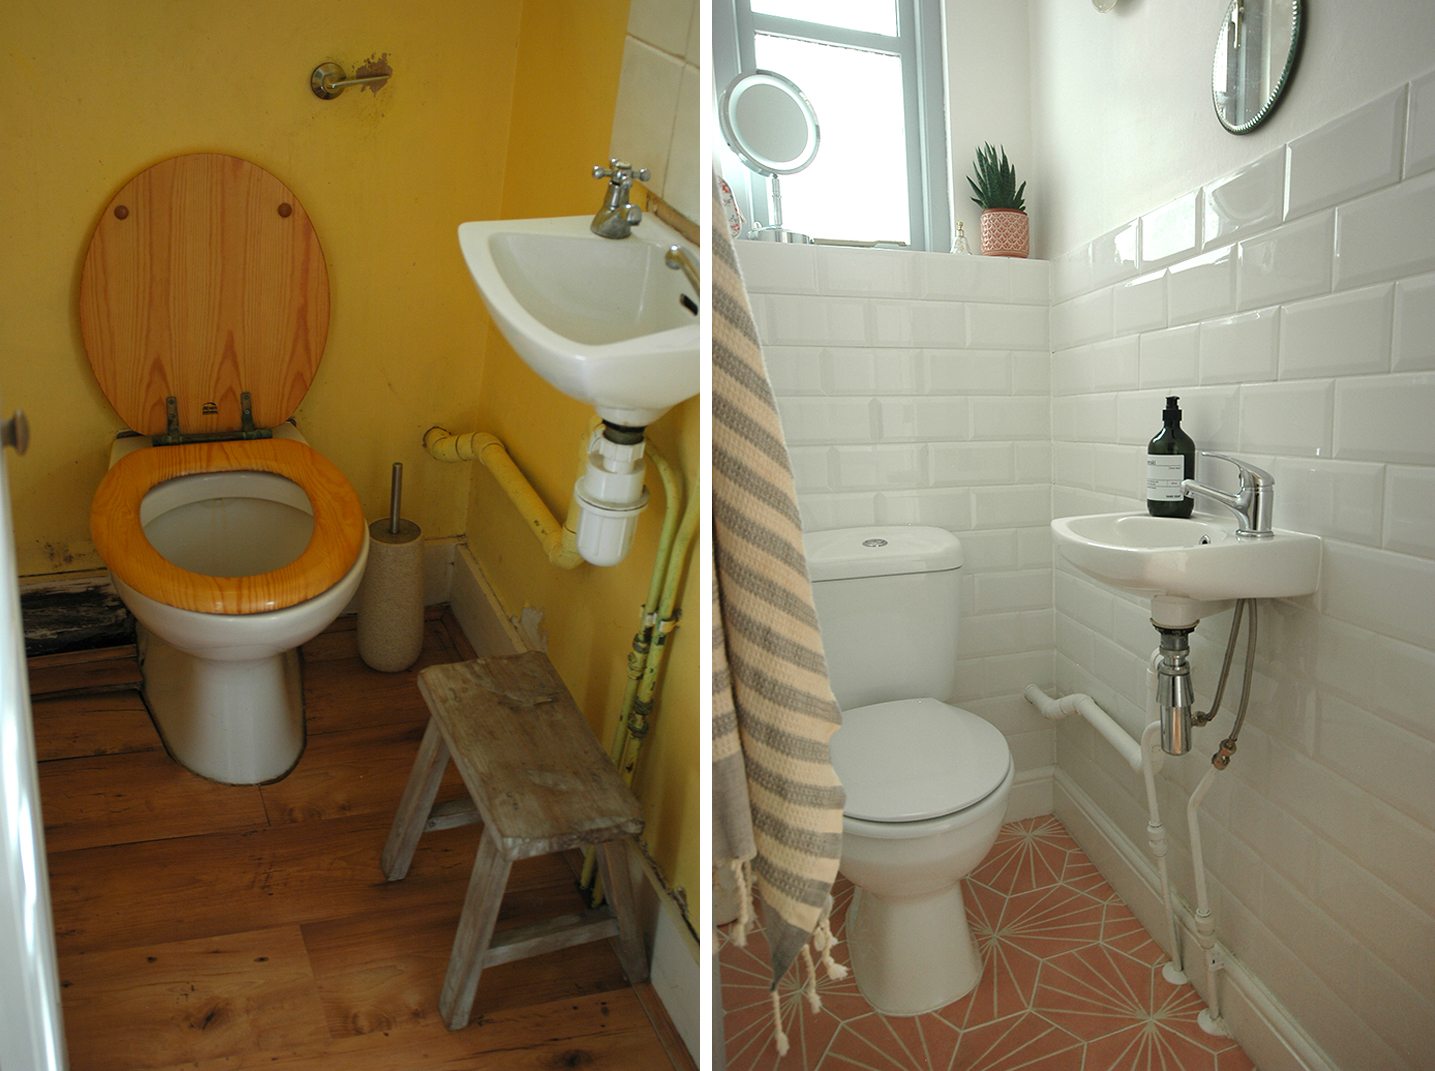
I recently wrote about my plans for our guest bedroom and I’m happy to say it’s now all done! yay! You don’t know how good it feels to have this room sorted as I always cringed when we had people staying as it was just so horrible in there! You can see a few ‘before’ pics here.

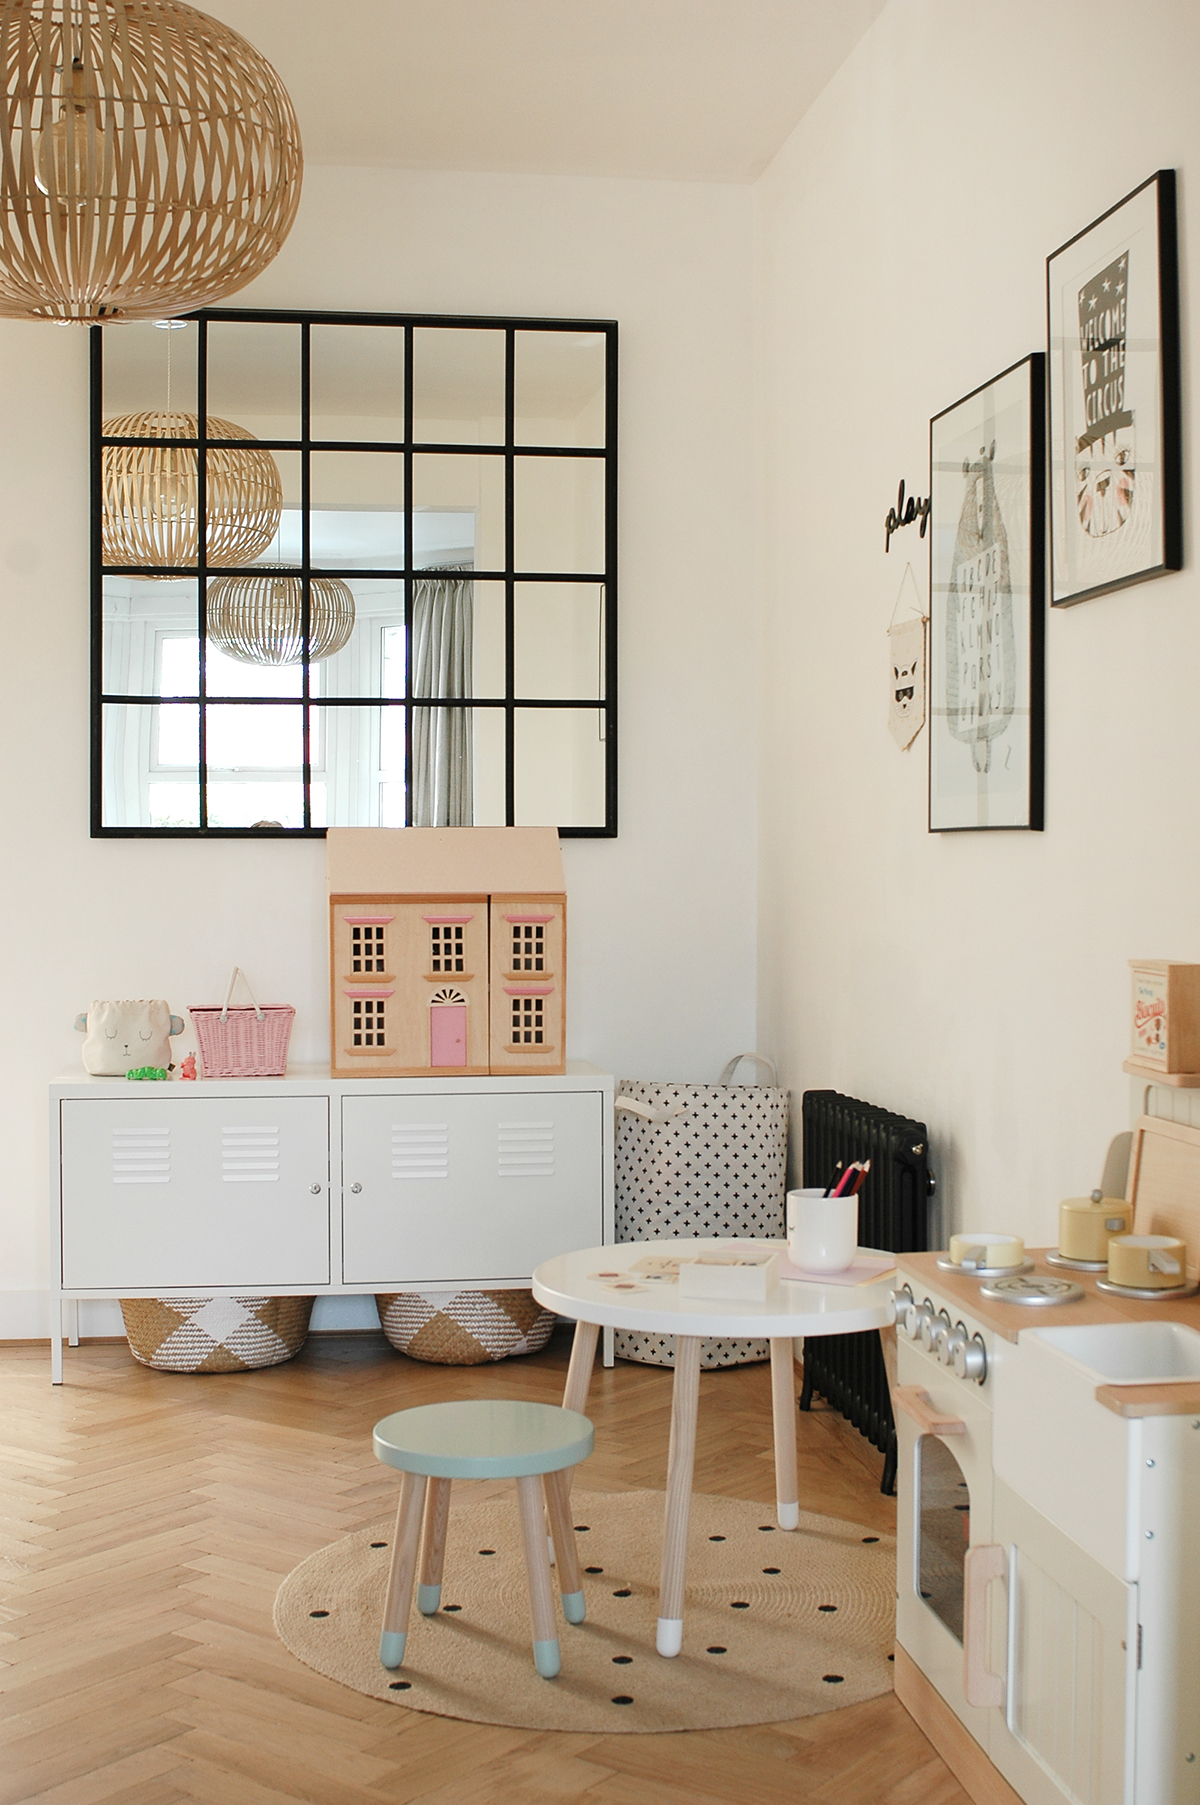
It’s really tricky to photograph this room as you are shooting towards the window a lot of the time, but hopefully these images give you a bit of an idea of how it looks!

Small spare bedroom makeover - bare plaster and pink walls
Guest bedroom makeover - bare plaster walls and pink paint
bedroom makeover - pale pink, mustard yellow and forest green colour palette

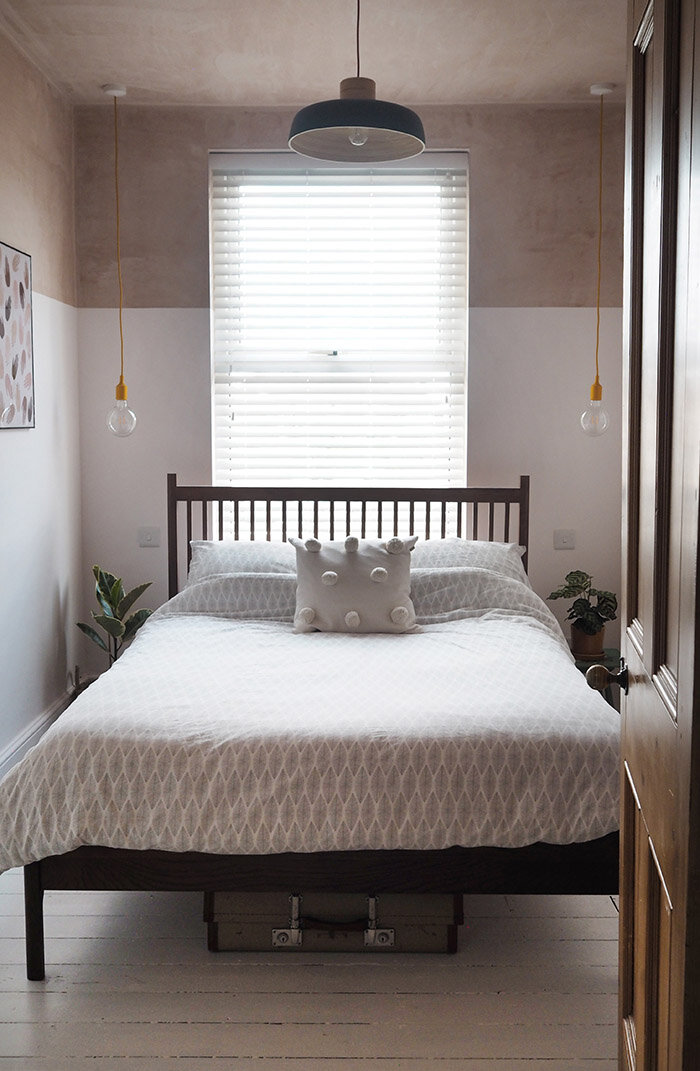
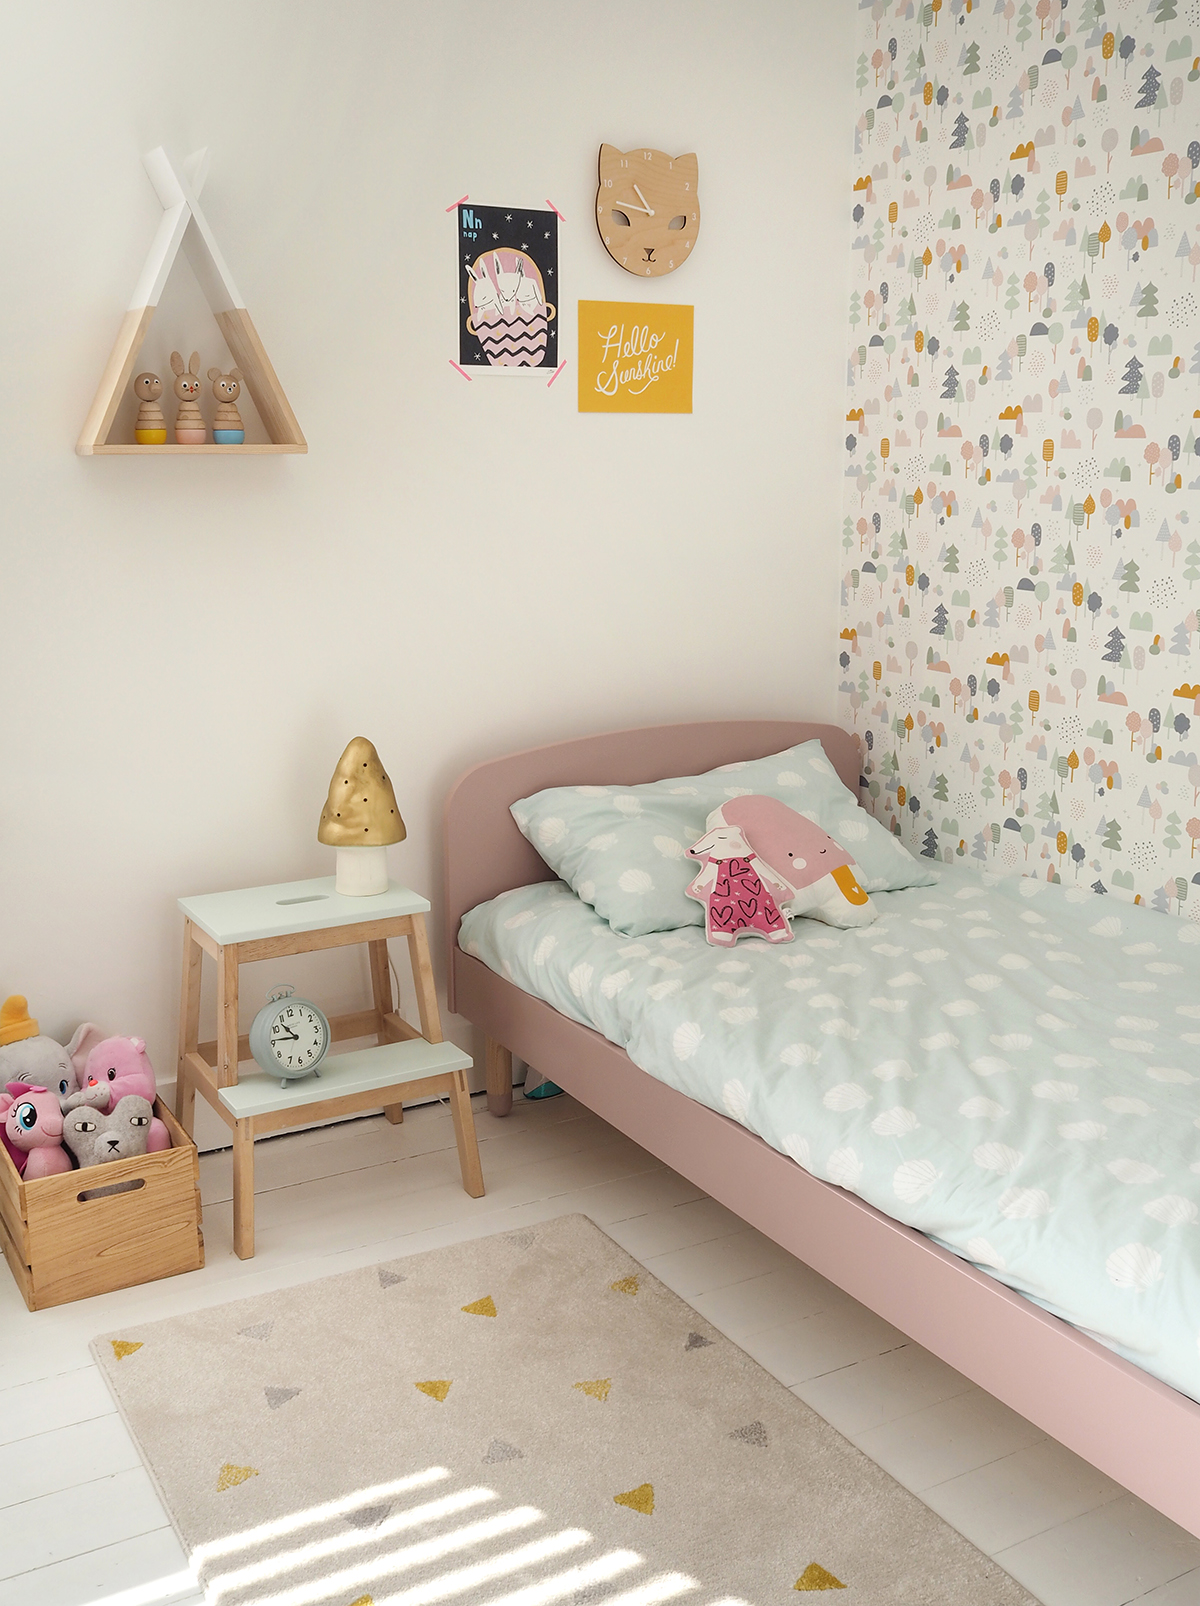
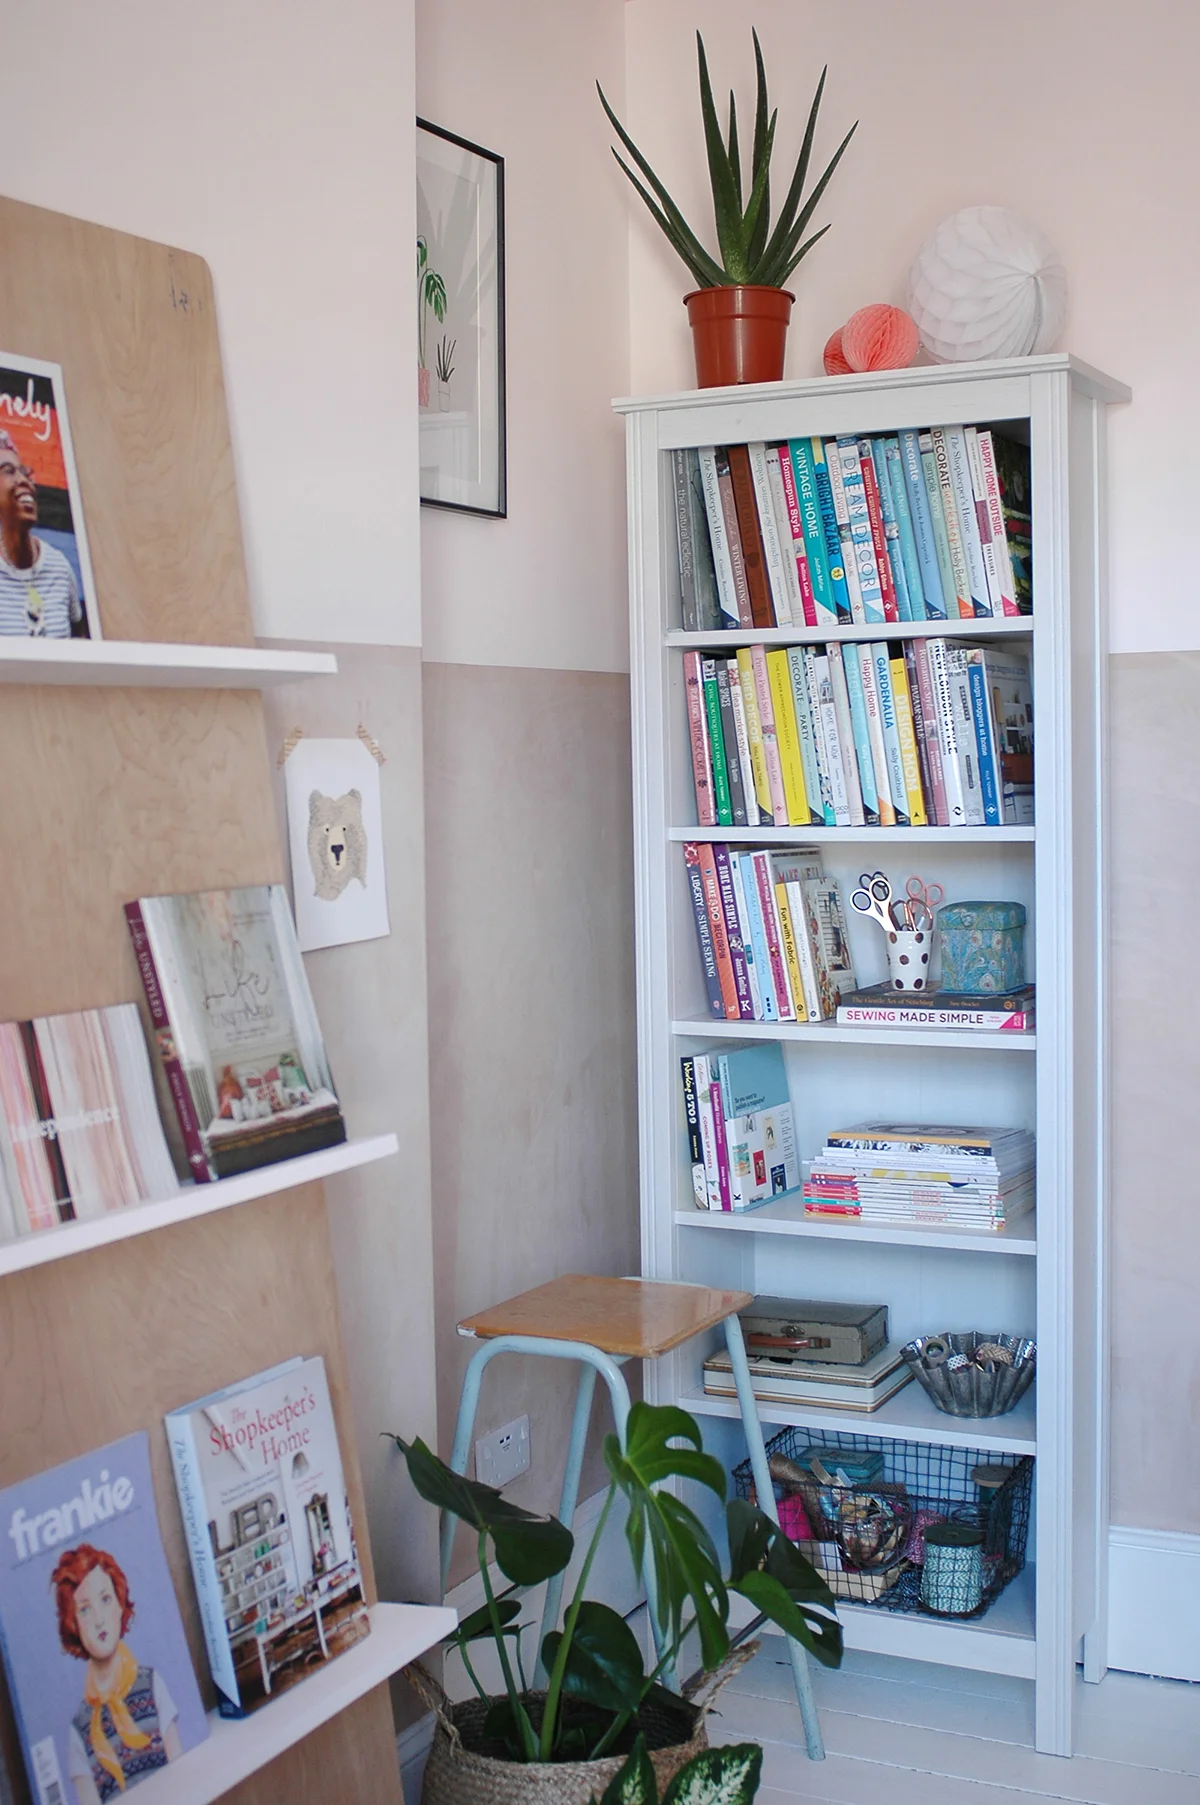
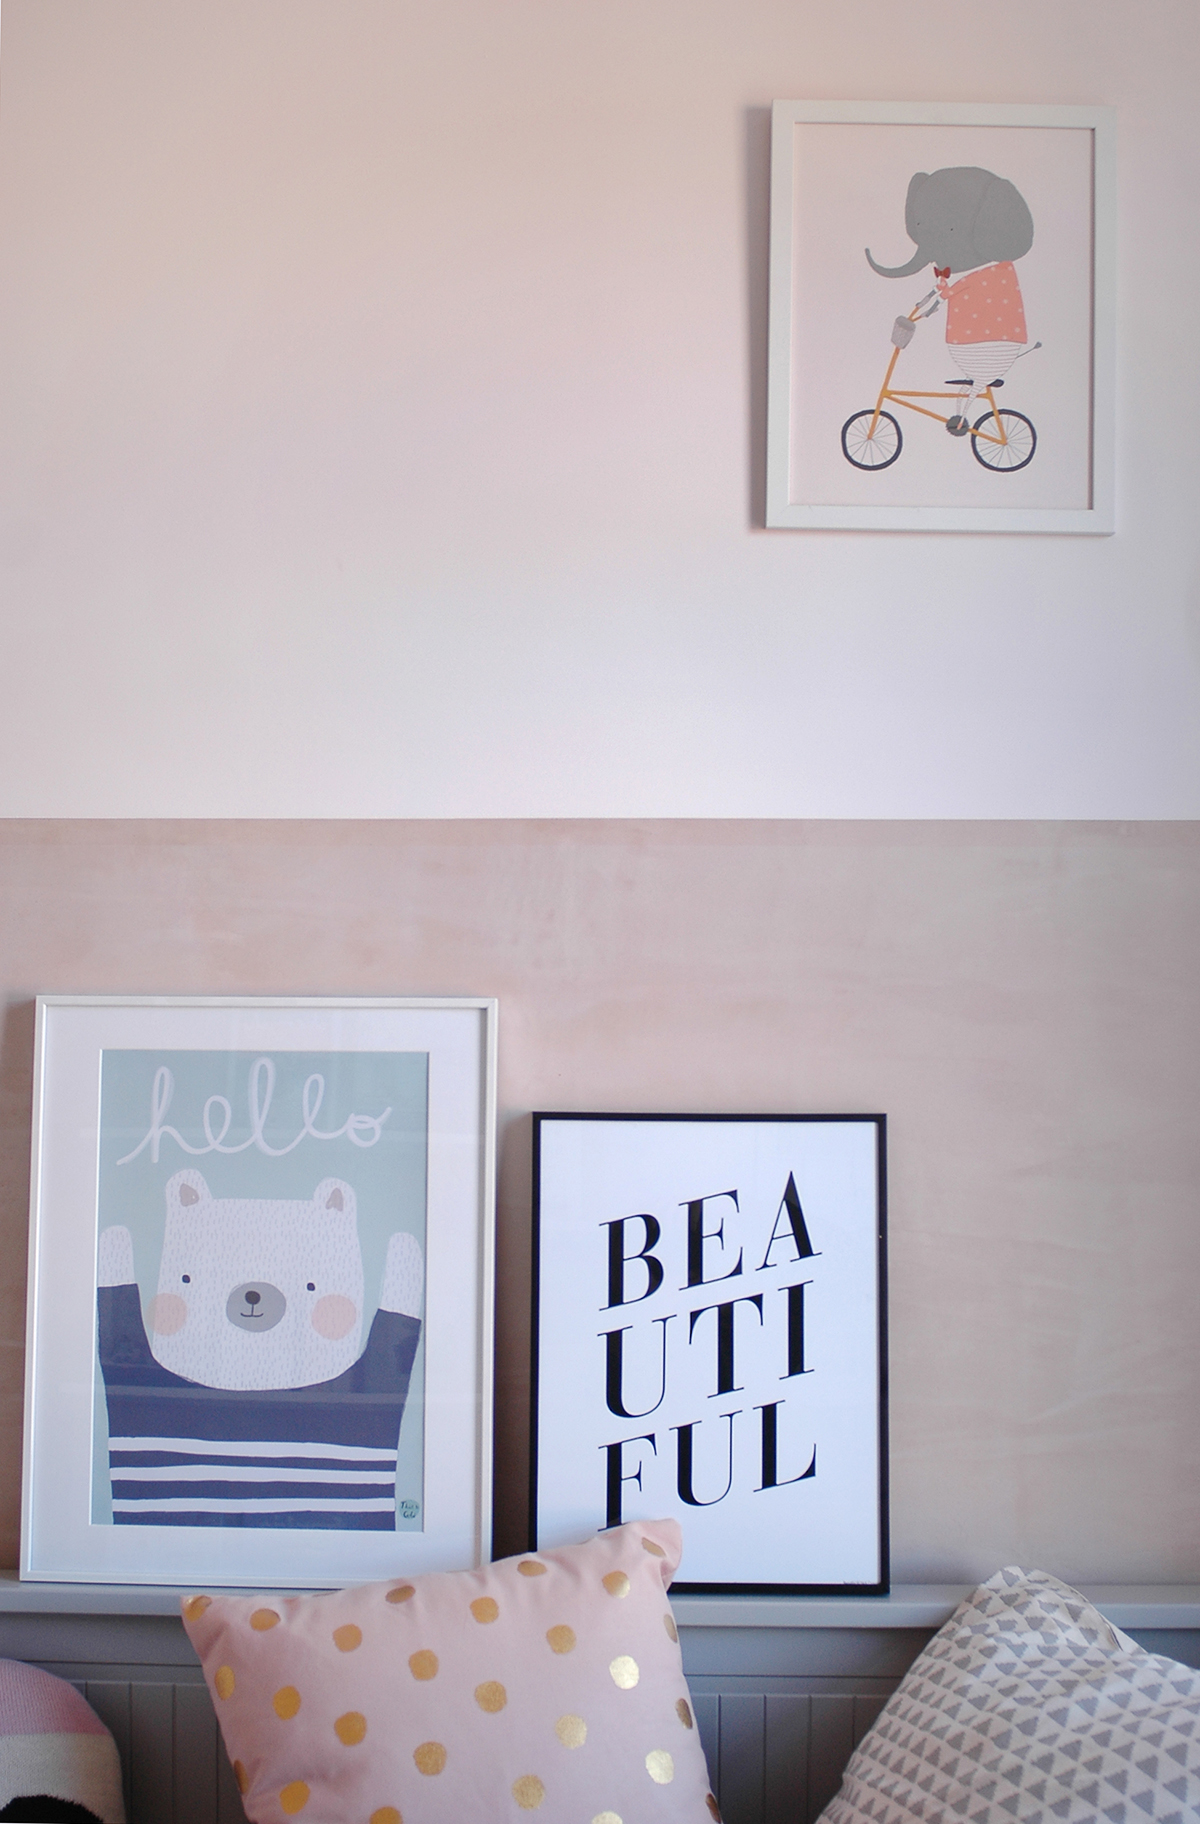
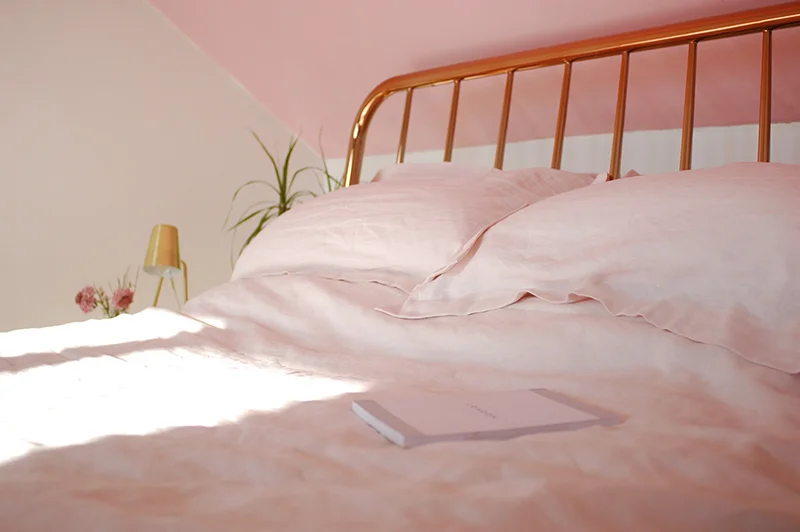
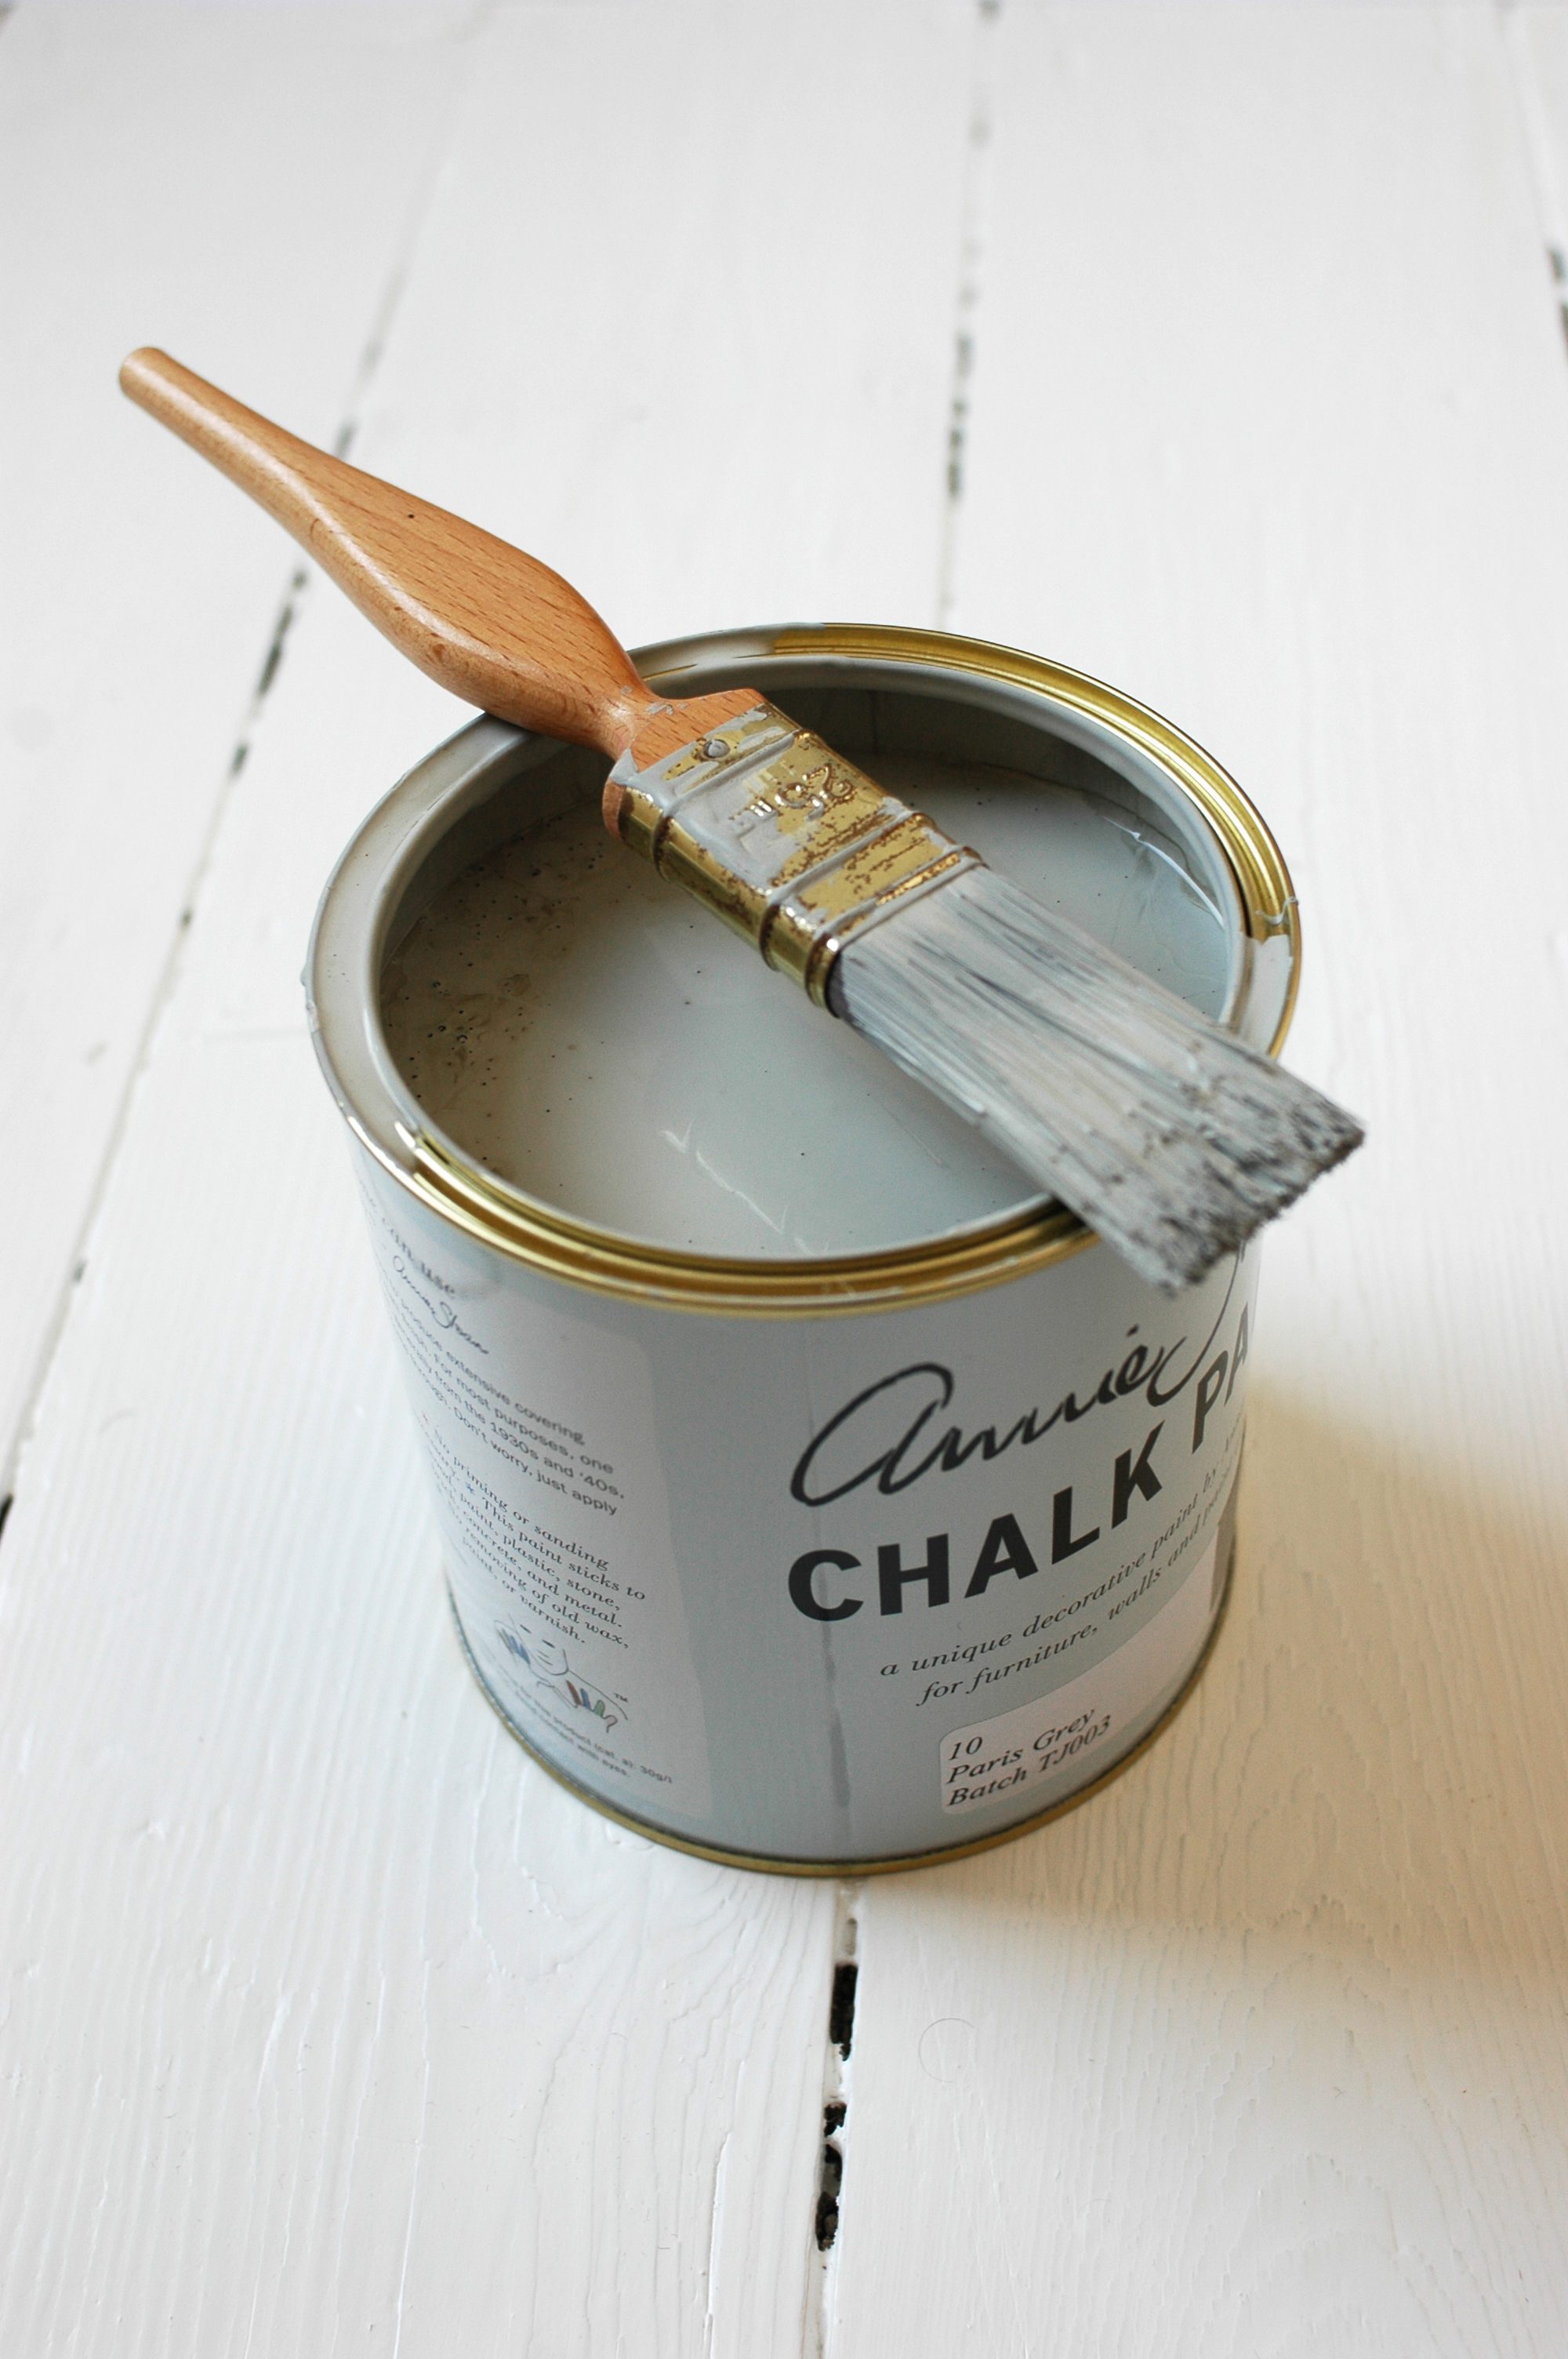
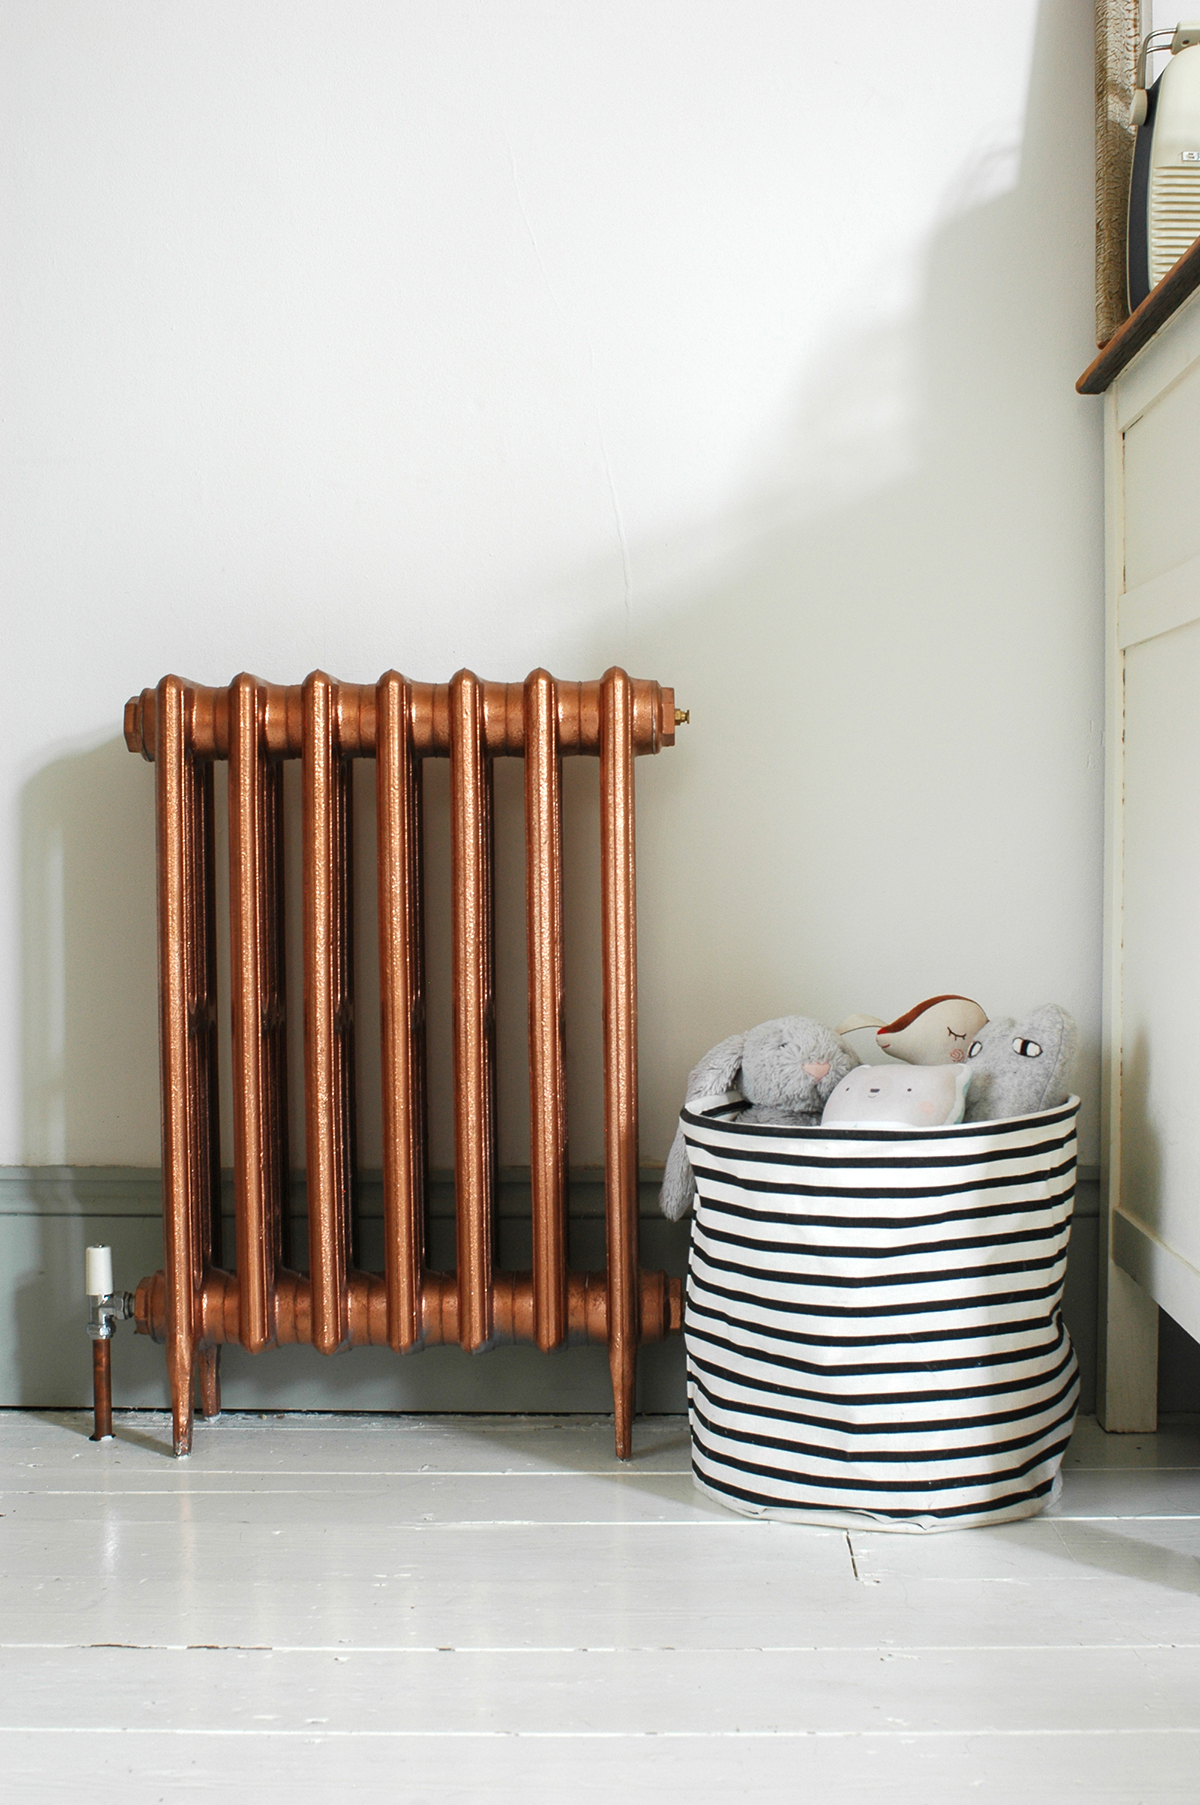
Transforming the room was relatively straight-forward and low cost. Firstly, I stripped all of the old wallpaper and we then had the entire room re-plastered - including the ceiling as it was artex previously. We then had some electrical work done as I wanted the hanging pendants on either side of the bed. Once the tradesmen had done their bit, it was over to me to finish the room. We pulled up the horrendous carpet and simply painted the floorboards white. For the walls, I did the reverse of what I did in my office - I left the top half and the ceiling as bare plaster and painted the lower half in pale pink, as well as the skirting boards. I tried out loads of paint samples but ended up going with the same colour that I have in my office as it seems to work best alongside the plaster. It’s Dulux Jasmine Shimmer. I love this paint technique - it’s great if you’re a lazy decorator like me, as you don’t even need a ladder to reach the high bits and it takes half the time! A good masking tape is essential though!

Guest bedroom makeover
Guest bedroom makeover - bare plaster walls and pink paint
bare plaster walls

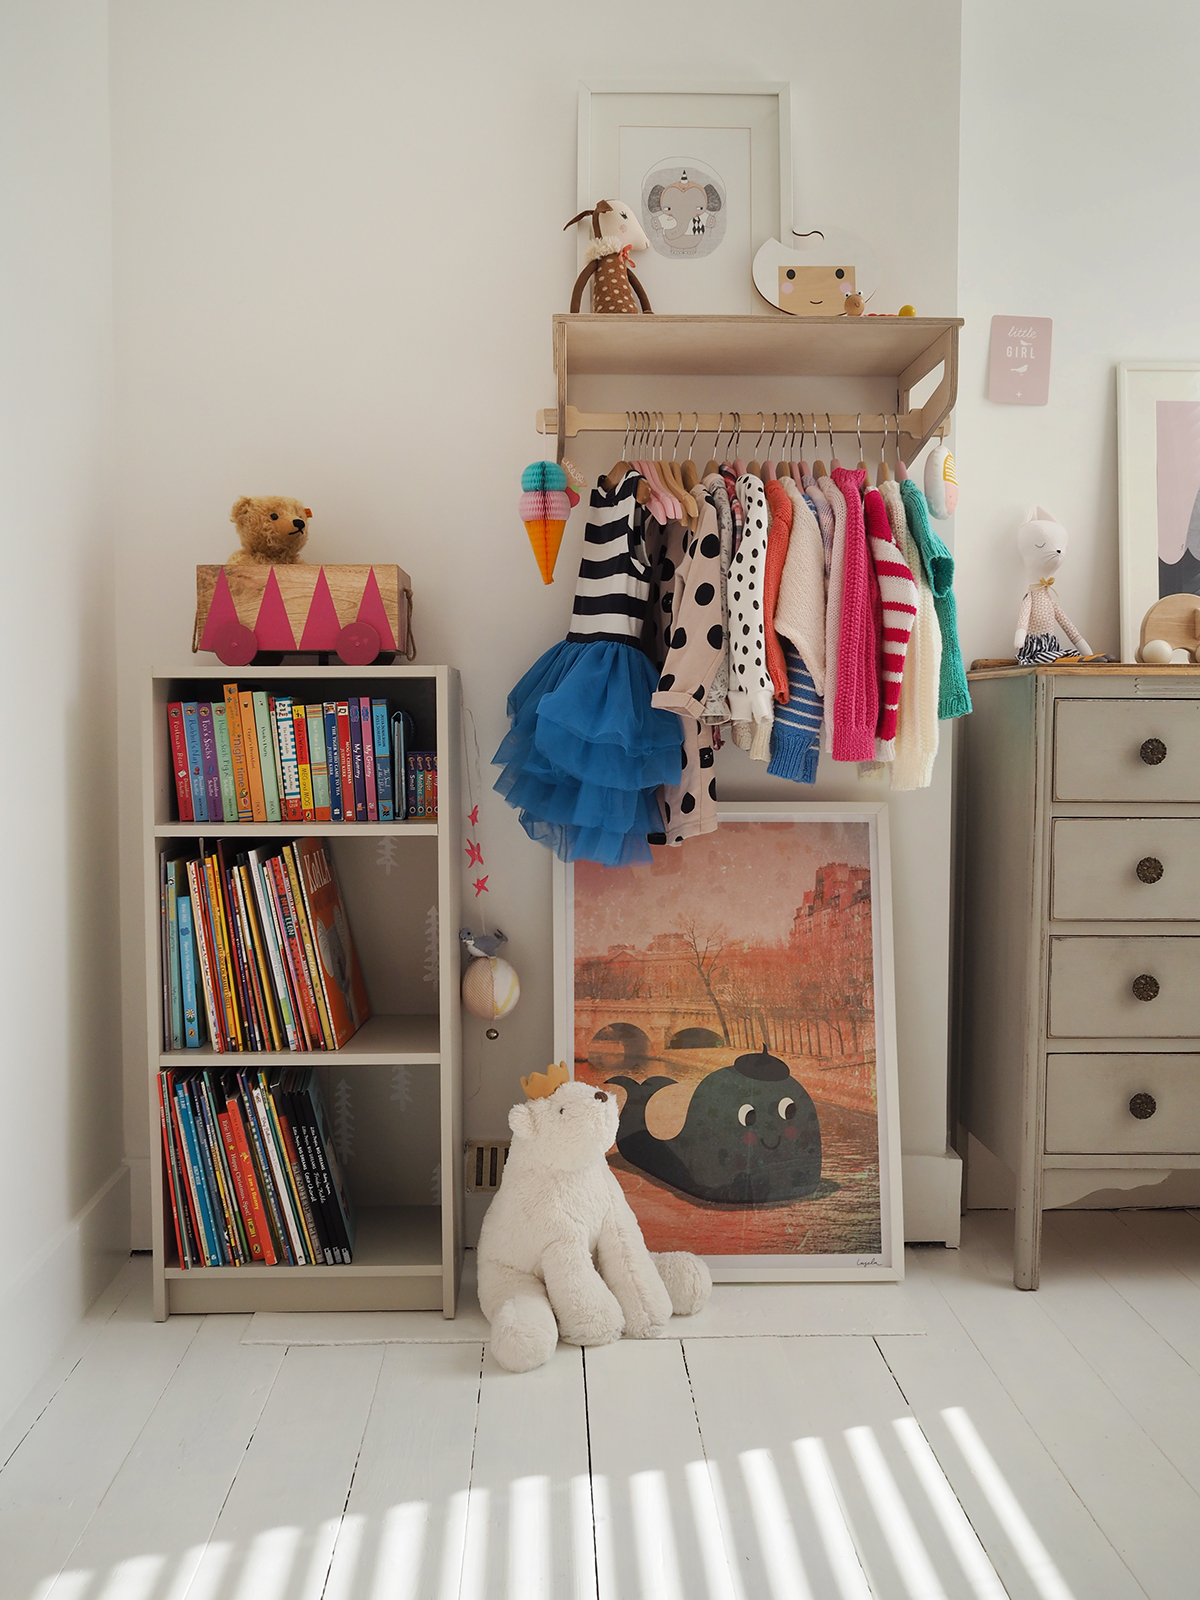
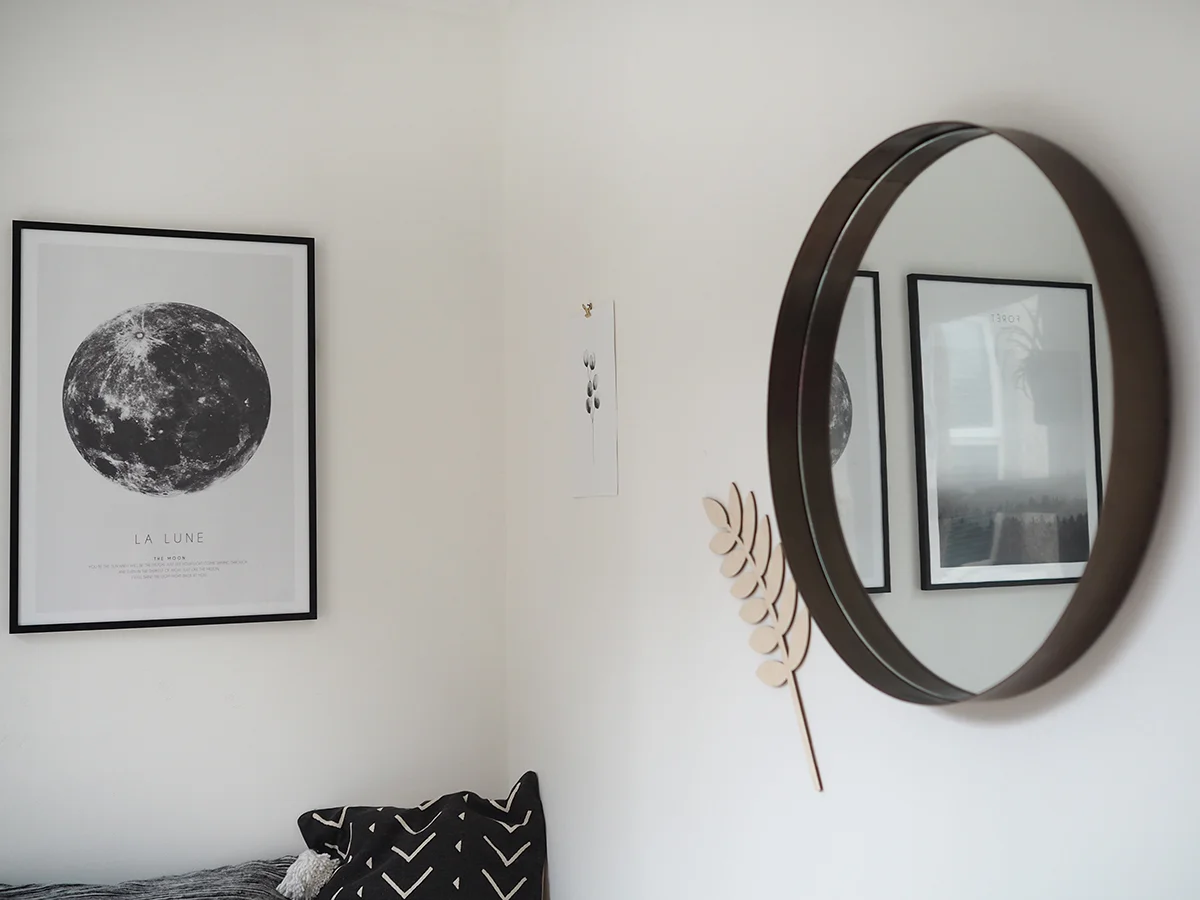
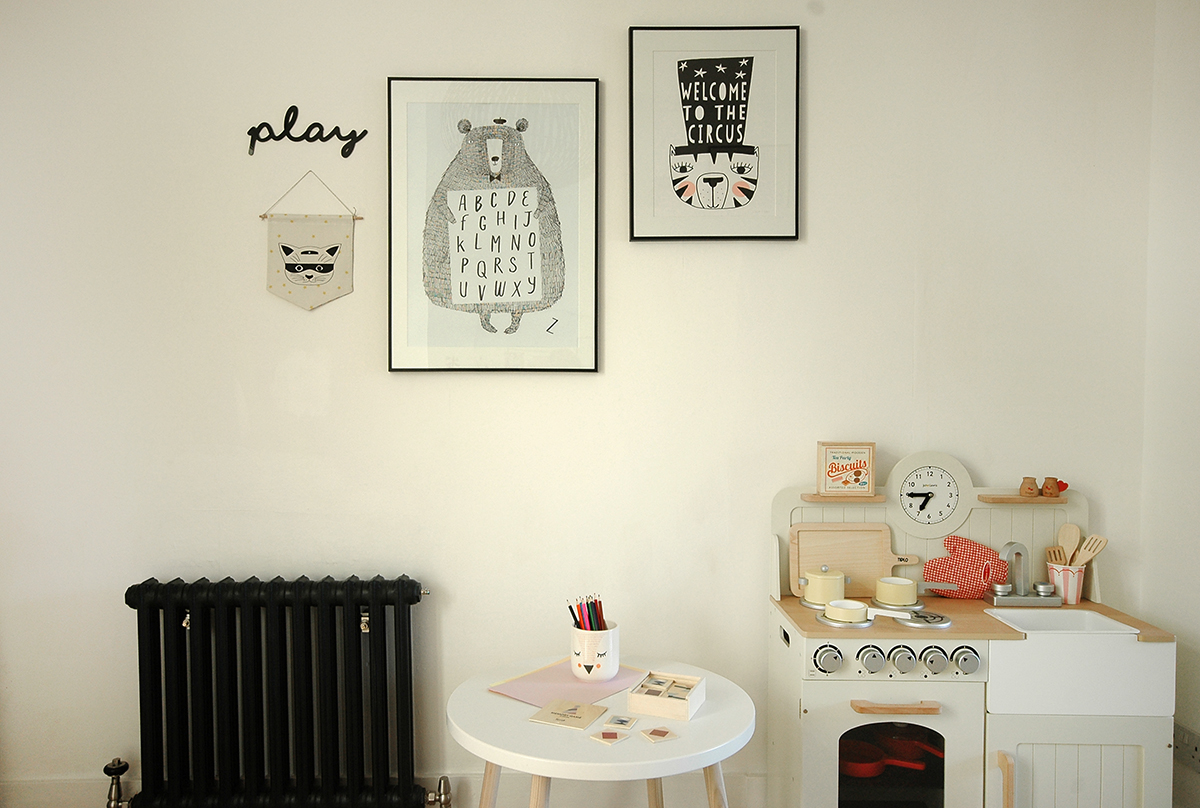
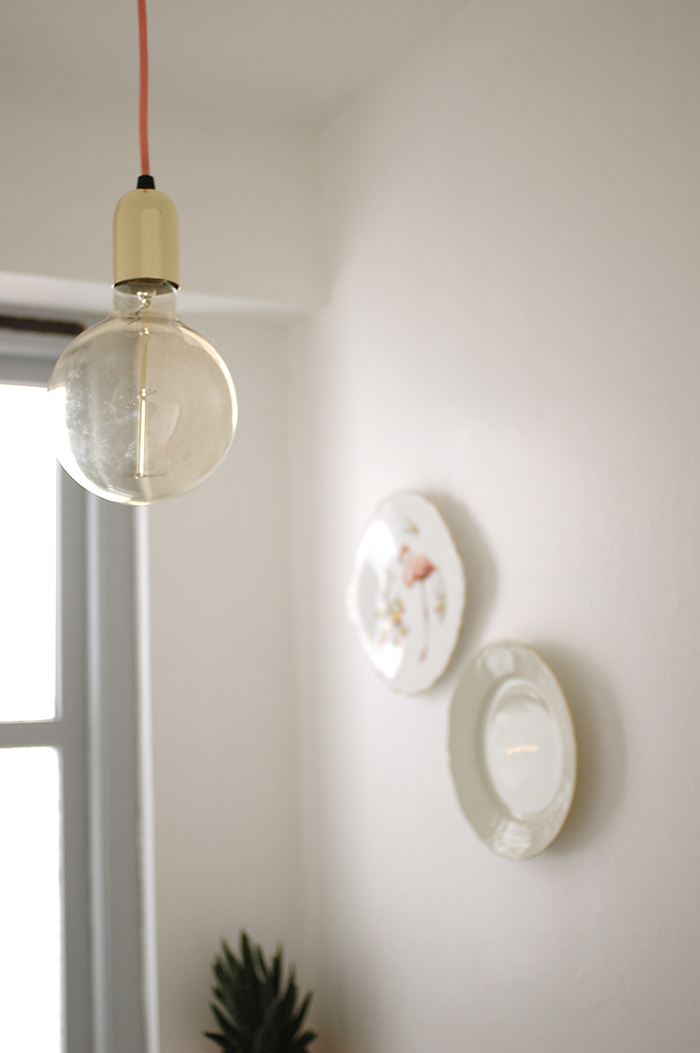
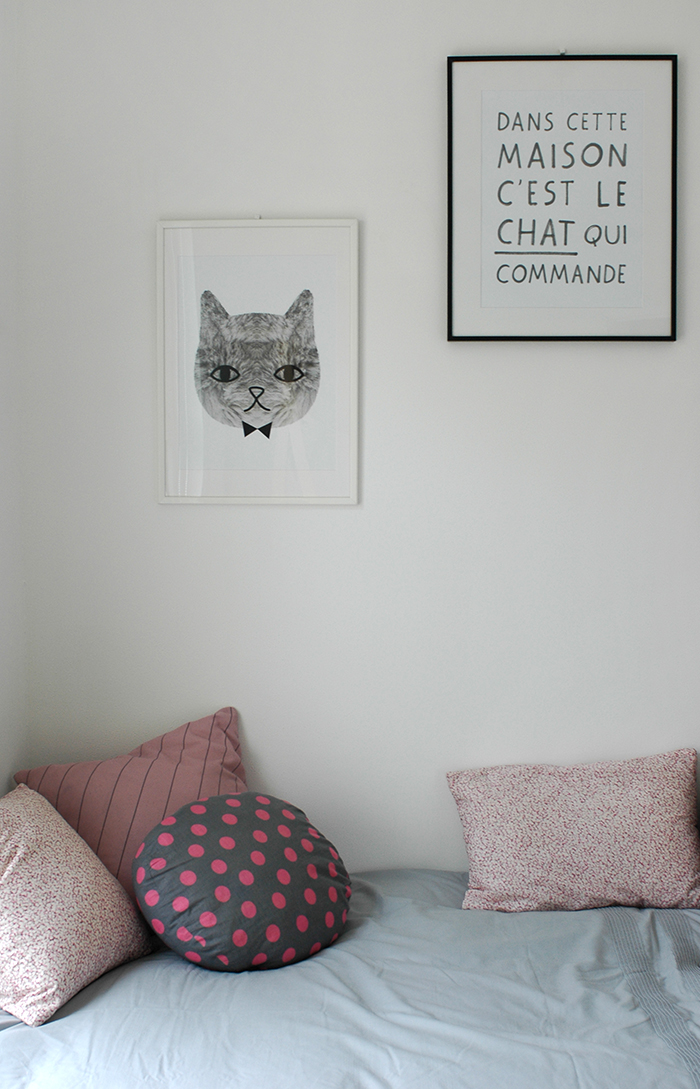
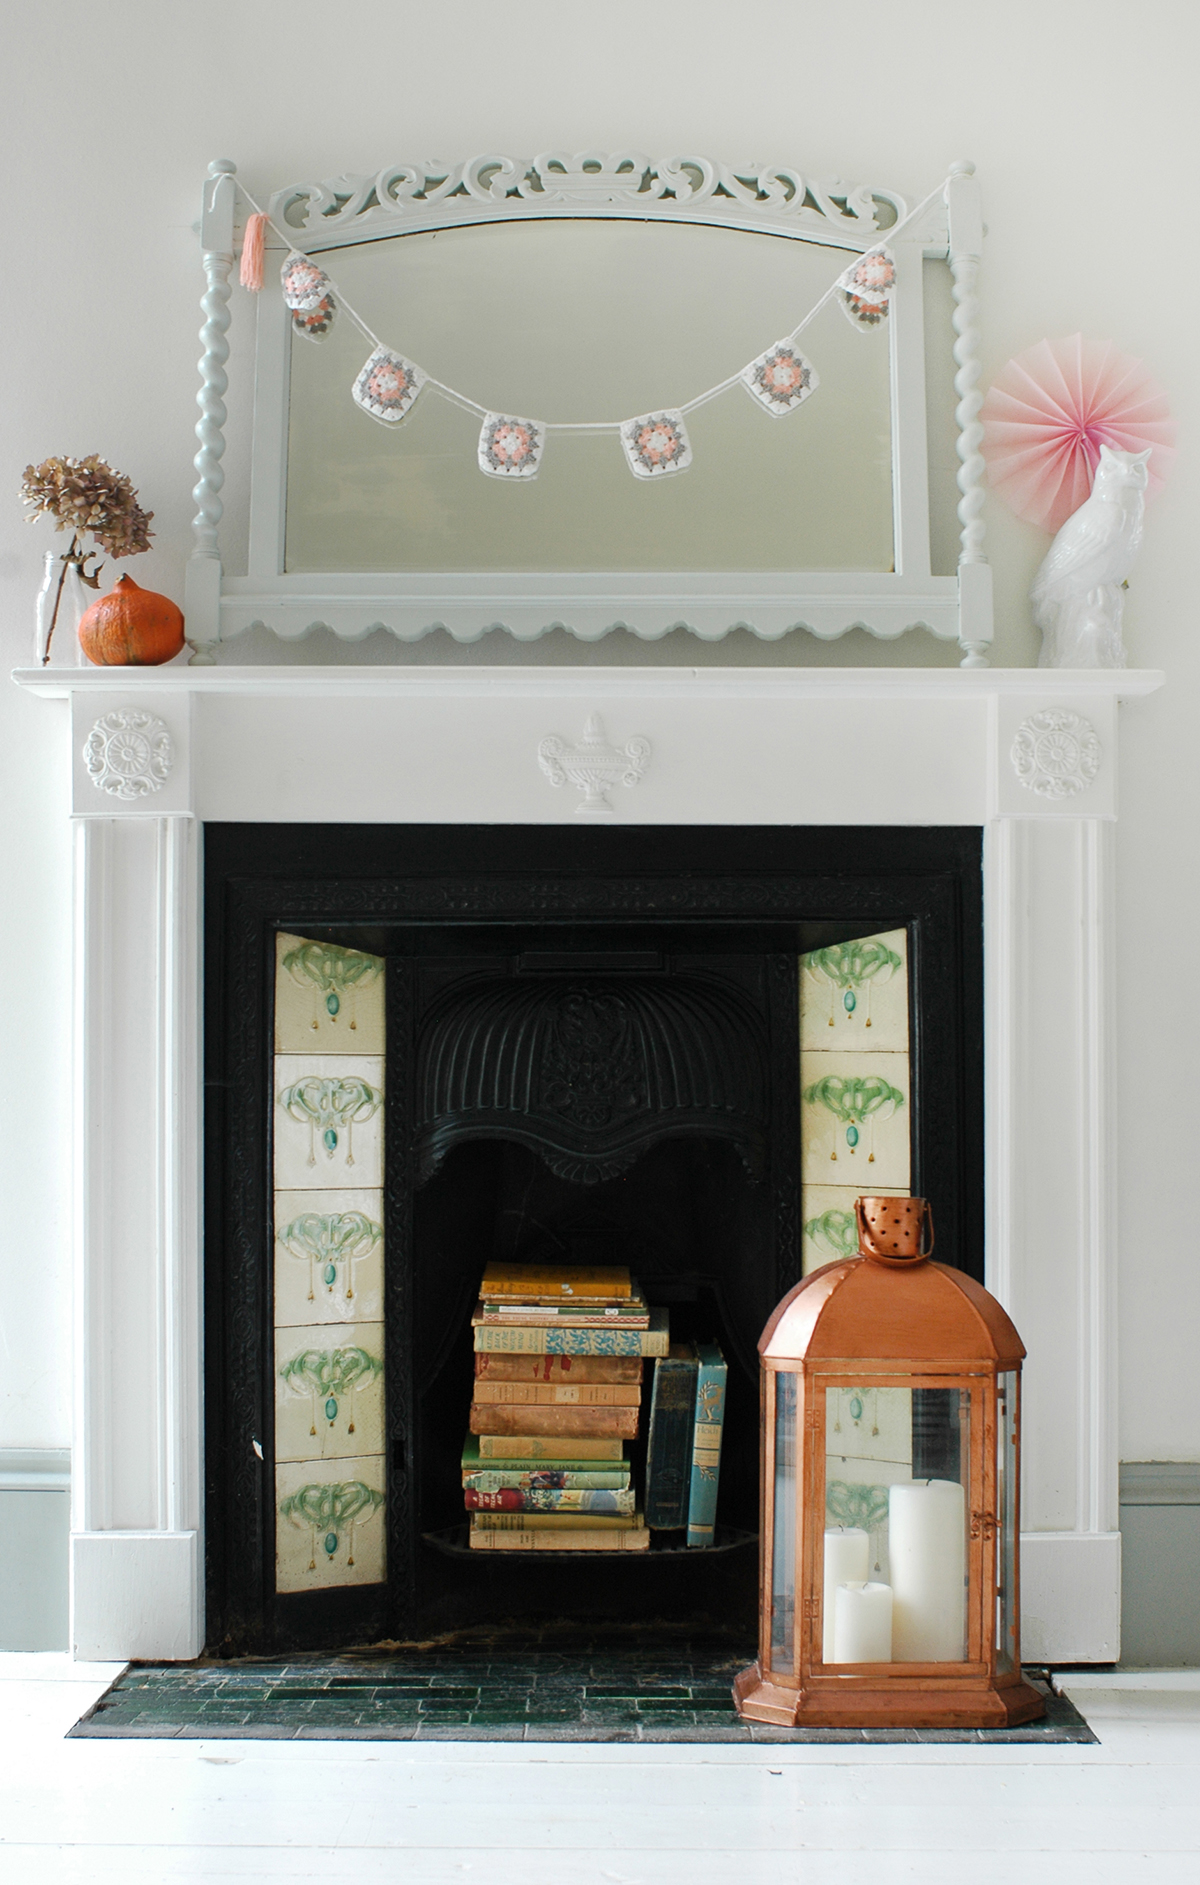
I’m so pleased with the lighting - I love the dash of mustard yellow against the pink and plaster walls - they are by Muuto, which I bought from Nordic Nest. I also changed the main light to a shade from Made.com as I wanted to bring in another element of the forest green colour. We’ve keep the walls quite simple at the moment - I think as it’s a small room it needs simplicity, so we’ve just added a couple of pieces of art which I was kindly gifted by Juniqe. (There is actually a 35% off discount code for their shop at the bottom of this post BTW!) I went for the GRRRL Poster and The Purple Umbrella. I found the vintage cane mirror in a little shop during a recent visit to Winchester.

decorating a small spare bedroom
bedroom makeover - pink and plants

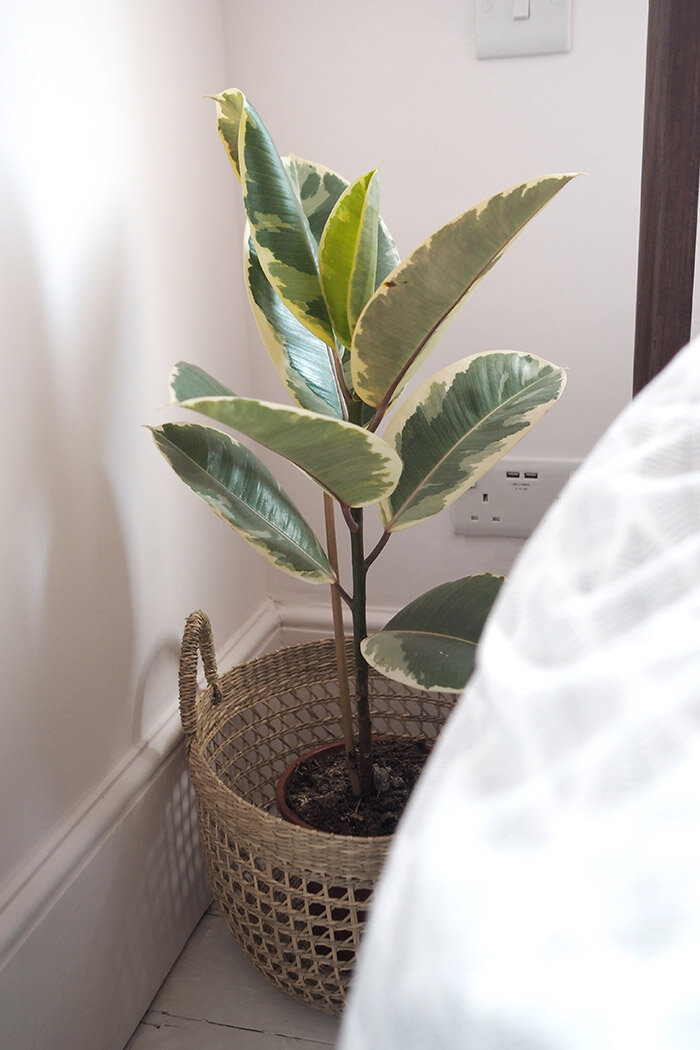
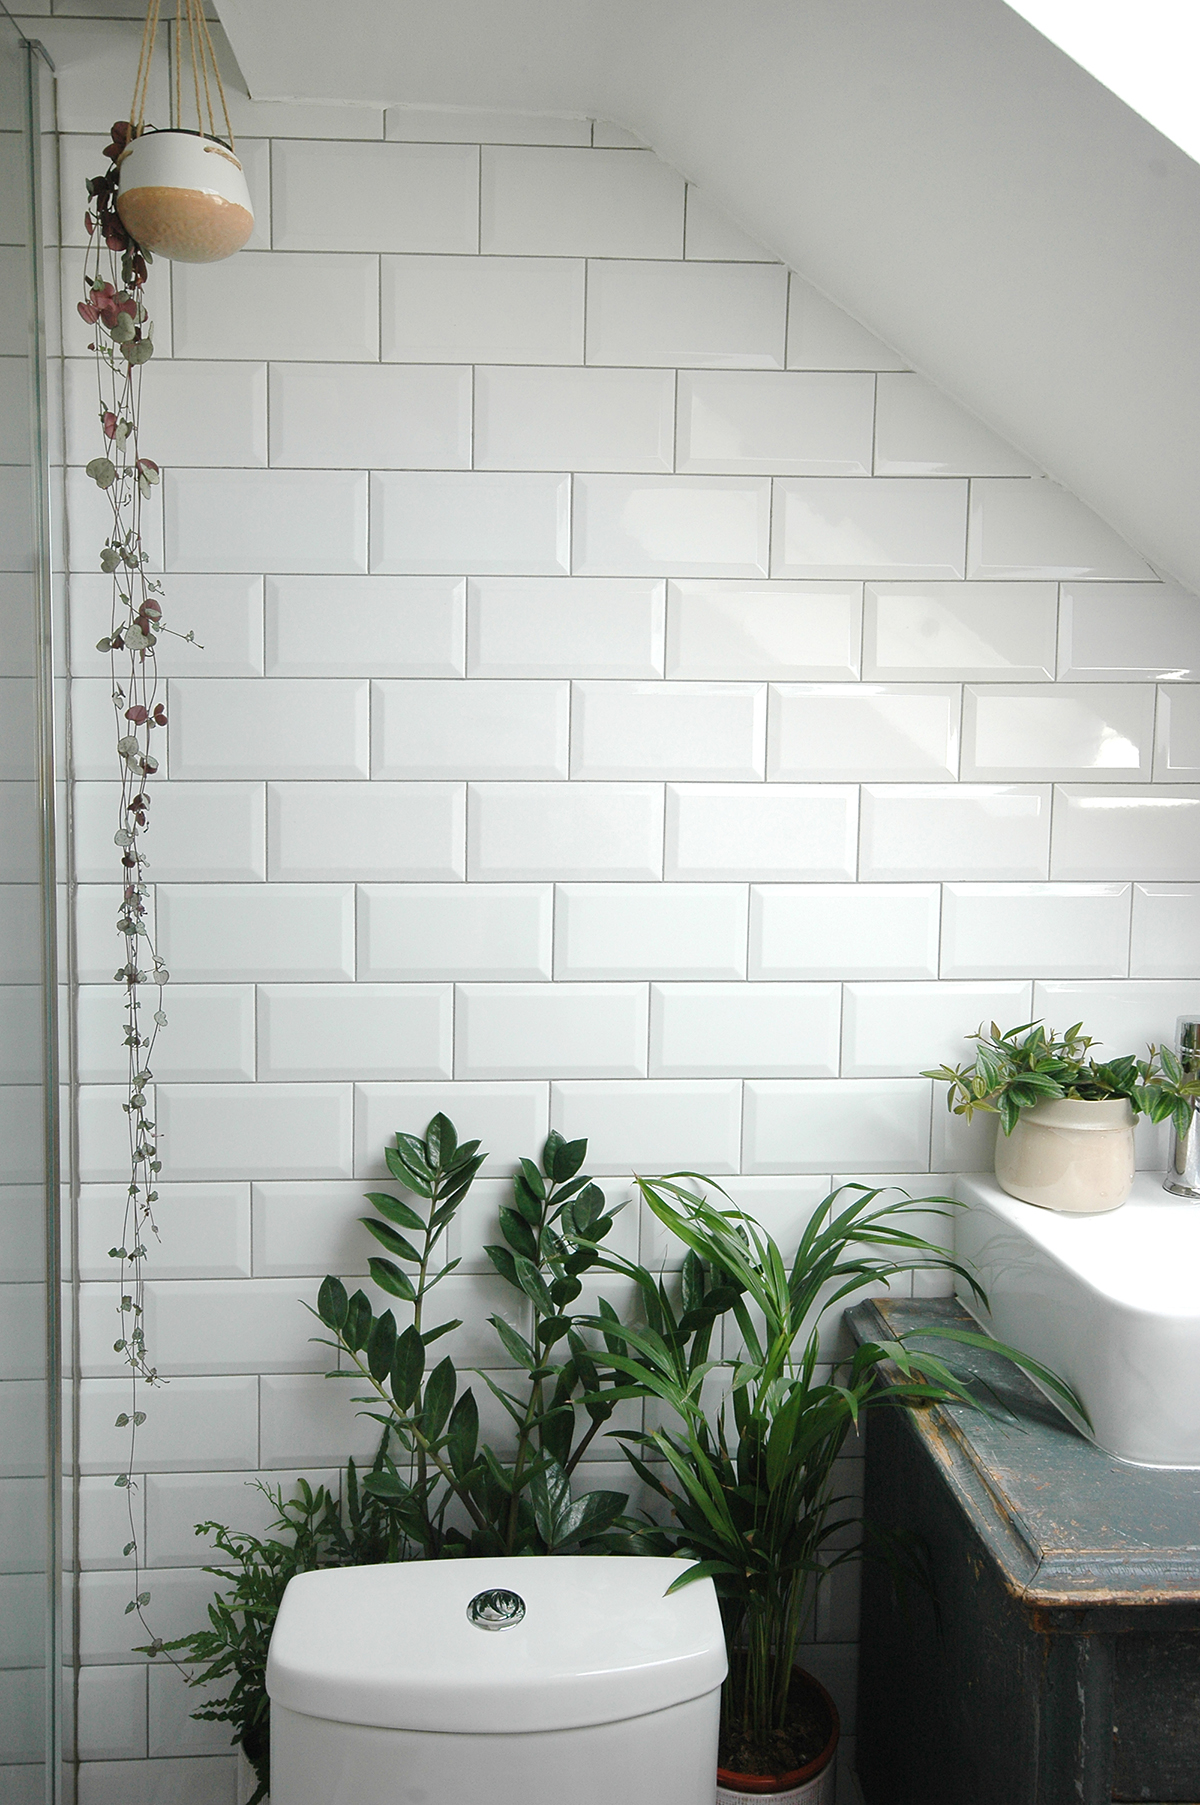
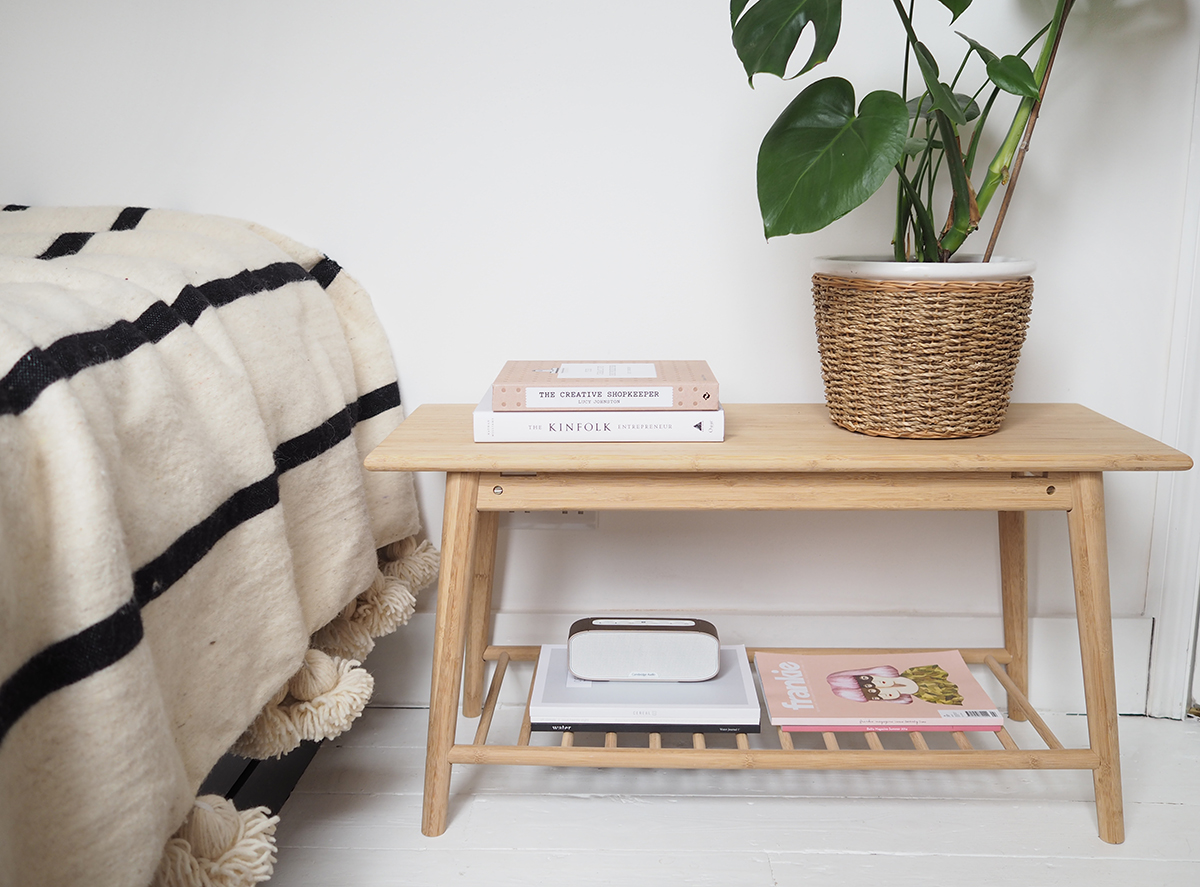
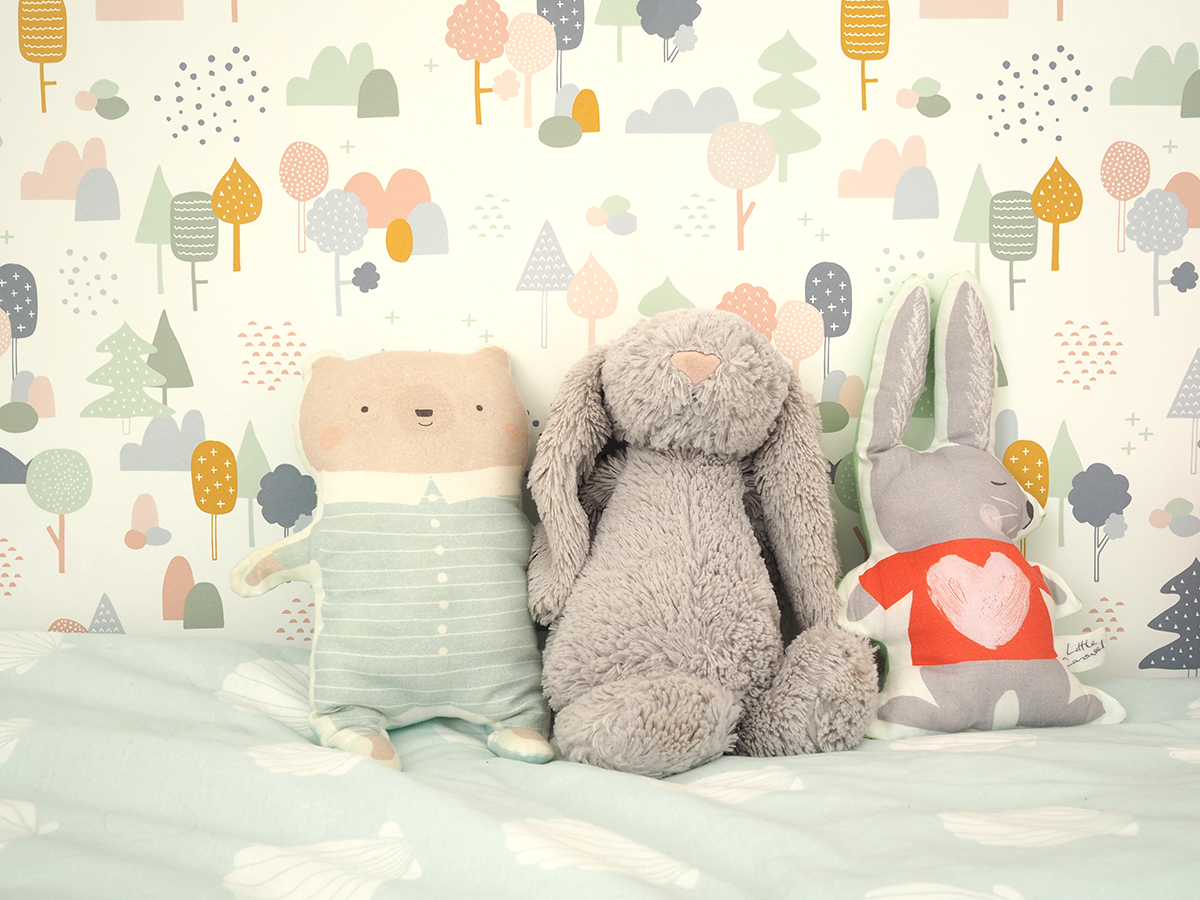
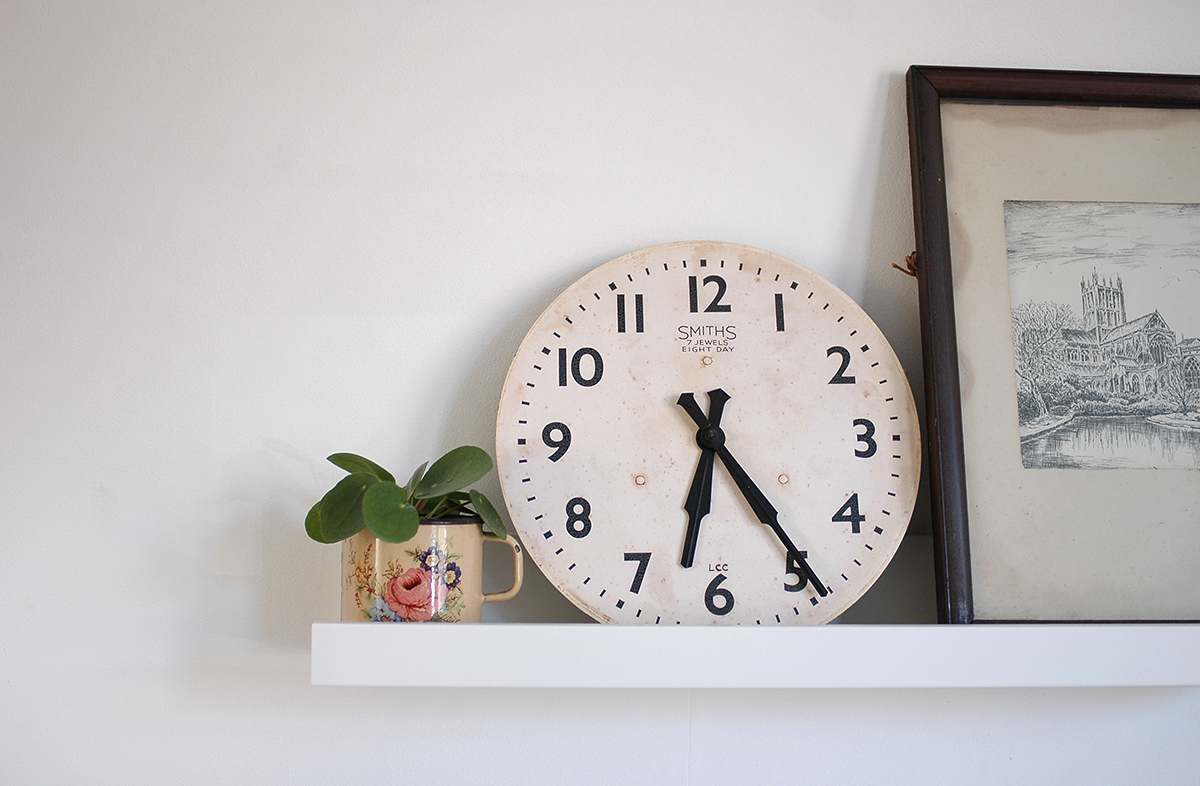
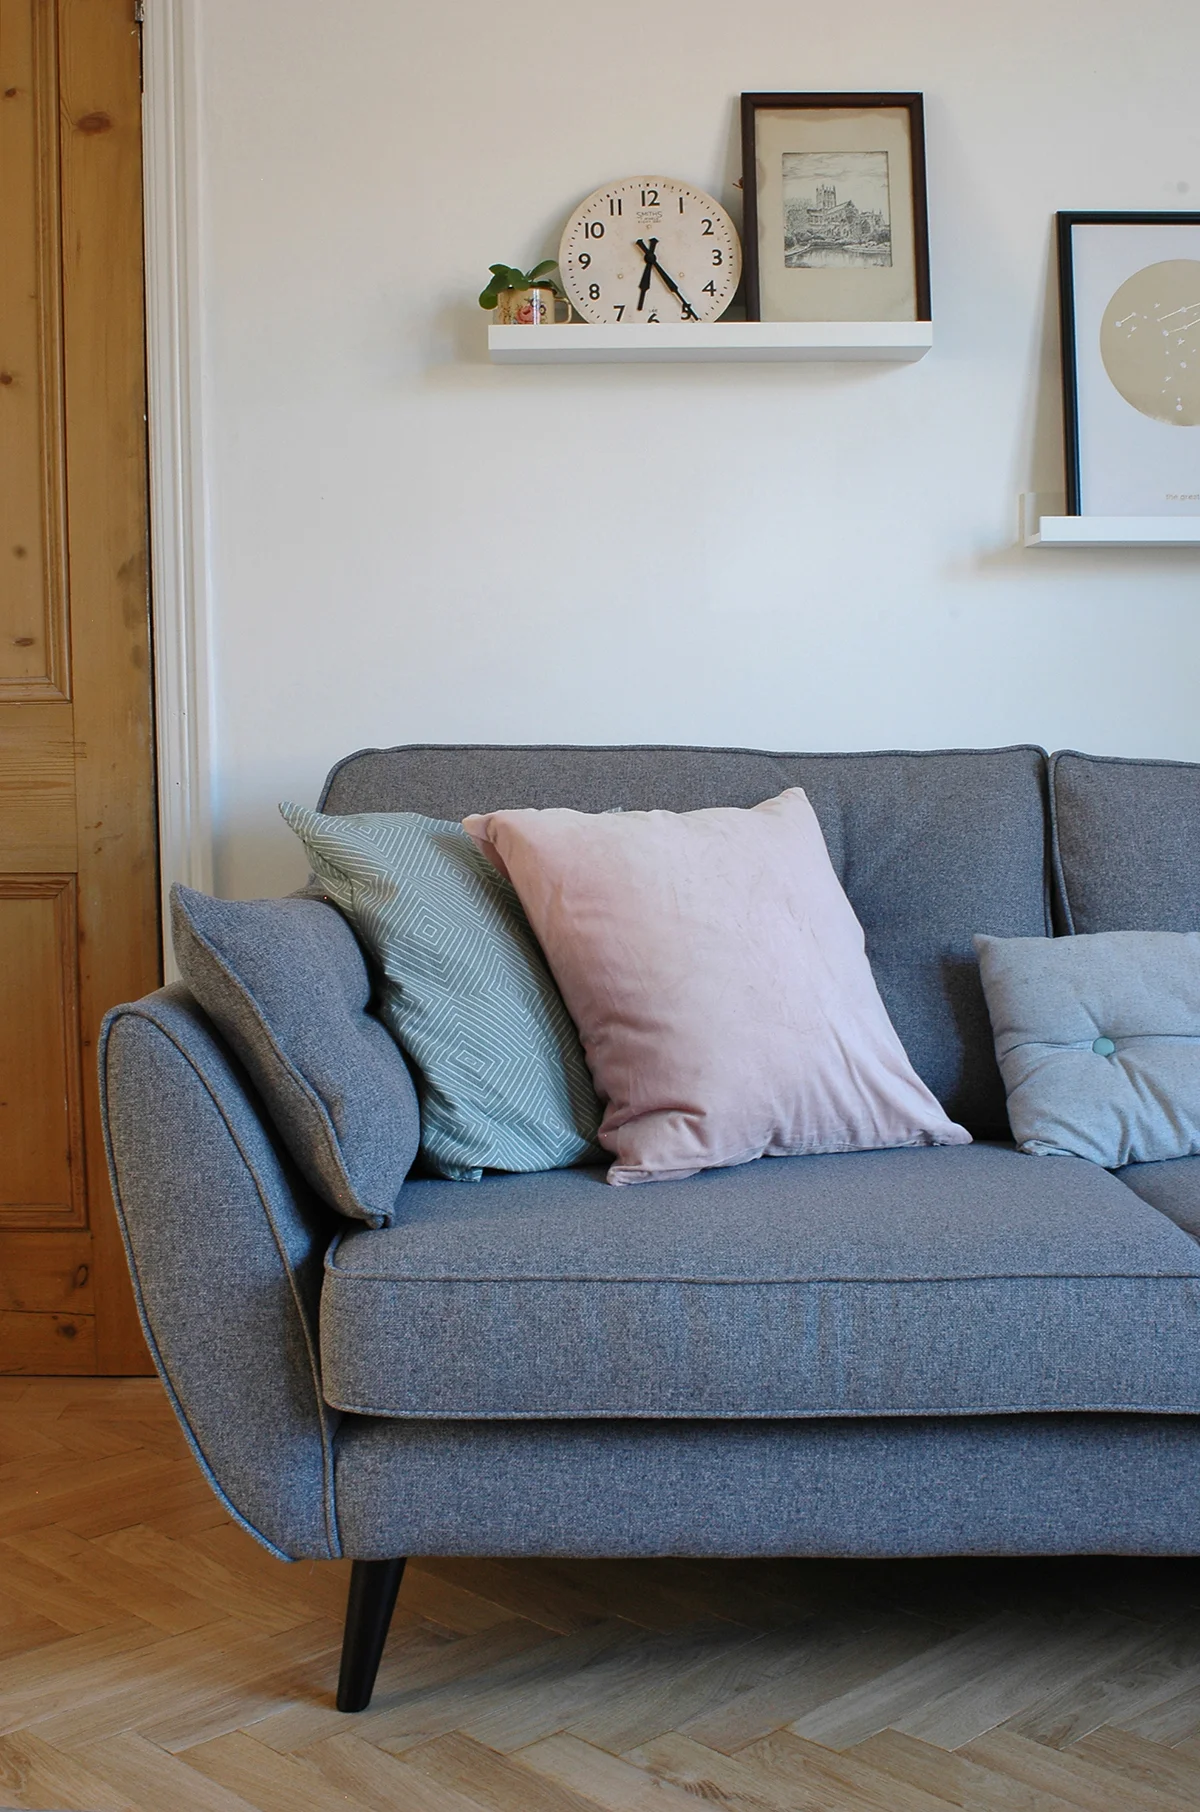
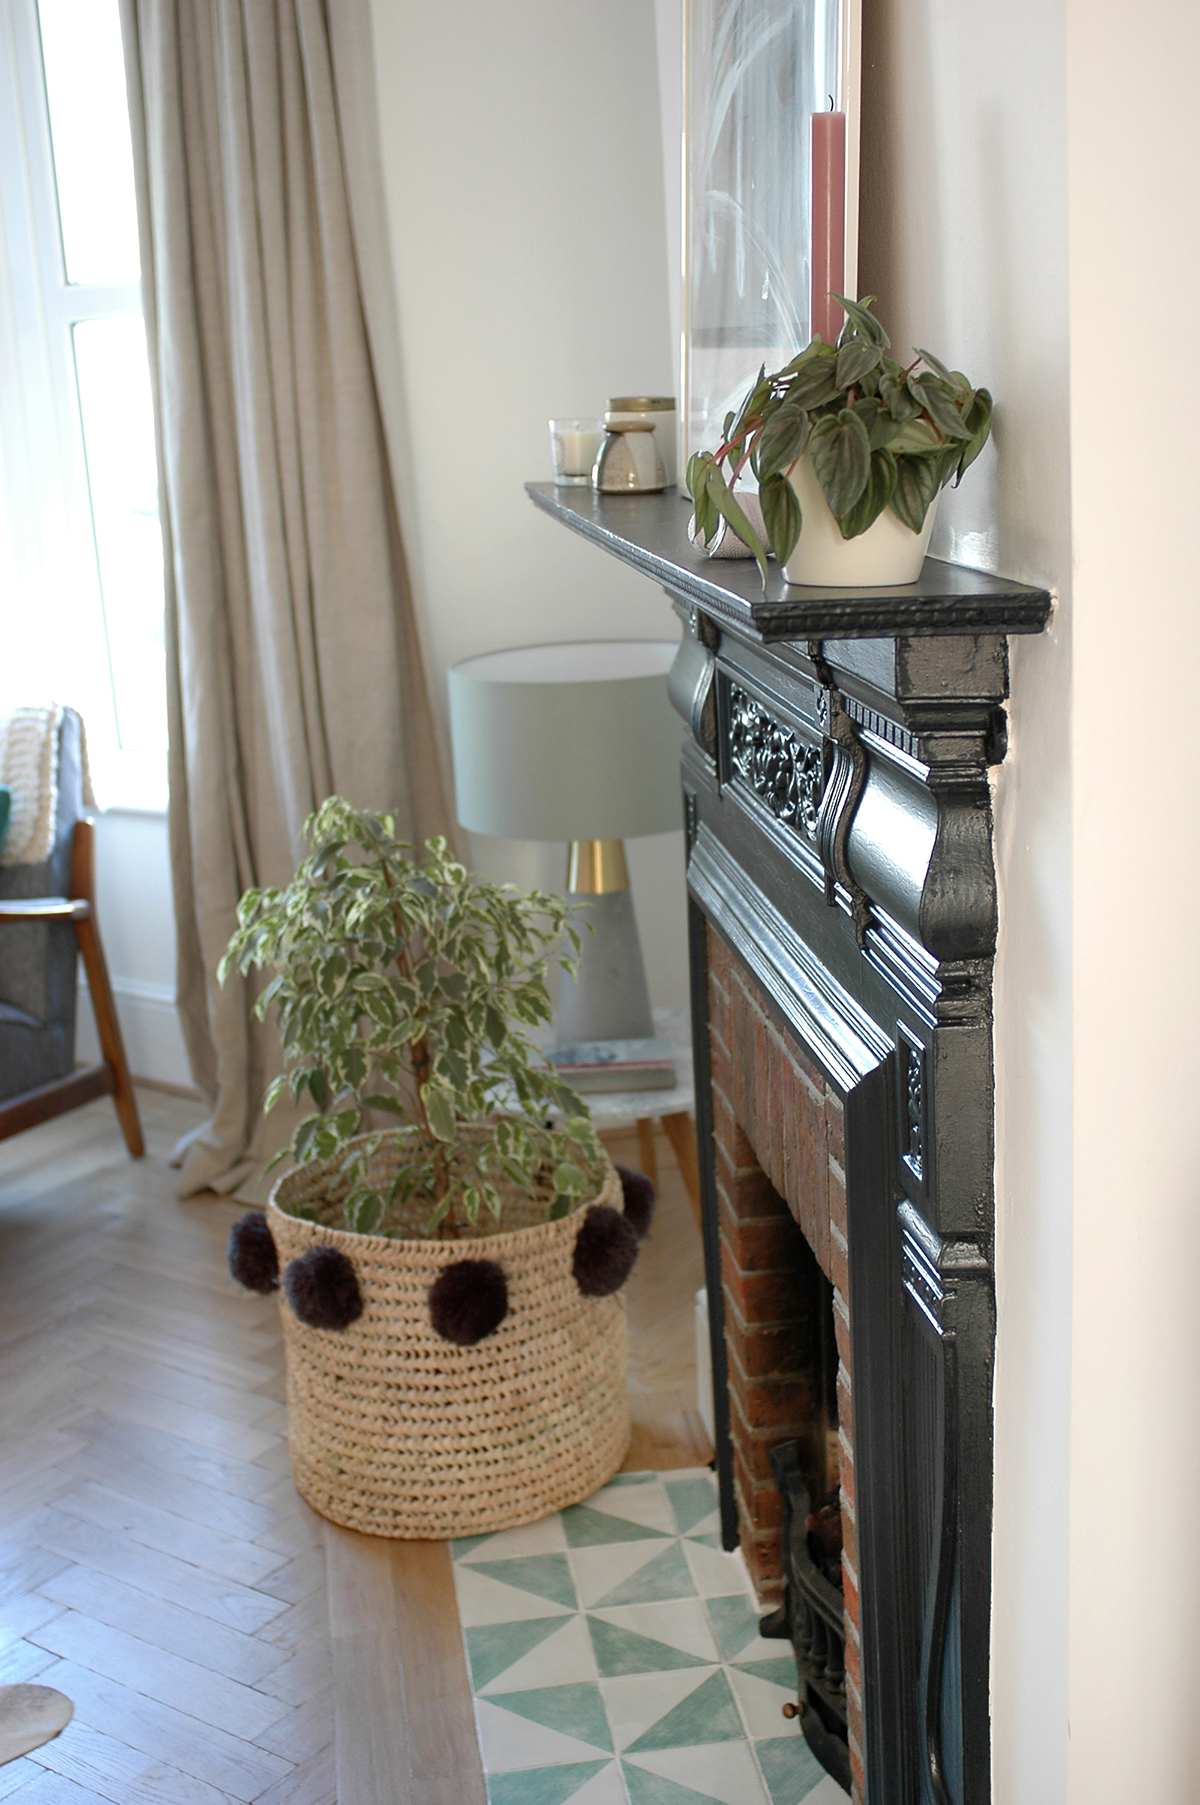
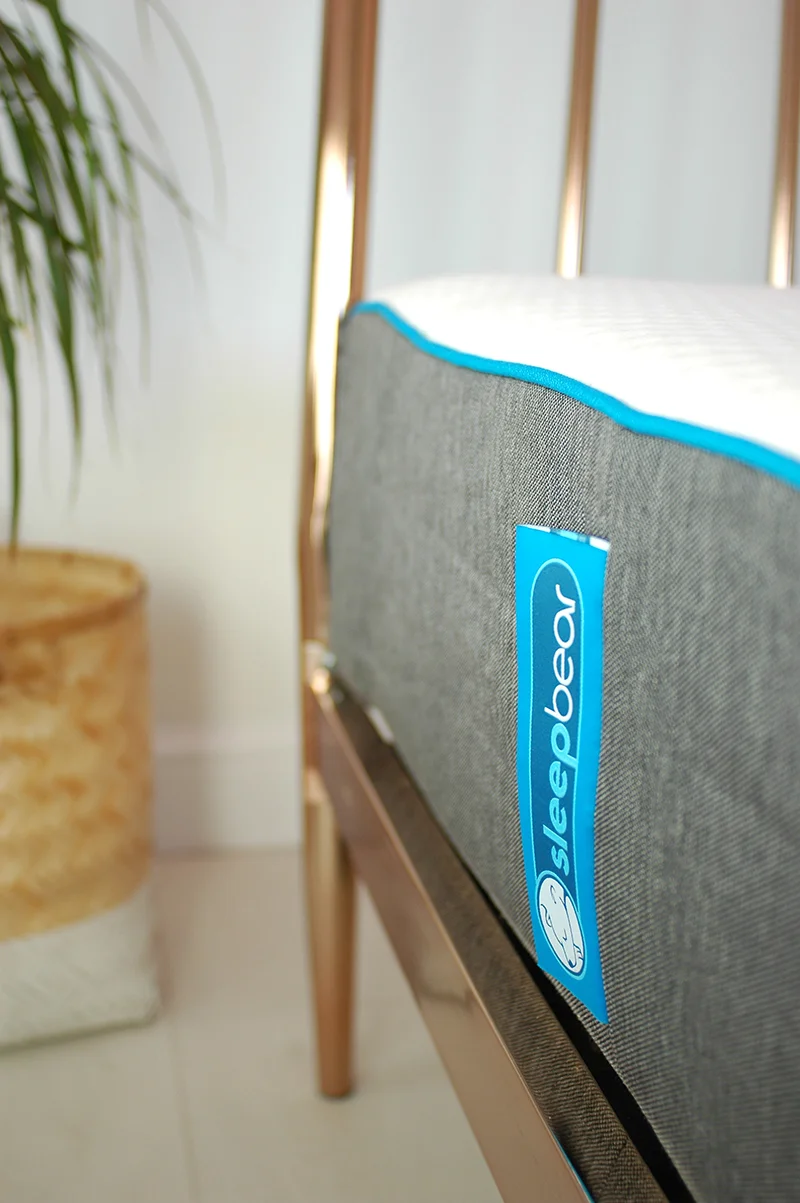
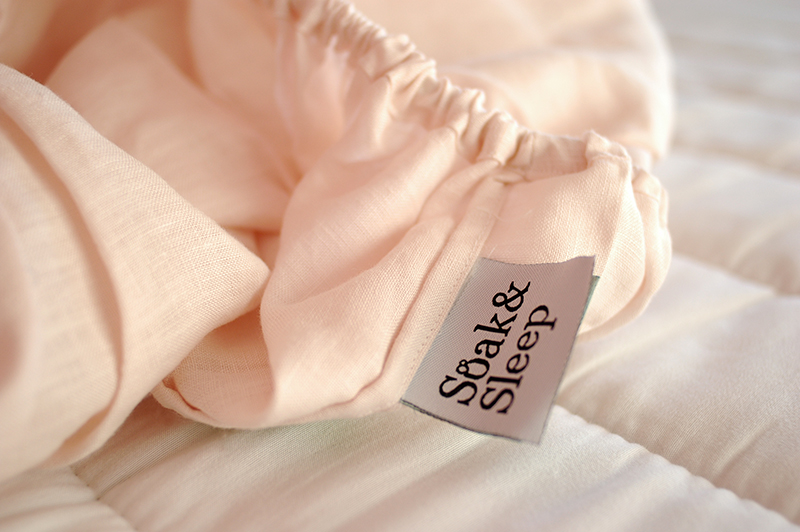
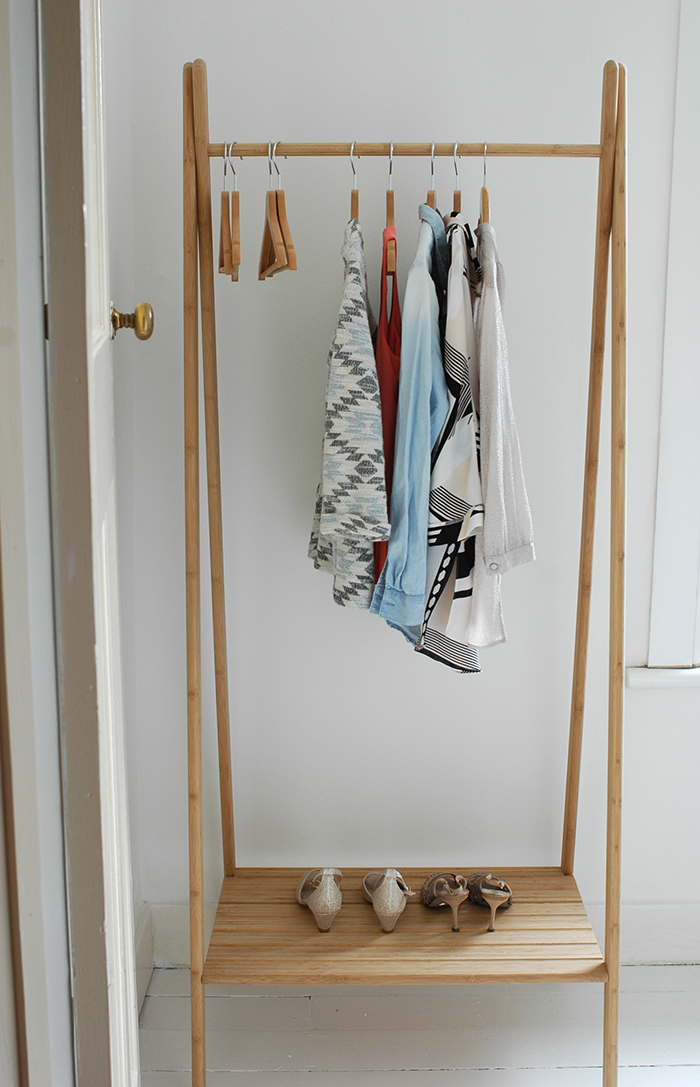
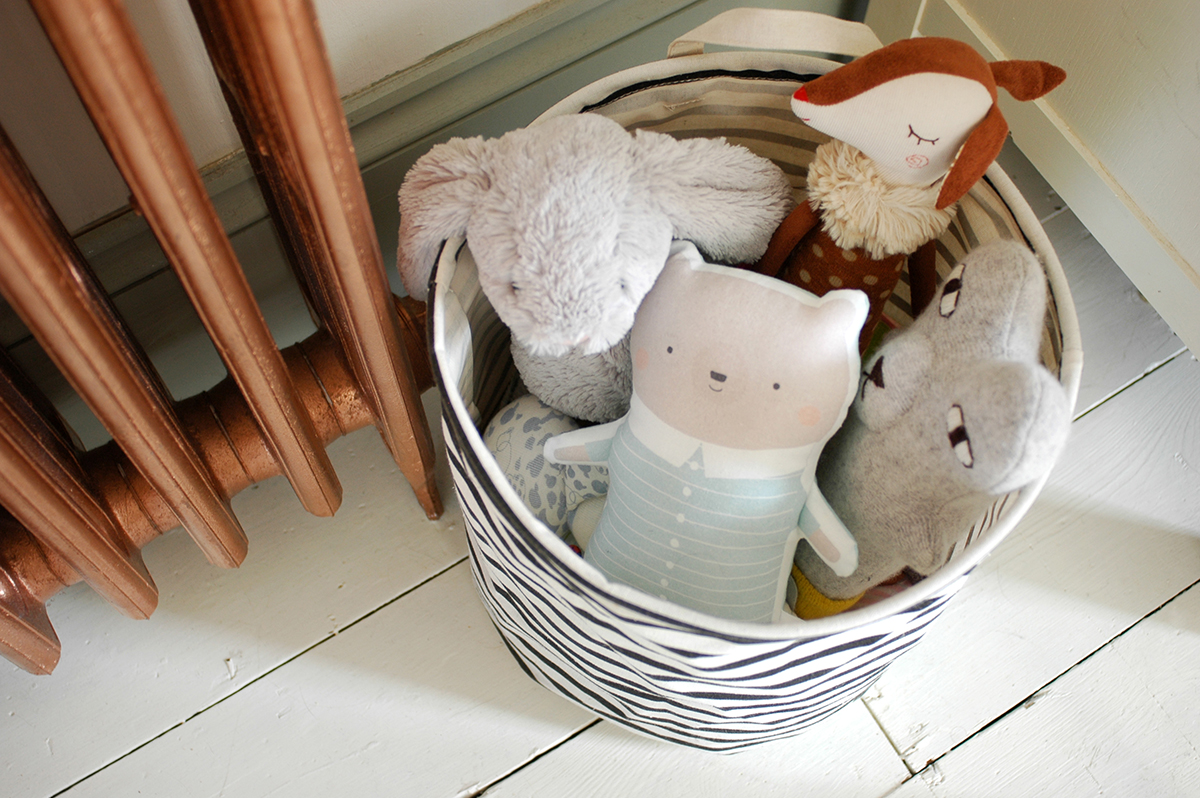
There is not much space on either side of the bed, so my plans for a wall shelf had to be abandoned when it arrived and I realised our guests would just keep knocking into it! So, again I’ve kept it really simple with some plants by the bed. I bought the basket from Scandiborn and the yellow pot is from Arket. The little vintage table is one I’ve had for ages. I’ve actually kept quite a few bits in this room that we previously had - the bed, the bedding, cushion and a clothes stand (unseen).

bedroom makeover

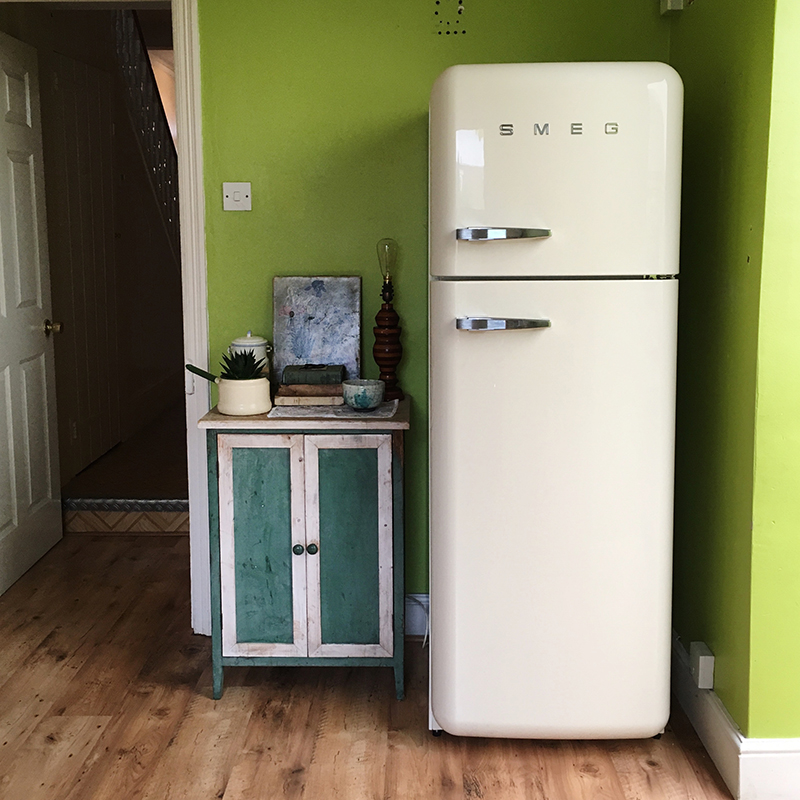
We had these drawers in here before too, but I’ve attempted a bit of an Ikea hack on them! They’ve been painted in Craig and Rose Angelica and I added these drawer pulls from Anthropologie (which I’ve had for a few years). I love the deep green next to the pale pink.

pink and bare plaster bedroom style

I’m so pleased with this little room and despite it not being ‘in use’ every day, I really enjoy coming up the stairs and getting a little view of it as I walk past, so it was worth getting on and doing it! I’m sure our guests will thank us too that they no longer have to walk on that manky carpet! I’ve love to hear what you think! :)

As I mentioned before, Juniqe kindly gifted the two art prints to me, and they are offering my readers an amazing 35% off for a limited time. The minimum order is £19 and you just need to use the code CAROLINE35 at the checkout. The offer is valid until 24th November 2019 so go take a look at all the lovely prints they’ve got before it’s too late! www.juniqe.com

Our kitchen - before and after

Last weekend was the two year anniversary of us moving into this house. I can’t believe it’s been two years already! One of the biggest projects on our list was the kitchen, which needed completely gutting and redoing. It’s taken most of the summer to complete as we did some of the work ourselves, but today I can finally show you the results, and I hope you’ll agree it was totally worth it! There hasn’t been any structural changes whatsoever, but it feels like a complete transformation.

pink and plywood kitchen makeover

If you saw my kitchen plans post from back in March, you’ll notice that most things did go to plan - although I ended up repainting the walls as the Wilkinsons paint we had originally chosen just didn’t look right, so we painted over with Farrow and Ball Calamine. We also had to rethink the flooring as the engineered wood we’d planned to get wasn’t going to work with the underfloor heating and the slightly uneven nature of the subfloor. Instead, we went for a white laminate, which I never thought I’d opt for, but laminate flooring has really improved in recent years, plus the wood flooring next to the ply looked all a bit too ‘woody’ so the white is a better contrast against the cupboards.

Below is the main area of the kitchen in terms of usage - cooking, making tea, washing up etc. You can see the before shot of this below too. As you can see we kept the sink and hob in pretty much the same place as before, but moved the dishwasher next to the sink and the oven is now under the hob. We got rid of all the high cupboards and replaced with open shelving and added an extractor.

pink and plywood kitchen makeover
before

before

pink and plywood kitchen makeover
before

before

There is a chimney breast in the kitchen which we initially planned to remove so we could have a flat run of worktop along this wall, but when the quote came in around £3.5-4K just to remove it, we needed to find another solution. Our builder suggested that he custom build a larder over the chimney breast to disguise it and we are so happy with how it turned out. It isn’t hugely deep inside, but it still has plenty of room for all our larder essentials.

plywood kitchen
left hand pot was from Anthropologie, the others are ones I’ve painted myself.

left hand pot was from Anthropologie, the others are ones I’ve painted myself.

pink plant pot was from this shop in Margate; pot stand I bought at Baileys; small white salt pot is from White Black & Grey; the little enamel cups I bought in Utilitario Mexicano in Mexico City.

pink plant pot was from this shop in Margate; pot stand I bought at Baileys; small white salt pot is from White Black & Grey; the little enamel cups I bought in Utilitario Mexicano in Mexico City.

We kept our cream Smeg fridge and just relocated it into the corner by the larder which previously had built in cupboards, the fridge fitted perfectly into the space. We agonised over door handles for AGES - they really do impact so much on the look. In the end we opted for these small brass ones by House Doctor. I love them, although I must say they have started to discolour a little with use, and I’m unsure whether they will clean up ok…. I hope so.

hand print by Maggie Magoo, I bought in NgNg Design; Glass carafe I bought at a French flea market; the two cups are by Studio Arhoj but I bought them and the plant pot on the lower shelf from Boom Boom Shop; the plant pot on the top shelf I bought …

hand print by Maggie Magoo, I bought in NgNg Design; Glass carafe I bought at a French flea market; the two cups are by Studio Arhoj but I bought them and the plant pot on the lower shelf from Boom Boom Shop; the plant pot on the top shelf I bought in Baileys. The wicker basket is from Harriet Hare* and the stripy one is from H&M. The marble serving board is M&S*.

plywood and pink kitchen
open shelving
pink and plywood kitchen
before

before

This area feels so different - removing the high cupboards really opened it up, and getting rid of the tall oven section gave us lots more worktop space. The worktop itself is formica faced birch plywood. I found it SO hard to find a worktop I liked that wasn’t extortionate. We needed quite a bit so the quotes we got were eye-watering. Then I came across this and it was perfect for the look we were going for and was affordable. The total cost including VAT was just over £900. Some of the other quotes we had were over £3000!

plywood kitchen makeover
Be Brave print by Margo in Margate, I bought it from Rose & Grey. The Pates tin is vintage and the black and white pot is from H&M.

Be Brave print by Margo in Margate, I bought it from Rose & Grey. The Pates tin is vintage and the black and white pot is from H&M.

Tea towel by Happy & Co*.

Tea towel by Happy & Co*.

plywood kitchen makeover
pink and plywood kitchen makeover
Wooden chopping board on shelf is from Baileys; the plant pot just in front of the board is by Oh Happy Glaze; the other ceramic pieces on the shelf I bought in Mexico City. Print on the wall is by Fran Murphy; pot on the right is from Ikea; the lar…

Wooden chopping board on shelf is from Baileys; the plant pot just in front of the board is by Oh Happy Glaze; the other ceramic pieces on the shelf I bought in Mexico City. Print on the wall is by Fran Murphy; pot on the right is from Ikea; the large round tray is from Feather & Nest*.

The mother and baby print is by Marta Abad Blay*, and the poster hanger came from Desenio. The plant pot on the far right is from Arket, while the others are from local garden centres.

The mother and baby print is by Marta Abad Blay*, and the poster hanger came from Desenio. The plant pot on the far right is from Arket, while the others are from local garden centres.

The Mexico City poster is from Alvar Carto; the green vase on the left is from Albert & Moo* and the tiny black and white pot I found in a shop in a French village. The bread bin was a vintage find at the Decorative Living Fair.

The Mexico City poster is from Alvar Carto; the green vase on the left is from Albert & Moo* and the tiny black and white pot I found in a shop in a French village. The bread bin was a vintage find at the Decorative Living Fair.

before

before

This side of the kitchen was absolute carnage before. We had a big gap under the worktop, a mess of tiles in the corner, holes in the ceiling and only a small area of workspace. As you can see, we have moved the washing machine and dishwasher and instead added cupboards and drawers underneath. We also extended the worktop as there was space to do it, and then kept the area above simple with one long shelf.

plywood kitchen
the pink plant pot was from Anthropologie; the plant print I bought from Rose & Grey; the basket is from Clas Olhson, and the first aid box was from Hema.

the pink plant pot was from Anthropologie; the plant print I bought from Rose & Grey; the basket is from Clas Olhson, and the first aid box was from Hema.

the stripy plant pot I bought in Liberty, and the others I decorated myself.

the stripy plant pot I bought in Liberty, and the others I decorated myself.

Gold hooks were from Monpote; the black and white tea towel is by Happy and Co*, and the grey one is from Ferm Living.

Gold hooks were from Monpote; the black and white tea towel is by Happy and Co*, and the grey one is from Ferm Living.

pink and plywood kitchen - utility area
before

before

I wanted to create a little utility area over in this corner which previously housed the fridge and didn’t really feel like part of the room. So we moved the washing machine and dryer there, then added some more worktop and a couple of cupboards for storing cleaning and laundry products. It now feels much more part of the room while also being separate from the food preparation areas.

handmade ceramics
plywood and pink kitchen makeover

In terms of the finishing touches, I wanted to keep the clutter to a minimum, yet still have some interest on display. Luckily we have a good amount of storage, which meant we could keep the worktop and shelving quite clear. On the worktop is mainly things that we use on a daily basis - kettle, toaster, coffee machine etc, and on the shelves I’ve simply added some ceramics I’ve collected and a few plants and pieces of art. I’ve popped a few easy-to-care for plants like cacti and succulents on the high cupboards so I don’t have to climb up to water them that often!

I’ve put some details of the smaller items in the image captions, although many of them I’ve had for a while so may not be available any longer. Also, I have starred * any items that were gifted to me. Below is info on the bigger items, but if you have any questions about anything do just ask! I’d love to hear what you think of the kitchen! :)

Large items:

  • The cupboards and drawers are birch plywood supplied by our builder.

  • Open shelving - I ordered a big 8ftx4ft sheet of birch plywood from buildermerchant.com which our builder then cut the lengths from, the sheet was about £135.

  • Worktop - formica faced birch plywood from Morland - I bought 4 lengths which was more than enough costing around £930 including VAT.

  • Fridge - Smeg

  • Oven, hob and extractor fan - all from AO.com

  • Flooring - white laminate from local store Jordans Wood Floors. We have similar in our bedroom which we got from UK Flooring Direct.

  • Sink - from Wayfair, in Crystal white

  • Taps - John Lewis in brushed steel

  • Tiles - came from Tiles Direct - you have to buy left and right tiles to make this pattern.

Mini makeover: porch

This may possibly be the most uninteresting makeover post ever, but well, I thought I'd share it anyway - I'll keep it brief! Our latest house renovation project has been sprucing up one of our porch areas. (we have two - this is the side entrance one) Yes, it's not somewhere we spend a lot of time, but first impressions count right?! Plus, there are practical reasons for doing what we've done - my hubby often keeps his bike out there and sometimes Ruby's buggy, so the walls were getting scuffed and dirty really easily, so tiling the walls seemed like the best course of action.

colourful tiled porch

Below is what it looked like before - pretty uninspiring! We had given it a lick of paint when we first moved in, but as I say it quickly got grubby again.

porch makeover - before

The tiles kind of came about by accident. I had ordered samples of the five different colours from Topps Tiles Matrix range to see which one I liked best, and when they arrived, we realised that they all looked really great together! 

tiled porch makeover

We also added a proper skirting board as it looked really unfinished before. I can't take much credit for this project as hubby did most of the work, although I did give some plant pots a little bit of decoration!

upcycled plant pots - geometric design
colourful tiled porch makeover

The flooring will hopefully get replaced when we do the kitchen, and maybe one day we will replace the doors (these PVC ones just don't do it for me!) but for now, I'm really happy with this colourful little corner! It's certainly a much nicer scene to come home to than boring, grubby walls! 

A year in our home - what we've done

The end of September marked a year since we moved into our new home. The buying process was pretty stressful but we are so pleased we persisted; we are so happy here, not only with the house itself but with the area, Ruby's nursery and the fact that we can have family and friends stay anytime. As a little one year anniversary celebration and to remind myself how far the house has come in a year, I thought I'd do a little round up of the changes we've made to the place so far... I hope you enjoy this 'half home tour'! I'm linking to the full room tour posts for each if you'd like to see more... 

living room makeover
living room fireplace
living room shelving
living room play area
living room reading nook
BEFORE

BEFORE

Downstairs we have a large living area which is two rooms knocked together. As you can see from the 'before' shots, it was dark and a real mis-match of colours. We swiftly had the textured ceiling skimmed, painted everything white and laid a parquet floor. We also re-painted the two fireplaces and laid some new tiles. We replaced one of the radiators and added a new one under the window. That is pretty much all we did in terms of decorating for this room, and it has been completely transformed! There are actually three posts about this room - the furniture, the features and the play space, if you'd like to know sources etc. 

downstairs loo - pink floor tiles
BEFORE

BEFORE

Actually one of the first rooms we had to do was the downstairs loo. The floor was about to collapse, and being such a handy amenity we wanted to sort it asap. It was a complete refurb - new floor and wall tiles, new skirtings, new toilet and sink and everything painted. Full makeover post is here. The rest of the downstairs is a project for this year - we are planning to open up the kitchen and conservatory and refurb those, as well as decorating the hallway. 

creative home office space
office / spare bedroom makeover
creative home office
office storage
BEFORE

BEFORE

Upstairs on the first floor is 4 bedrooms and the bathroom. I use one of the bedrooms as my home office and it also has a day bed for when we have lots of people staying. This room has got to be one of the most dramatic changes! As you can see above, the room was DARK, and had some decor quite unique to the previous owners... The painted paper was coming off, so it was stripped only to reveal that the walls were in a bit of a mess. The walls and ceiling were replastered and we pulled up the carpet. The floorboards were in good nick though, so those were painted white and I left half of the walls as bare plaster and painted the rest and the ceiling in a pale pink. Again, relatively minimal in what needed doing to completely transform this space. I then added lots of other touches which you can read more about on the original makeover post

Girl's bedroom decor
little girl's bedroom makeover
children's bedroom decor
BEFORE

BEFORE

Again, Ruby's bedroom was pretty straightforward in that we just stripped the walls, had them replastered and pulled up the carpet. Everything was painted white and we hung some wallpaper on one wall. We also changed the blind on the window, but that was it. It was so much fun picking out all the decorative details for her room - you can find out more about those in this post

PA011598_1200.jpg
guest room makeover
small bedroom decor ideas
BEFORE

BEFORE

I totally forgot to get a proper 'before' shot of our little single guest room. It had carpet tiles on the floor which I think I pulled up on pretty much our first day here! It was relatively neutral in here, but again we just painted everything white straight away. I did a temporary makeover in here in the first month of moving in, and have just got round to doing it properly and I'm so happy with this little room now. It feels like a cosy little space to retreat to - all the details are in this recent post. We have one more bedroom and the bathroom to do on this floor, as well as updating the stairs and landing. 

pink and white bedroom
loft conversion bedroom
BEFORE

BEFORE

Our bedroom is up another flight of stairs in the loft conversion, and is in a temporary state at the moment. I forgot to take proper 'before' shots again (!) but this one was from when we viewed the property. I've got bigger plans for this room, but in the meantime we painted the dark purple walls in white, and took up the dark blue carpet. There were no nice floorboards like the rest of the rooms as it's a conversion, so we opted for some white laminate flooring instead. It's a lovely light, bright room, I can't wait to properly get to work on it! There's a full post on what we've done so far with sources here.

P7060070_1200.jpg
en suite in loft conversion
small bathroom ideas
BEFORE

BEFORE

Last but not least, there was a little room next to the loft bedroom that was kind of a nothing room. As soon as we saw it, we said it would be a perfect en-suite. So that's what we did. It's not particularly straight-forward putting a bathroom in a loft conversion, but we thought it would be worth it, and it definitely was. It's great having a bathroom on this level, especially when we have guests. All the details and sources (and the woes) are in the full makeover post

So there you have it! Turns out we've done half of the rooms in the house in our first year! yay! I'm sure my hubby will be glad to hear me say the goal is to finish the other half by this time next year! ha! I hope you are enjoying seeing our progress, I know I am loving transforming our home. Do let me know what you think! x

Small bedroom makeover

As I mentioned in a recent post, I had given our little single spare bedroom a quick makeover when we first moved in (it had carpet tiles on the floor and a pine bed frame before!) but even after that it was never really how I wanted it to look. So recently, as I had some Farrow and Ball Off Black paint left from painting our fireplaces, I decided to repaint the bed frame in it and update the room with a boho monochrome look with a few botanical touches.  

boho monochrome style bedroom

Now I am SO happy with how it looks and love a little glimpse in it every time I go upstairs! I received this amazing HUGE Moroccan blanket from Moroccan Bazaar, along with the first and third cushions on the bed. These helped to set the basis for the room design. If you haven't heard of Moroccan Bazaar, they are a long established company importing Moroccan furniture, lighting and accessories to the UK market. They have a showroom in West London, and supply to the retail and commercial sectors. The berber throw and cushions are handmade using artisan techniques on looms from a 100% natural wool and feel so authentic. The blanket is actually folded in half here so you can imagine how big it is, so would also work well on a double bed or sofa too. 

Boho monochrome style bedroom
Moroccan Berber cushion with pompoms
Moroccan Berber throw and cushions

As you can see, the furriest member of our family is a big fan! I couldn't even bring myself to remove her to take these pics! I think she likes sitting by the window so she can keep an eye on things outside! 

Small bedroom ideas
Monochrome posters by Desenio
small bedroom decor

I then simply sourced a few extra details to add to the room. These amazing art prints are from Desenio. I discovered this website a little while ago, and got completely lost in browsing their collection of artwork, which ranges from photography to illustration to typographical prints. It is super affordable with small prints from as little as £2.95. Plus you can choose from a range of frames to fit your print choices. I got the two main posters in 50cm x 70cm with the frames and the little one in the corner at 21cm x 30cm. I've got a special 25% off reader discount for Desenio at the bottom of this post, so do take a peek, there is SO much to choose from! 

boho scandi bedroom
monochrome hanging planter  -Maison du Monde
peperomia plant

The other two cushions are from H&M and the mirror and the hanging planter are from Maison du Monde, and how beautiful is the plywood laurel leaf by LaLa Loves Decor? I love mixing artwork with items like this on my walls. The peperomia plant I picked up at the Conservatory Archives pop up in Liberty along with the stripy plant pot.  

boho scandi bedroom
boho scandi decor
small bedroom ideas
boho monochrome bedroom

As it's such a small room, we don't have much other furniture in there - just this table and a clothes rail, both made from bamboo, from Cox and Cox. Oh, and the final touch was this beautiful curtain from Urban Outfitters which ties in perfectly with the pom pom details on the cushions. I kinda wish we could just magic this room bigger and made it our own bedroom! It feels like such a cosy little spot to go and have some time to yourself, catch up on some magazine reading and hang out with Claude, who is now a permanent resident in here! I'd love to hear what you think! And as promised, here is the discount code for Desenio to treat yourself to some gorgeous artwork....

Discount code "patchworkharmony” gives 25% off posters* between 3rd - 5th October. 
*Except for handpicked/collaboration posters and frames.

Boho monochrome small bedroom style

*Thank you so much to the brands who provided complimentary items to assist with this makeover - Moroccan Bazaar, Desenio and LaLa Loves Decor. I truly love what all of these companies have to offer and hope you do too! 

My daughter's bedroom makeover

It's taken us a couple of months to complete Ruby's bedroom makeover, you might remember my post in July about the plans for it? We had to have it completely re-plastered, then it obviously needed painting - walls, ceiling and floor, as well as hanging the wallpaper. Then we had the unexpected hold up on the bed taking about four weeks to arrive from Denmark. That was my own fault really, as I should've checked in advance how long it would take and ordered well in advance - note to self! 

toddlers bedroom decor

We got there in the end and I am thrilled with how it looks, as is Ruby! This is her first 'big girl's bed' and she's taken to it so well. It is the Flexa Play bed which we got from Junior World. It is a full size single, but it's great that it is not too high. The design is Danish and is so lovely, I particularly love the legs and Ruby particularly loves that it is pink! It does feel like quite a big milestone moving your child from a cot to a bed, so I wanted to make sure everything was just right. I wasn't sure what the deal was with kids bedding, but thankfully I was introduced to The Fine Bedding Company's kid range via Rooi.com. This little guide to kids bedding is handy if you are grappling with this too. I ended up going for a standard duvet and pillow which are washable and hypoallergenic. I then found this bed linen on Urban Outfitters website in the sale for only £18 which I was really chuffed with! The rug was also a great find - I had been eyeing up Olli Ella's gorgeous Teepee rug, but at £349 I just couldn't afford it, but I found this one on La Redoute (they have some great rugs!) for about a 10th of that price - currently it is just £39!

toddlers bedroom - Ikea upcycled stool side table
toddlers bedroom makeover

If you saw my 'plans' post, you'll know that I based the design of the room around this gorgeous wallpaper designed by Cathy Nordstrom, which I bought via Photowall. I'm SO in love with it! There are lots of things in the room which I had before and have just updated a little - so the Ikea step stool was just given a lick of paint (Dulux Tuscan Glade 5) and is now a bedside table. I bought the little shelves in a charity shops years ago, and I just repainted those with the same paint. 

small toddlers room decor

On the other side of the room we have the same vintage drawers (bought on eBay) that we had in Ruby's old bedroom, but as she now has a bigger collection of clothes I've added this clothes rail from The Modern Nursery. It is also Danish in design, made from birch veneered plywood, and it the perfect solution if you are lacking in space for an actual wardrobe. It was also SUPER easy to put together (no husband required!) and has the added bonus of the little shelf on top for extra storage or display. 

The other thing we replaced in the room was the window blind. Before it had a grubby old roller blind left by the previous owners, which did the job, but looked awful. So we went for this fresh white wood venetian blind from Make my Blinds, which looks a million times better, and I really love the stripy shadows it casts which the sun is shining! A husband was required for the assembly and hanging of this, but his report was it was very easy to do. I always tend to dread choosing and ordering blinds, but this website did make it super straightforward, so I think I'll be using them again if we need any further blinds custom made. 

little girl's bedroom design

Ruby absolutely loves books and she's amassing quite a collection, so this bookcase was actually a very swift, essential purchase when we first moved in, as I didn't have time to source anything else. It is from Argos for just £23.99. I wanted to give it a bit of a personal touch so I stencilled a design on the back of the shelves which you can just make out here with a stencil I already had from Stencilit. All the artwork you can see above we had in Ruby's old room - so do check out this post if you want to know the sources. 

One of my favourite things about designing a room is sourcing all the little details, and it's especially fun for a child's bedroom. There are so many gorgeous indie brands for kids around now, so below I've just put the info about all the finishing touches... 

child's room styling
child's room wall shelf

I just LOVE this little tipi shelf which is by Childhome at Cuckooland. They also do a bed and a play tent and some stylish high chairs and other nursery furniture that are well worth a look. I've accessorised it with these cute as a button toys by Sarah and Bendrix. I came across this brand years ago, even before I was a mum, so I was excited to discover their shop is just up the road from us now in Cheam. If you are in the area it is worth a little peek - gorgeous toys, books, and decor for children, as well as a few gift items for adults. 

Nap print, £18 - Little Carousel; Cat clock, £25, Red Hand Gang, Hello Sunshine print, £16, Papermash

Nap print, £18 - Little Carousel; Cat clock, £25, Red Hand Gang, Hello Sunshine print, £16, Papermash

North bear (custom design), £18, Little Carousel;  Ice cream cushion - I bought from Papagaio in Crystal Palace, but you can find here too: Ava's Dreams

North bear (custom design), £18, Little Carousel;  Ice cream cushion - I bought from Papagaio in Crystal Palace, but you can find here too: Ava's Dreams

Miss Kitty Doll, £30, Sarah and Bendrix; wooden elephant - I found him at a car boot sale. 

Miss Kitty Doll, £30, Sarah and Bendrix; wooden elephant - I found him at a car boot sale. 

Wooden face clothes hanger, £14, Red Hand Gang

Wooden face clothes hanger, £14, Red Hand Gang

hanging decoration is by Hesperoo, but doesn't seem to be available anymore; Hangers, £3 for 5, Ikea; Knitwear by Ruby's nanny! 

hanging decoration is by Hesperoo, but doesn't seem to be available anymore; Hangers, £3 for 5, Ikea; Knitwear by Ruby's nanny! 

Sleepy bear toy, $28, Petit Pippin; Jellycat bunny was a baby gift, see John Lewis; Love Bunny toy, £16, Little Carousel

Sleepy bear toy, $28, Petit Pippin; Jellycat bunny was a baby gift, see John Lewis; Love Bunny toy, £16, Little Carousel

Wooden pear, £10, LaLa Loves Decor; Ballet book, car boot sale find, Panda money box, vintage shop find; painted car, gift from grandparents; Wooden bear & triangle (part of a set), £42, desEnfantillages, Dinosaur light, £11, Sarah and Bend…

Wooden pear, £10, LaLa Loves Decor; Ballet book, car boot sale find, Panda money box, vintage shop find; painted car, gift from grandparents; Wooden bear & triangle (part of a set), £42, desEnfantillages, Dinosaur light, £11, Sarah and Bendrix

Plant pot, from This Modern Life, no longer available

Plant pot, from This Modern Life, no longer available

Steiff teddy, gift from grandparents; Wooden box from H&M, no longer available. 

Steiff teddy, gift from grandparents; Wooden box from H&M, no longer available. 

children's book storage
Little girl's bedroom style

Oh, and if you were wondering what the room looked like 'before', see below! It had a dirty beige carpet, the walls were covered in paper painted in magnolia, and the ceiling was artex. Drab drab drab!

before.jpg

It's not a big room by any means, so there's not that much to see, but I hope you've enjoyed a little peek at what we've done to the space! I did buy the majority of the items for the room myself, but there were a few ideas that were kindly gifted to me. I only ever accept gifts of things that I love and would buy myself, but just so you know, these are the items gifted for this makeover. Thanks so much to the lovely brands for helping out on this. 

Kids single duvet and pillow - Rooi.com / Venetian blinds - makemyblinds.com / Tipi shelf - Cuckooland / Wooden pear - LaLa Loves Decor

An en-suite bathroom in the loft conversion

We are really lucky that our new house came with a ready made loft conversion - although I must admit, it may not be how I would have configured it if we had have been doing it ourselves, but hey, beggars can't be choosers. We've got a decent sized master bedroom which you can get a peek of here, and then there was another small room off the landing which was kind of an office space when we moved in. We knew straight away that it would be the perfect space for an en-suite, and having a bathroom on the same level as our bedroom felt like a bit of a necessity for those middle of the night, half asleep, toilet trips! 

P7060070.JPG

As always, with any renovation project, things aren't as straightforward as they seem, and when we started talking to our builder about it, we discovered that because of the positioning of the room it would be a bit more complicated. Basically the room is at the front of the house while the soil stack is at the back. This meant that we would need a macerator. I'd never heard of this before - it's a system that compresses all the waste, sends it through a much narrower pipe than usual, and then directs it to the soil stack - delightful! It wasn't ideal, as I'd read a little about the potential for things going wrong with them, but we decided it wasn't a reason to not do the en suite, so went ahead with it. (and so far so good!)

It then transpired that if we wanted the sink to supply hot water, we'd also need a kind of mini hot water heater fitted under the sink. I had originally planned to have a wall mounted basin, but we were advised to have a cupboard under the sink to house the heater. This, of course, sent me on a sourcing mission to find a beautiful cupboard that we could adapt to fit the sink, rather than those horrible, under sink cupboards you get in the bathroom shops! After a bit of a search, I discovered this one on fab vintage website Goose Home and Garden. We travelled down to the south coast to pick it up, just about fitting it in the car! When we got it home & put the sink on top, it was a tiny bit too high for me, so my builder had to cut the feet off it to make it the perfect height! 

When it comes to tiles, I always like to try and find something a little bit different - and I totally fell in love with these floor tiles from Baked Tile Co. It is from their 'Urban' collection and has a chipboard effect. They have lots of designs available and there are various ways you can configure them to create different looks. I actually had planned to tile the walls in these also (in the plain version) but sadly it was working out a bit out of our budget, so we opted for the white metro tiles from Wickes, which you can never really go wrong with. 

I ordered all the bathroom fittings online - the shower came from soak.com and the toilet and sink from Taps UK. Once the bathroom was installed, I set to work putting the finishing touches to the room. I wanted to keep it pretty simple as it's a small area, but wanted it to feel inviting and a little bit tropical! We have a boxed in section behind the toilet (where the macerator is housed) so to detract from the big space behind the loo, I added a selection of plants. I picked up all of these plants at Homebase (bar the string of hearts) and added a little peperomia on the sink and a calathea on the floor. 

I quite recently discovered a gorgeous online shop called Lilac Coast, who stock lots of lovely homeware, and in particular some gorgeous plant pots. Both of these are from their range. Their earthy tones tie in nicely with the floor tiles.

I've had my eye on this whale print for ages, but until now hadn't had a place for it. It came from another lovely online shop - Grey September - and the laundry basket I picked up from Deco Baby

I'd love to hear what you think of it! I'm really happy with it, and so chuffed to finally have an en suite! Oh, and I couldn't leave without giving you a peek at how the room looked pre-renovation! See below. ;) 

DSC_3910.JPG

Living room play space - reveal

A while ago I wrote a post about creating a play space in your living room that is not only fun for your child but also blends with your decor and doesn't just look like you have a creche in the corner of the room. I recently put the finishing touches to the space I created for Ruby, and this is the last area of the living room to show you - you can see the rest of the room here and here.

I went with mainly neutral colours - black, white and beige with a few pastel colours thrown in. It's often tricky with kids as they are naturally drawn to bold, garish colours, and of course Ruby does have lots of these toys, but I've added baskets and the Ikea PS cabinet so that these can be tidied away after play time. 

DSC_4660_1200.jpg

She got the John Lewis play kitchen for Christmas last year - again I opted for the neutral design - although I'm sure she may have preferred a hot pink one, but hey, parents rights! There are so many gorgeous products for kids these days that there is no need to end up filling your home with plastic tat, particularly when it will be in your living room! Ruby loves this little table and stool from Nubie (I think I may love it even more!) Yes, it is a bit more pricey than others I looked at, but it is really sturdy and will grow with her. The rug is by Ferm Living (I bought via Trouva) and just breaks up the floor space a little. 

In the little alcove next to the fireplace I created a reading nook for her. This gorgeous bean bag from This Modern Life, fits seamlessly into the space and is super comfy - she often drags it over to watch telly on too. I've just used a wooden crate on its side for storing some books and the owl planter I picked up in Homebase

This Modern Life is one of my fave online stores for kids decor, toys and gifts. The little fox container is perfect for colouring pencils or crayons, or perhaps for a plant. And how beautiful is this memory game by Ferm Living?! Really lovely gifts too, don't you think?

We added this large mirror from One World to try and help reflect a bit of light into this corner as it can sometimes be a little dark. The dolls house is actually Ruby's 3rd birthday gift which is in a few weeks, so I need to hide it again! I found it on eBay for £40. I love it's simplicity and the pink details should keep Ruby happy! The little pink picnic basket came from Deco Baby (we went to their pop up shop at &Hobbs in Shere recently - it's on until 2nd July, and is well worth a visit if you can!) The sleepy bear storage bag is great for those tiny toys kids seem to accumulate & is super cute. (I think I got that from Tea and Kate ages ago) 

As I've mentioned storage baskets are essential. They are easy to move around and you can chuck everything in at the end of the day. These ones are from Oliver Bonas and are perfect for things like Lego, and fit right under the Ikea cabinet. The tall bag in the corner is from Hema, and again so handy for throwing everything in to. 

DSC_4678_1200.jpg

So there you have it! I'd love to hear what you think.... here are a few more images and sources of anything I didn't mention above. 

Acrylic play sign - LaLa Loves Decor / Cat fabric banner - Olive Loves Alfie / Bear Alphabet print - Corby Tindersticks / Welcome to the Circus print by Seventy Tree - Deco Baby / Cast iron radiator - Castrads

Acrylic play sign - LaLa Loves Decor / Cat fabric banner - Olive Loves Alfie / Bear Alphabet print - Corby Tindersticks / Welcome to the Circus print by Seventy Tree - Deco Baby / Cast iron radiator - Castrads

Living room makeover - Part II - features

As you may have read in the first part of our living room transformation, we did quite a bit to the space, so I thought it best to break up the posts up a bit! This time, I thought I'd focus in on the fixed features of the room - the backdrop to the furniture & accessories....

One of the biggest changes to the room was definitely the floor. Below is the 'before' shot again so you can see the carpet that covered the entire room before. It was old, worn, saggy and smelt! 

We decided we wanted the living room flooring to be a big feature in the house, so while it wasn't cheap it will be there for a long time and hopefully should only get better with age. I did consider reclaimed parquet, but after reading up on it, it sounded like it might be a nightmare as the old glue is usually left on the planks, making it more difficult to re-lay. We decided to go for oak parquet made to order, that had a bit of a distressed look in a paler shade of wood. We used a local company to lay it, Surrey Wood Flooring, who sadly, I was quite disappointed with. They started off well, but when it looked like the job was over running, they suddenly sped up and rushed through the finishing. The beading around the edges was terrible (I had it redone, but still a lot of it came away from the skirtings and we've had to re-stick it ourselves.) Anyway, I won't bore you with my complaints, but it's just very frustrating when you spend so much on something only to have lazy workmanship isn't it? Overall, I'm pleased with the floor, but it's those little details that I'm sure no-one else will notice, but I know they are there!

We decided to add an extra radiator in the room as well as replacing one of the old ones. We added this one under the window from Castrads. This is their Grace 6 Column model. Their radiators come in over 60 finishes, including Farrow and Ball and Little Greene colours. We opted for Farrow and Ball in Off Black - it's just gorgeous. It probably sounds weird, but I feel cast iron radiators give a room a bit more credibility, as if it's a bit more grown up.... is that just me?!

At some point the room was two separate rooms, so there is actually two fireplaces in it. We gave both of these a bit of a facelift. I really wish I had a before shot before we painted the walls - the chimney breasts were gold and the rest of the walls dark navy, but you can see how the old tiles looked at least in the before & after above. I repainted the fireplace surrounds in Farrow and Ball Off Black, the same as the radiators to tie these together. It's a really dark navy and is less heavy looking than the previous black paint. Their paint is so lovely to work with I find - easy to apply and gives a beautiful finish. We then replaced the fireplace tiles with these amazing Bert and May glazed tiles. I'm SO in love with them! They look great against the parquet. Below is the other fireplace....

On the wall behind the sofa we put up some Ikea picture ledges. I decided I wanted to be able to change the display here. For example if I change the cushions on the sofa, and could change the display accordingly. It's a really easy way to update the look if I feel like it. 

I'm totally in love with this pouffe from Swoon Editions. Would you believe I actually ordered it when I was in hospital in January! I found internet shopping was the best way to distract myself from my nerves about the imminent surgery. I also knew that Swoon Editions don't have items in stock for long so I HAD to snap it up! They don't have them anymore, but it's worth keeping an eye out as they sometimes get items back in stock....

The final addition to the room was some alcove shelving. Our new favourite thing is going to Homebase and getting wood cut to size! ha! Such a handy free service, and saves us a job! So I think these shelves cost us about £10, and I'm really loving their simplicity. I'm trying to keep them uncluttered in my quest for a more pared back look.

So that's that. In the final post I will be showing you the last corner of the room which is Ruby's little play area which we are just finishing off at the moment. Stay tuned! 

**Thanks goes to Castrads, Farrow and Ball and Bert and May for helping out with our makeover."" 

My office makeover reveal

I'm so excited to finally have this room complete and ready to share with you! One of the things I looked forward to most about moving to our new house, was having a workspace again. For so long I'd worked in the corner of our living room, cramped and messy - and of course that usual thing of never feeling separated from work as it's right there, a few feet from the sofa. So now, having this space is fabulous, and in fact, it is currently my favourite room in the house!

DSC_3412_1200.jpg
Day bed: Ikea / Vintage pendant light: V Interior / Curtain: H&M / Pirate cushion by Lucky Boy Sunday/ Spotty cushion: Rigby and Mac (via Trouva) / Triangle cushion: H&M / Throw: Oliver Bonas / Elephant print: Petit Pippin / Bird plate:…

Day bed: Ikea / Vintage pendant light: V Interior / Curtain: H&M / Pirate cushion by Lucky Boy Sunday/ Spotty cushion: Rigby and Mac (via Trouva) / Triangle cushion: H&M / Throw: Oliver Bonas / Elephant print: Petit Pippin / Bird plate: Donna WIlson via Moonko / Hello bear print by Aless Baylis / Beautiful print: John Lewis

When we moved in, this room slightly resembled a cave - a cave with a Statue of Liberty mural. Clearly someone had taken some time to paint this on the wall, but as you can imagine it wasn't quite to my taste! Here's a couple of 'before' pics. I worked in here for the first few months, and to be honest found it quite depressing (her stern expression didn't help!), so just before Christmas I bought a wallpaper steamer and started stripping the walls. 

IMG_0789_700.jpg

The walls weren't in great shape so I decided that I would get the whole room re-plastered, so I would have a nice base to work with.  We also pulled up the horrible carpet which you can't really see here (it was grim), and my dad painted the floorboards white for me. 

Around the same time Dulux had got in touch with me about doing a makeover collaboration for their Lets Colour magazine - perfect timing! So I agreed to complete the room by the end of March and shoot it for the magazine. It really helped to give me a deadline to get things done! 

Desk: Habitat / Chair: Voga / Floor lamp: Barker and Stonehouse / My Daily Melody print: Audrey Jeanne

Desk: Habitat / Chair: Voga / Floor lamp: Barker and Stonehouse / My Daily Melody print: Audrey Jeanne

I wanted to do something a bit different in the room, seeing as it is my creative space. I selected Dulux's Jasmine Shimmer in Light & Space, and painted the ceiling and half the walls in this gorgeous soft pink colour. I was a bit unsure how it was going to pan out, but I am so chuffed with the result. The pink looks so lovely next to the earthy tone of the bare plaster. 

One of my aims with the room was to have lots of storage for all my books and magazines, and I desperately wanted some plywood display shelving to perch my current favourites on. My lovely hubby set to work creating this! Homebase cut the plywood to size for us and delivered it as it wouldn't fit in our car, and then we simply added the pink painted ledges (also in Jasmine Shimmer).

Bookcase: Ikea

Bookcase: Ikea

Magazine rack: La Redoute / floor lamp: Barker and Stonehouse 

Magazine rack: La Redoute / floor lamp: Barker and Stonehouse 

Vintage pendant light: V Interior / Vintage cupboard: Goose Home & Garden

Vintage pendant light: V Interior / Vintage cupboard: Goose Home & Garden

Sheepskin rug: Barker and Stonehouse 

Sheepskin rug: Barker and Stonehouse 

I then added further storage with an Ikea bookcase, a magazine wall rack and my vintage cupboard. The Ikea day bed also has amazing storage in the three drawers, and the drawer on my Habitat desk is useful for hiding away paperwork that tends to build up.

pink plant pot: Anthropologie / Belly basket: Olli Ella 

pink plant pot: Anthropologie / Belly basket: Olli Ella 

Window cushion: Donna WIlson

Window cushion: Donna WIlson

Mini wall hanging: Kate Housley 

Mini wall hanging: Kate Housley 

Monstera print: The Lovely Drawer / Bear print: Seventy Tree

Monstera print: The Lovely Drawer / Bear print: Seventy Tree

Then it was just a case of adding a few finishing touches, some of which I already had, and others which I had fun sourcing! I've put the sources in the photo captions where applicable, although some don't seem to be available any more I'm afraid.

As of tomorrow, I am no longer doing the part time job I've been doing for the past 15 months, and I am back in the world of freelance. I've bought myself a sparkly new laptop and I feel re-energised to get to work on lots of lovely projects this year (if you need a writer, editor, blogger, picture editor etc - do get in touch!). It definitely helps to be able to work from this lovely new room that's for sure!  

Thank you to Dulux for supplying the paint for decorating this room. Look out for it in their Lets Colour magazine soon! 

Downstairs Loo makeover

So, it's not the most glamourous of rooms, but it is one of the first in our new house to get a full makeover! People keep asking me what our 'plan' is for renovating the house, but to be honest, we don't really have one, we are just doing things when we feel the urge, or when we come up with what we'd like to do in a particular room. With this, it was kind of a needs must job. While it was pretty grotty in there, it wasn't at the top of the list, but just after Christmas we realised that the floor felt really unstable. It appeared that there had been a long-standing leak where the cistern was boxed in. So we decided, if anything, we should do it for safety reasons sooner rather than later. Here is a 'before and after' to get the full effect...! 

As you can see it was pretty rough around the edges - a lot of yellow and a considerable amount of pine for such a small space! It simply needed a complete overhaul so my first task was to source some pretty tiles - naturally!

I'd fallen for some tiles when I was at an event before Christmas, and after posting a pic on Instagram, I managed to find out the supplier and checked out their site. Much to my joy, they came in pink - which I can't seem to get away from at the moment. The tiles are designed by Scandinavian designers Claesson Koivisto Rune, in collaboration with Marrakech Design. They are actually a Swedish company, and while I tried to source a UK supplier to save on delivery, I couldn't, so I bit the bullet and paid the delivery fee from Sweden. So, I'l admit they weren't cheap, BUT I am literally so happy to see them every time I go in there! 

We then opted for simple white metro tiles, painted the walls white and used some grey paint I had left over from a previous project for the window frame and folding door. We got our toilet and basin from Victorian Plumbing, and while we are happy with the items, I was a little disappointed in the service. The delivery came when I was in hospital, and it turned out the sink wasn't there. It took nearly two weeks for them to redeliver it! Not what I needed when I'd just had surgery! 

Anyway, you get over these things... We're really happy with the transformation, it makes SUCH a difference! Below are a few of the little details I've added, some of which were things I already had, such as the plates, plant pot, perfume bottle and mirror, but I've popped the sources for the other bits at the bottom of the post.

Hand towel: House of Rym via The Future Kept

Meraki handwash - Trouva

Light fitting components: Enamel Shades

Gold light pull - Pushka Home

Toilet roll holder - Ferm Living via Scandinavian Design Center

Toilet brush - John Lewis

I'd love to hear what you think! I've got another room makeover coming up next week, so look out for that too. x

Bedroom makeover & bed upgrade

When we moved into the new house, one of the first things we needed to purchase was a new bed. We needed an additional double for the spare room so my parents could stay. So before we even moved, I'd earmarked this copper bed frame from Made.com for our room, and ordered it as soon as we got the keys. 

As the bed was quite a big spend, I decided to order a relatively cheap mattress and bedding - bad move! I should have taken my own advice and not scrimped on the things that need to do a good job. The mattress was really hard and too thin, and the bedding was too light and flimsy. The hubby wasn't happy and I was kicking myself for my less than satisfactory purchases. But luckily, that was when two fabulous companies stepped in to sort things out. 

Firstly, Sleepbear introduced me to their British-made, latex-topped mattress. A new family run business, Sleepbear have developed a 'one mattress suits all' design, which they believe is the ultimate in comfort, support and a good night's sleep. It seems the pure latex they use within the mattress is key to everything - it contours to your body and it's elasticity allows the mattress to bounce back. Not only that, latex is naturally hypoallergenic, so fends off dust mites, mould and bacteria, and due the materials open cell structure it is super breathable, keeping you cool in the summer and warm in the winter. 

When our mattress arrived and we lay on it, we both literally went 'OH YES!' It was SO different to what we had been sleeping on. You can see in the pic above how substantial it is (and it's lovely design!), and it has 100% kept it's shape since we started sleeping on it. It has a firmness to it, but still feels like you kind of sink into it each night. 

So with our mattress upgrade, it would have been ludicrous to then top it with the flimsy duvet and misshapen pillows we'd been using, so thankfully the lovely folk at Soak and Sleep were able to guide us on making our bed a truly luxurious place. On their website, you can tailor your choice of bedding to what kind of sleeper you are... side, back or front sleeper, cold or hot, allergy sufferer etc. We were advised to go with a pure wool duvet, which, as a natural material is great for temperature regulation - I often go to bed cold, but wake up in the night too hot, so it was perfect. As for pillows, it seems latex is winning out again! Same as the mattress, the latex pillows keep their shape amazingly well, and are hypoallergenic, (as is the wool duvet) which is useful for my asthma. 

Last but not least, the bed sheets. Again, I've always been a bit of a cheapskate when it comes to this, but NO MORE! 100% French Linen is the only way to go! I can't believe I've cheated myself out of sleeping between anything less. It feels amazing, it is breathable, again helping with temp control, and there is no need to iron it! added bonus! I'm totally in love with this Blush Pink set I went for, I can't stop looking at it! :) 

Doing this bed upgrade has honestly opened my eyes to how important a good mattress and bedding is. Maybe I'm just getting old, but it feels like a real priority to have a super comfy bed to retreat to after a long, stressful day! 

The entire bedroom has had a bit of a makeover, although it is not complete yet. We are still working out storage options and additional furniture etc. But we did strip off the lining paper that was painted a deep purple and repainted in white, We then got rid of the dark blue carpet and replaced it with this white laminate flooring. As it's a loft conversion, there were no nice floorboards under the carpet, hence the laminate, but I've honestly surprised myself with how pleased I am with it! It has completely transformed the space. I will probably repaint the pink sloping wall, and we need things like a new light fitting, a new door and window coverings, but for now, just making those small changes has made it a completely different room to what it was. Of course I forgot to take any decent 'before' pics (again!) although below is a terrible phone pic from when we viewed the property, and a few 'in progress' ones when I was stripping the walls! 

What a difference a lick of paint and a new floor can make right?! The only furniture I've added to the room so far are the little side tables which I got from Nordic House.

Things are slowly taking shape round here! There's still lots to do, but at least we now have a lovely, comfy place to retire to after days of decorating! Thank you so much to Soak and Sleep and Sleepbear for their help with upgrading our bed - I know I will continue to opt for better quality when it comes to bedding from now on! 

oh, and if you fancy upgrading too, Sleepbear have a £50 off discount code until January 31st, see their website for the code, and Soak and Sleep are in the final week of their sale so take a peek for some bargains! 

Quick bedroom makeover

Since we moved into our new house about 5 weeks ago, we've been very busy, but it feels like we've been jumping from job to job - there's just so much to do, and we keep spotting or discovering things that need our attention, so it's hard to stay focused on one thing. But I really felt like I wanted to get at least one room 'done', so the smallest bedroom seemed like the place to start. Of course I forgot to take a proper 'before' shot - it originally had some carpet tiles (!) on the floor that were filthy, but thankfully very easy to get rid of, so this is what it looked like after these were removed.... 

Firstly my dad painted the walls and floor in white so this freshened up the space instantly. The bed on the left was actually left by the previous owners, and fits perfectly along that wall, so for now we've decided to keep it there until we find something else. So in the meantime, I decided to give it a lick of paint. I must admit, I am a bit of a lazy decorator. I wish I could click my fingers and everything was painted! So that is why Annie Sloan's chalk paint was so appealing. I didn't want to spend too long on this room, so the fact there is no need for prep before using Annie's paints got the thumbs up from me. 

I selected four paints from the Annie Sloan range - Paris Grey, Old WhiteScandinavian Pink and Antoinette. I painted the bottom panel Paris Grey, the top panel Old White and then for the drawers I did a little bit of mixing. The left drawer was Old White with a little bit of Antoinette mixed in, the middle drawer is Antoinette on it's own, and then the right drawer I added a little Scandinavian Pink in with the Antoinette. All finished off with a little bit of Clear Wax

I plan to make some new cushion covers and change the bedding as it was a quick fix as we had someone coming to stay, but the little rug is a new addition from Oliver Bonas. I didn't want the room to look overly pastel-y, so added this darker rug to contrast with the paler colours. 

It's such a teeny tiny room, that there isn't much space for furniture, but obviously we wanted something for our guests to put their clothes, so this gorgeous clothes rail from Cox and Cox was the perfect option. it's made from bamboo, which is a sustainable wood, and also looks beautiful. It literally took minutes to construct and I'm loving the simple design. I am tempted to steal it out of here for my own room! 

plant pots from Howkapow

plant pots from Howkapow

prints by Audrey Jeanne

prints by Audrey Jeanne

There's still a few bits and bobs to be added to this room - a bedside table and lamp, a window covering and maybe some shelves, but for now am happy that at least one room in the house feels like us rather than the previous owners! I'd love to hear what you think! 

*Thanks to Annie Sloan and Cox and Cox for helping me out with this makeover.*

Our new home... finally!

So, I know it's been pretty quiet around here of late, but as you may have read in recent posts, we have been waiting to move house for a whole year! We put our flat on the market in September 2015, expecting to have moved by Christmas. We found the house we wanted to buy in the October, but had to wait while the owner found her new home. In the meantime, we lost buyers left, right and centre due to the wait, but eventually got a dedicated couple I think around April. But then the legal problems commenced. I will never own a leasehold property again in my life! It is a nightmare! After months of thinking it might never happen we finally exchanged at the start of September, and completed on the 30th.

While we were desperate to move to a bigger house, it was still sad as we watched the removal guys take everything out of the flat we'd lived for 7 years. So many big events happened in our lives during that time - getting married, bringing our first child into the world and of course I launched 91 Magazine from here - and if you didn't know, this house inspired the magazine's name - as the address was no.91.

We look back and hope we managed to improve that flat while we were there, I particularly loved the kitchen which was our biggest project, and the room that most prospective buyers seemed to love. Here it is just before we left... and yes, we did leave the Smeg behind! :( 

Goodbye no.91, you will always have a special place in my heart! But it definitely felt like the right time for us to move on. We have now been in our new home for a week and it feels great! We have somehow managed to upgrade from a 2 bed flat to a 5 bed semi detached house! The day we viewed it last year I literally couldn't sleep that night thinking about it. The house was a bit of a mess in terms of decor and maintenance, but I loved the space and the flow and just knew we could bring it back to life. When we thought we might lose it, I realised that it would be very unlikely we'd find the same amount of space for the price we were paying. Particularly in an area we liked and that suited us in terms of future schools for Ruby. So we held on and did everything we could to make sure the chain didn't collapse. So, here we are, finally in, and WOW, there is a lot to do! 

Downstairs there is a large knocked through living room, a large conservatory (or 'garden room' as I like to call it!), the kitchen and a downstairs loo. We decided on our second night in the house it was time to start painting. We just couldn't bear to be surrounded by dark, dark blue walls for any longer than was necessary! Dark walls can look great if done well, but I personally find it super oppressive. The room also has a worn red/brown carpet throughout! oh and did I mention the gold fireplace feature walls?! 

We are half way through painting this huge room white (it's taking 3 coats to cover the blue!) and already it feels so much brighter and even more spacious. There's still lots more to do in here - rewiring, flooring, and skimming the artex on the ceiling, but really it's all cosmetic, so shouldn't take too long to transform. 

On through into the 'garden room', I've tried to do a touch of styling and sprucing it up with plants, but there is NO hiding those lime green walls! Oh and yep, they carry on right through into the kitchen.... 

I realised after we agreed to include our Smeg appliances with the sale of the flat that I'd made a big mistake! My husband suggested we just get a cheap fridge to tide us over until we do up the kitchen, but I literally couldn't bear it (I'm such a Smeg snob!!) - but luckily I managed to get this one at a great price as it has a bit of damage. But those lime walls just aren't doing it justice are they?! So I think they are next on our hit list! 

Upstairs isn't quite so bad in terms of colour schemes, except for the room I'm typing from now, which has a questionable mural painted on the dark blue (again!) walls! Above is a small bedroom which I've managed to make passable for now, although what you can't see is the carpet TILES on the floor! 

Ruby's little room isn't too bad either - it just needs decorating and to be rid of the stained carpet. I never thought I'd say this, but I think we may actually go for carpet in the bedrooms. Even though the current ones are a bit manky, we've been quite enjoying the softness under our feet after having hard, cold floorboards in our old place.

This is all I dare show you of the bathroom! It needs complete replacement but it is quite a big room, so lots of scope to make it lovely. For whatever reason this is the only room that's been left with exposed floorboards, everywhere else has been covered with carpet or lino! 

So that's the first peek into our new home. I know it's all going to take a while, so I need to make my peace with that and endure living with things as they are for a while. But I am looking forward to the journey, and making the space lovely again. I hope you'll enjoy following along with me! :) 

The history of my home

A few months go I had the most intriguing of emails. It came from a woman who had lived in my house nearly 20 years ago. She had come across pictures of our kitchen/dining room online, and spotted the fireplace which she had purchased in an antiques shop in Glasgow in the 1980's - apparently it was bright orange when she found it! She cleaned it up and brought back to Kingston to install in the house. Shona emailed me to let me know of this crazy coincidence and we began chatting about the house and what it was like when she lived here. It really is incredible the connections that can be made via the world wide web right?! 

It feels particularly poignant to be looking back on the history of our home, as we prepare to move on from it ourselves after nearly seven years of living here. (that's if we EVER exchange, it's been the longest process). Shona sent me a few pictures of the interior when she was living here which was SO interesting, so I thought it would be fun to show the comparisons (which also includes some shots from when we bought it in 2009) and I did a little interview with Shona, to find out about her time living here... 

Now image by Cathy Pyle

Now image by Cathy Pyle

Patchwork Harmony: When did you live in the flat?
Shona: 1989-1997

Patchwork Harmony: What was the house like when you bought it? 
Shona: Not great, it needed totally refurbished - it was in a real mess. It needed a new bathroom, kitchen and it didn't have any central heating so that had to go in too. Before buying the flat we looked at one of the top floor flats next door, which was immaculate but I think about 25k more (!) - that gives you an idea of how much work needed to be done on it. I think the purchase price was around 72k.

Now image by Cathy Pyle

Now image by Cathy Pyle

Now image by Martina O'Shea

Now image by Martina O'Shea

Patchwork Harmony: Do you know any history of the house prior to you living there? 
Shona: I think it had been rented, although for some reason I think I was told squatters had been living there before we moved in!

Patchwork Harmony: What are your memories of living here?
Shona: I had an interesting time there. It was exciting in the early years as I had moved down from Scotland and just started my career. It was my first step on the property ladder. I got married when I was living there and then divorced just after I left the house so it's a place of real mixed memories and emotions. I also got two cats when I was there: Pyramus and Thisbe and my fondest memories seem to be of them as kittens!! I asked my friend if she had any interesting memories of the house and she said she remembered dancing a lot!

Now image by Cathy Pyle

Now image by Cathy Pyle

Patchwork Harmony: Did you make many changes to the house in terms of layout etc? 
Shona: The kitchen was made slightly bigger. The only other thing was the garden was really small and as we got on well with our neighbour we decided to make it one large shared garden instead of two smaller ones.

Patchwork Harmony: Things are very different now from when you lived here in terms of where homeowners find inspiration for decor - how did you go about it back then? Where did you find ideas? Where did you shop for home furnishings etc? 
Shona: If I remember correctly I loved Habitat, Laura Ashley and Designers Guild. I must have got inspiration from magazines and my brother is a designer so he was a great help. I remember I had to learn how to make soft furnishings as it was too expensive to buy them all - curtains, cushions etc. Festoon blinds were all the rage in the 80s :)

Patchwork Harmony: How long did you live here for and why did you decide to move on? 
Shona: From 1989-1997 then we moved about fifty metres up the road until 2006!

Thank you Shona for getting in touch and giving this little insight into the history of our home! I don't know if this is interesting to anyone else, but I felt the need to document on here even if it just for myself. 

I guess when you are about to move on from a home that has been so important in your life, it is a nice time to reflect on and look back on your time there. It was our first home we purchased together, we became a married couple while living here, and we brought our first child into the world here, not to mention that the magazine I founded is named after this place! It's funny how there are some similarities in the life events Shona experienced while living here too. Her email definitely wins the prize for the most intriguing of the year! 

From nursery to toddler room

So it seems I am now officially the mum to a toddler, not a baby. I honestly don't know where the time goes. One minute they are sleeping in a tiny moses basket next to you, next they are scrambling all over your furniture like a excited puppy! Ruby is 19 months now, and is of course still sleeping in a cot, but I've been thinking recently about giving it a little update as she gets older, and will very soon have grown out of her sleeping bag. So whenever Silentnight got in touch to ask me to take part in their 'Room for a little one' campaign, it seemed like a good opportunity to give her sleeping quarters a mini update! 

I choose some lovely bedding from Olli Ella, whose designs I've admired for a while. I went for a fitted sheet and pillow in their confetti pattern, and a blanket in Terra and Tartine. 

It makes such a difference to the cot, as before there was just a plain white sheet on the mattress, so it looks much more 'grown up' and part of the room decor. Plus the bedding goes perfectly with the existing wallpaper.

The other thing with a growing toddler is the ever increasing accumulation of 'stuff'. I've talked about storage for kids before, so you'll know I'm always on the look out for lovely baskets, boxes or bags to incorporate, so I also ordered one of their lovely belly baskets to help with the expanding toy collection! (I may have had my eye on one of these for some time!) Ruby's comment when she saw the new basket in her room was simply 'what's that?!' I'm sure she'll appreciate its beauty one day! 

I think new bedding is to a bed, what new cushions are to a sofa. It can make such a huge difference and generally for very little expenditure. It's a transformation that literally only takes a few moments! The next thing will be when she is ready for the cot to be turned into a bed! That really will bring home how fast she is growing up! 

This post was created in collaboration with Silentnight. All product choices and views are my own. 

My tabletop Christmas tree

Space is at a premium in our flat these days (hence our planned move!) and last year we didn't even bother with a proper Christmas tree, opting for a slightly unusual fake 'branch' tree! I did miss a real tree though, and had hoped that we would have moved into our big new house by this Christmas and we'd be back to finding the biggest tree possible! But alas, we are still in our flat, so I had to compromise on size, but thankfully have got a real one this time! 

Literally the only space we have available for a tree was on a table top so we decided to opt for a smallish tree - choosing a medium pot grown Norway spruce from B&Q. While we were browsing the trees, it dawned on us that in fact this was a very sensible idea with a toddler running around! I'm sure by now most of those baubles would have been removed if the tree had have been on the floor! But as it is, Ruby enjoys looking at the tree, but can't reach it! A pot grown tree was also ideal for displaying on a tabletop, I just popped it into this zinc bucket to protect the table, which also concealed the black pot it came in. 

For the decoration this year I wanted to go for something a little different. Pink and grey might not be the colours you immediately associate with Christmas, but I think they actually look fantastic! I selected some pale blush pink baubles, strings of beads and some glittery snowflakes and mixed them with some grey homespun decorations, made from felt and wool. I'm really liking this mix of textures too. 

What you can't really tell from these images is that the lights actually have a bit of a pink glow which works really well with the scheme. I then styled the rest of the table top with honeycomb balls and other paper decorations from Hema, a vintage frame with a Paperchase postcard hanging inside and some vintage candle holders.

I must say, I am totally sold on a smaller table top tree - it doesn't take up too much space and is out of the way of mischievous children and pets! What are your plans for your tree this year?!

** Thank you to B&Q who provided the lovely tree, lights and decorations. 

Decorating with Christmas cards

There are so many beautiful Christmas cards out there these days that it seems logical to somehow incorporate them into your festive decor rather than shoving them into one of those card holders where they are get overlapped and hidden, and not shown off. I wanted to share with you a few of my favourite card designs, but at the same time give some inspiration for how to display them and use some of your favourite cards to actually decorate this Christmas. 

I really urge you to try and buy some independently designed cards this year - Sarah Hamilton's Just a Card campaign highlights the importance of this, so even if it is just one of two for your favourite people, try and support those designer/makers who work so hard for their art. 

There are some discount codes at the bottom of this post for the card designers featured, so make sure you scroll to the end and make use of those!

For this scene I used a twig which I covered in foliage and hung using fishing wire. Then I simply added a mini bulldog clip to each card and hung it from the twig with some festive ribbon.

Card designs (L to R): Thornback and Peel / Katie Leamon / Katie Leamon / Thornback and Peel / Katie Leamon

Other prop details: Snowflake ribbon: Tiger / mini gold bulldog clips: Hema / Deer: Tiger / Spotty tumbler: Howkapow

This one is a bit more playful and colourful, as well as super easy as all you need is some washi tape! Simply sticking some of your favourite cards on the wall and mixing in a few paper decorations and sprigs of greenery, creates a really simple wall display and shows off the cards beautifully.

Card designs (clockwise from top left): Emma Block / Roxwell Press / Emma Block / Roxwell Press / Roxwell Press

Other prop details: Washi tape: Tiger / Paper snowflakes: Hema / Chalk pen (used on mirror): Chakola

How gorgeous are all of these Christmas cards?! If you fancy stocking up, then here are some discount codes to help out: 

Emma Block: Receive 10% off everything except custom artwork on Emma's website using the code: 91MAGAZINE - Click here to shop

Roxwell Press: Get free delivery until 6th December using the code: CRACKER - available for UK shipping only - Click here to shop

Thornback and Peel: Get 15% off everything valid until 14th Dec at Midnight using code: PATCHWORKHARMONY - Click here to shop

Katie Leamon: 10% off everything valid until 7th December using code: PATCHWORK10 - click here to shop. 

Utilising your space for storage

I'm sure I'm not the only one who struggles with storage in the home. It's a constant battle right?! I was recently asked by Harvey's Furniture to share three storage ideas so I thought I'd share some that have worked for me in my own home. Finding good storage solutions is about utilising all the space that you have, but also making sure it looks good. If like me, you don't have a loft, then it's necessary to find ways of using each corner of your home, without it just becoming cluttered and messy. 

1. Use the space above you

When we had to transform my office into Ruby's bedroom, I was left with a lot of boring files of paperwork and boxes of other admin type stuff I couldn't get rid of. I had no cupboard space available to hide them away, so instead we installed some shelving up above the line of the door to store these. They are things that don't need accessed on a regular basis so it is fine for it not to be easily accessible, but make sure you keep it orderly and neat otherwise it will just be an eye sore. The other idea is to create a fun fabric curtain to pull across and conceal it. I had actually planned to do this, but decided I quite liked the slightly utilitarian look of the shelves. 

2. Choose stylish bags and baskets

With things that do have to be easily accessible, such as toys, lovely storage bags and baskets are a perfect solution. BUT make sure they are lovely! I could never bring myself to buy those horrible plastic storage boxes as they are so ugly, and then you have to find somewhere to conceal those. Pretty baskets and other containers are readily available, so choose some that suit your decor and make them part of it. They can slot in anywhere where you have a little gap, and the kids can move them around as and when they like. Plus it's super easy to tidy up at the end of the day! I published a post recently about some great options you can find online

3. Make a feature out of existing spaces

Try to make use of awkward nooks and crannies, making them into an interesting feature instead. We have this beautiful fireplace, but it is not a working one, so I decided to stack up some old books which I often use as props for photos in there. It means my beautiful old books are on display rather than packed away in a cupboard, as well as making use of the otherwise dead space. 

What storage solutions are you most proud of in your own home? I'd love to hear!

This post was in collaboration with Harvey's Furniture,. As well as my tips, you can read two other bloggers top storage ideas on the Harvey's blog