A flower filled home - inspired by Chelsea Flower Show

Back when I worked for FT Weekend for five years, this time of year always meant Chelsea Flower Show for me. We did a lot of coverage of the show, and even did a special supplement on the event. I did a lot of sourcing images of the show as well as commissioning photographers to shoot at it. But never did I get to make a visit myself. So, unsurprisingly, I was thrilled when I was invited along this year by Marks and Spencer! I was finally getting to see all of those stands and gardens designed by the experts with my own eyes, and indulge in one of my favourite things - photographing flowers. 

Marks and Spencer's Spirit of Summer display (pictured above) was absolutely stunning. I spent ages snapping the fountain of blue, purple and green flowers with pops of pink, and the walls laden with vibrant blooms in the colours of summer. 

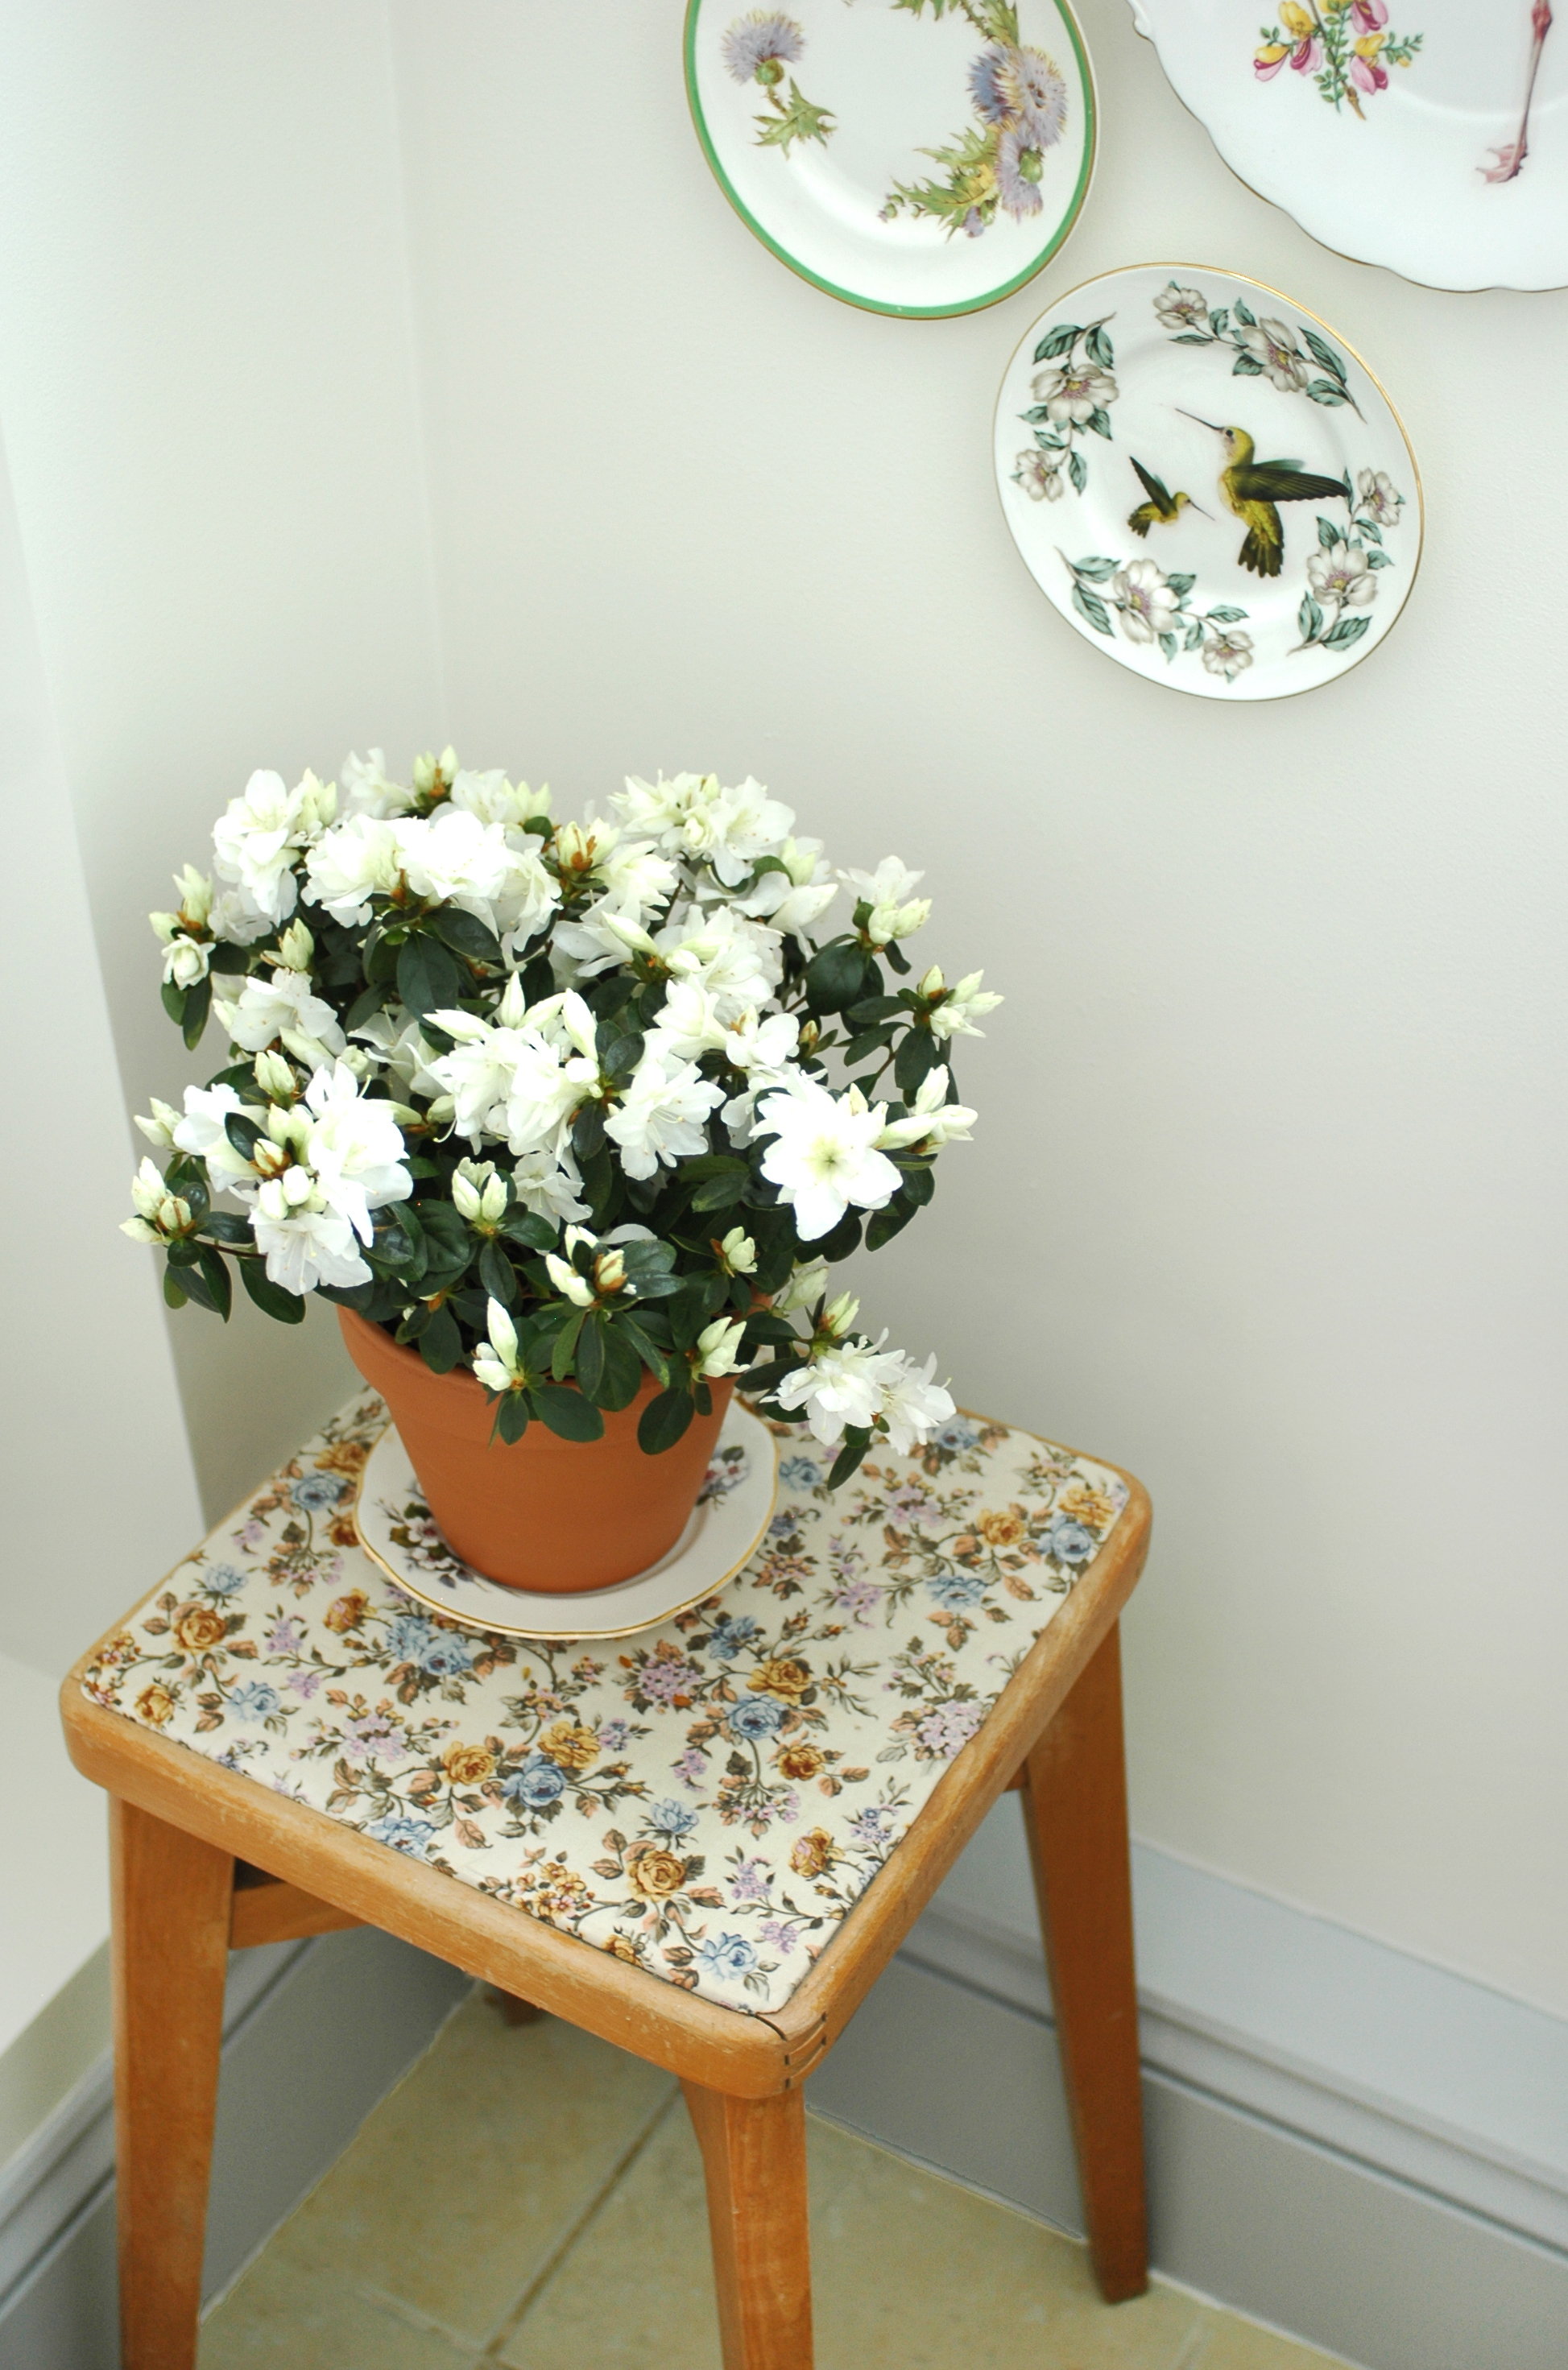
I didn't get as much time at the show as I'd have liked. I had an afternoon ticket, so had to whizz back to collect the little 'un, but after visiting M&S, I had a quick browse of some of the other stands, and was inevitably drawn to peonies and anything a little bit wild. And from my pics above, it's clear my pink obsession continues! While my trip was a bit of whirlwind, there's no doubt that it filled me up with floral inspiration, and coming home, I *needed* to surround myself with blooms in every room!

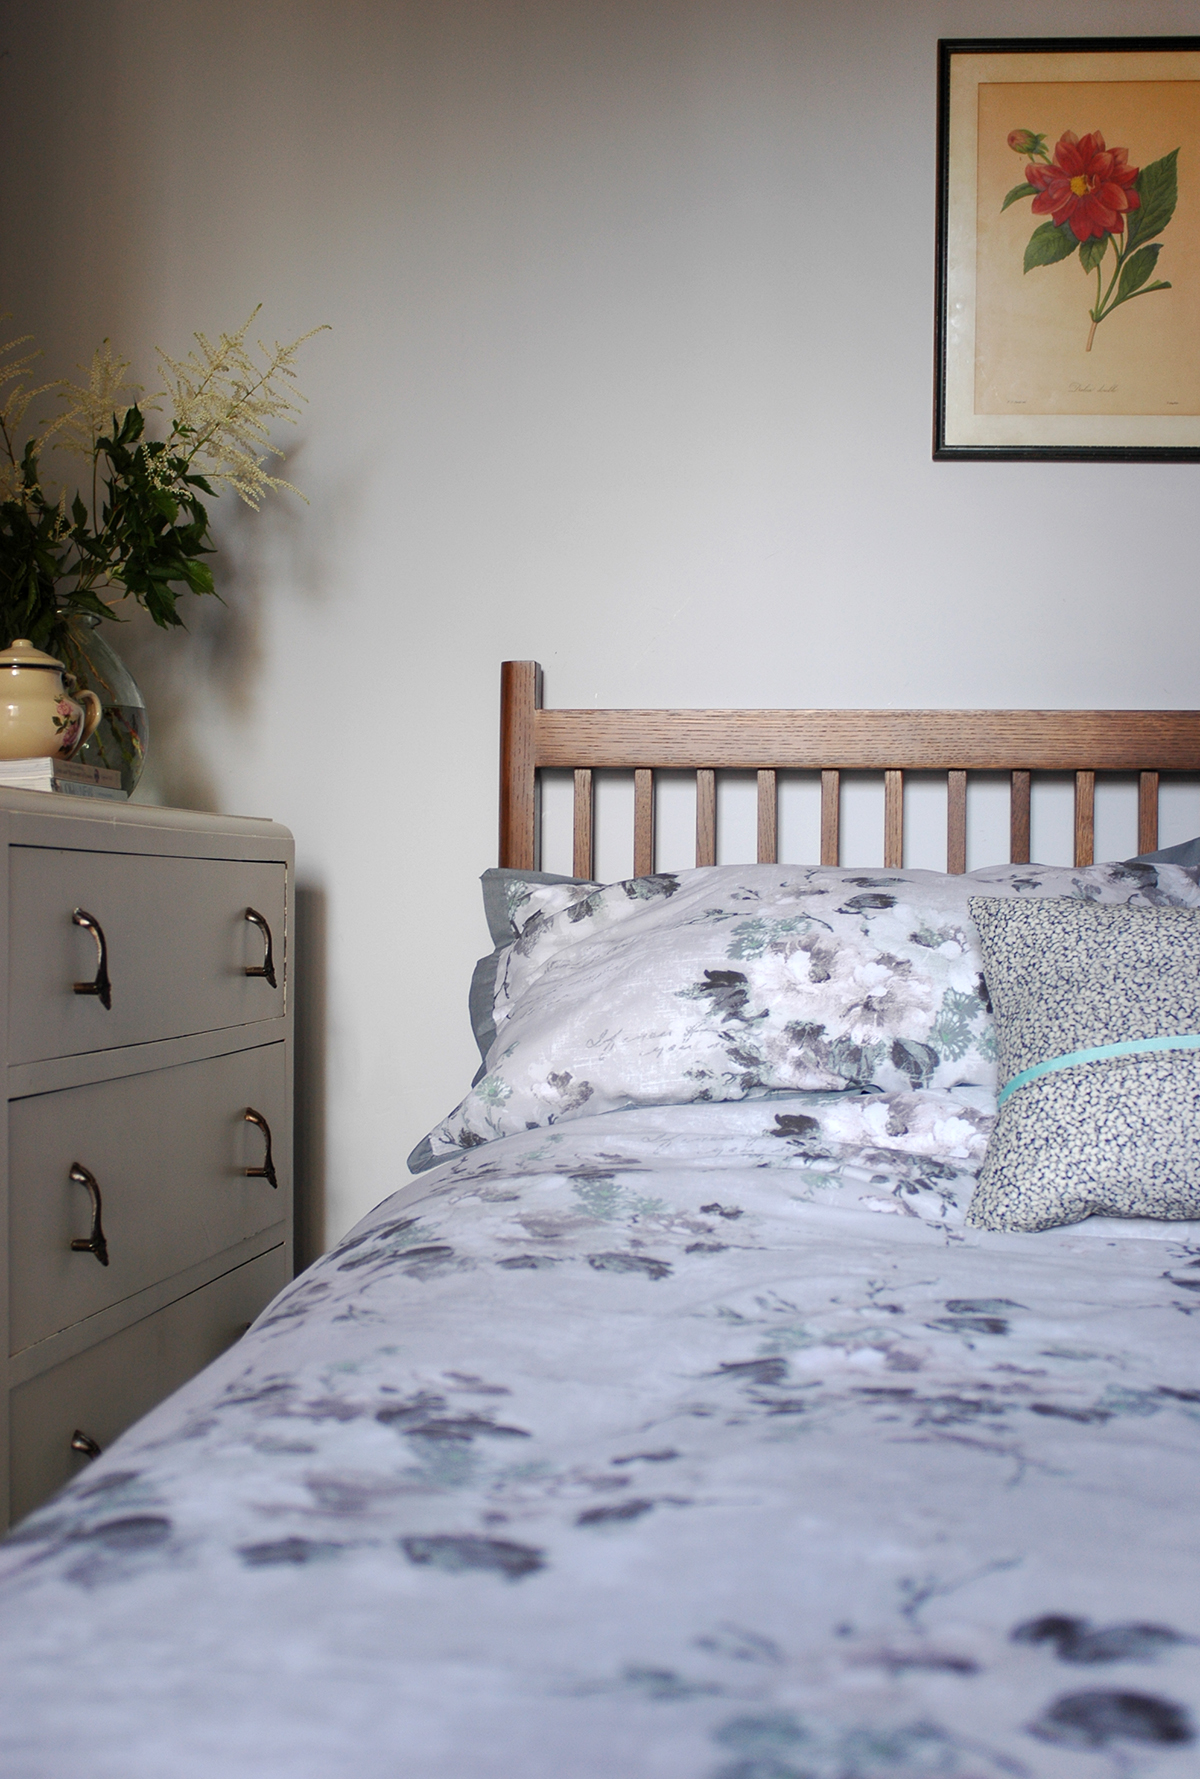
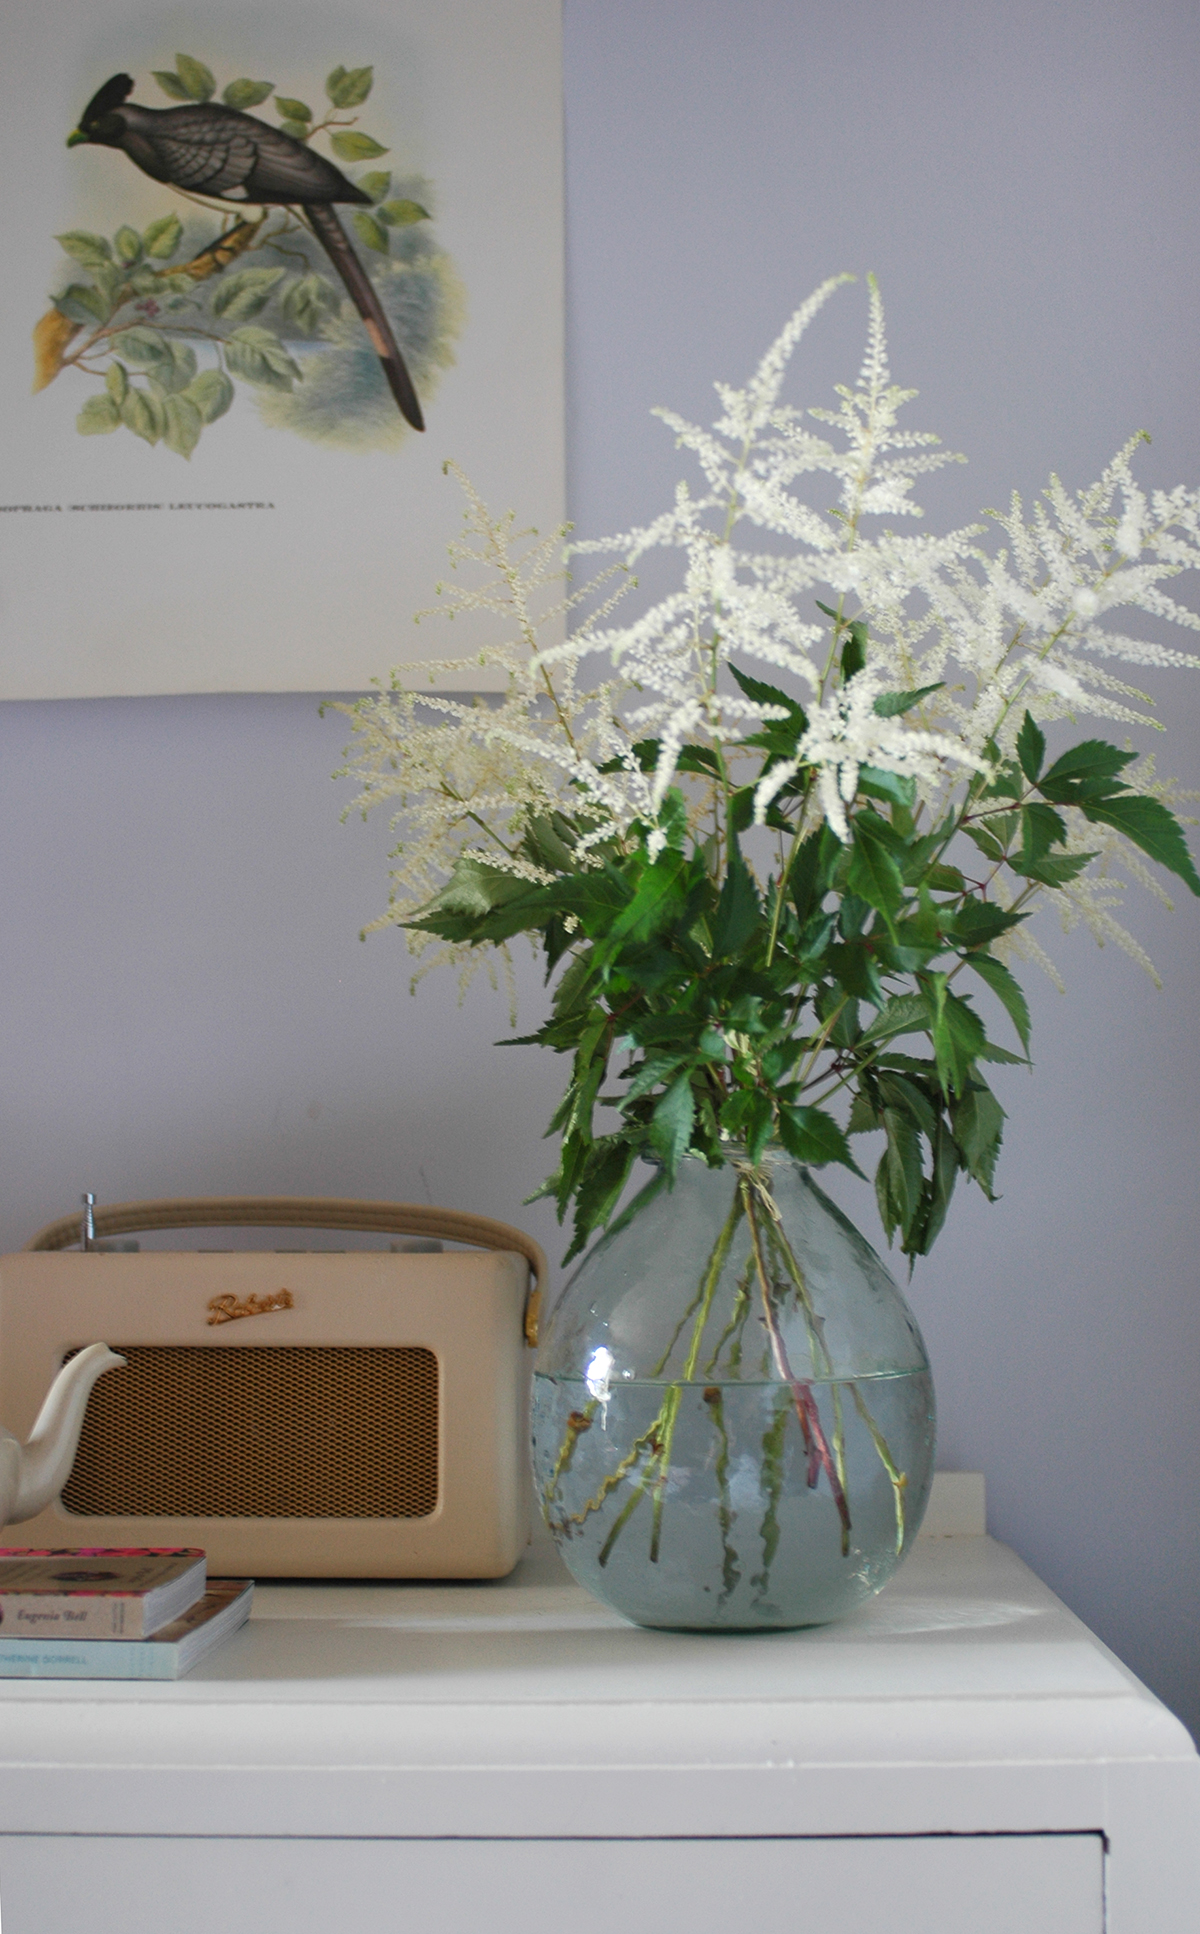
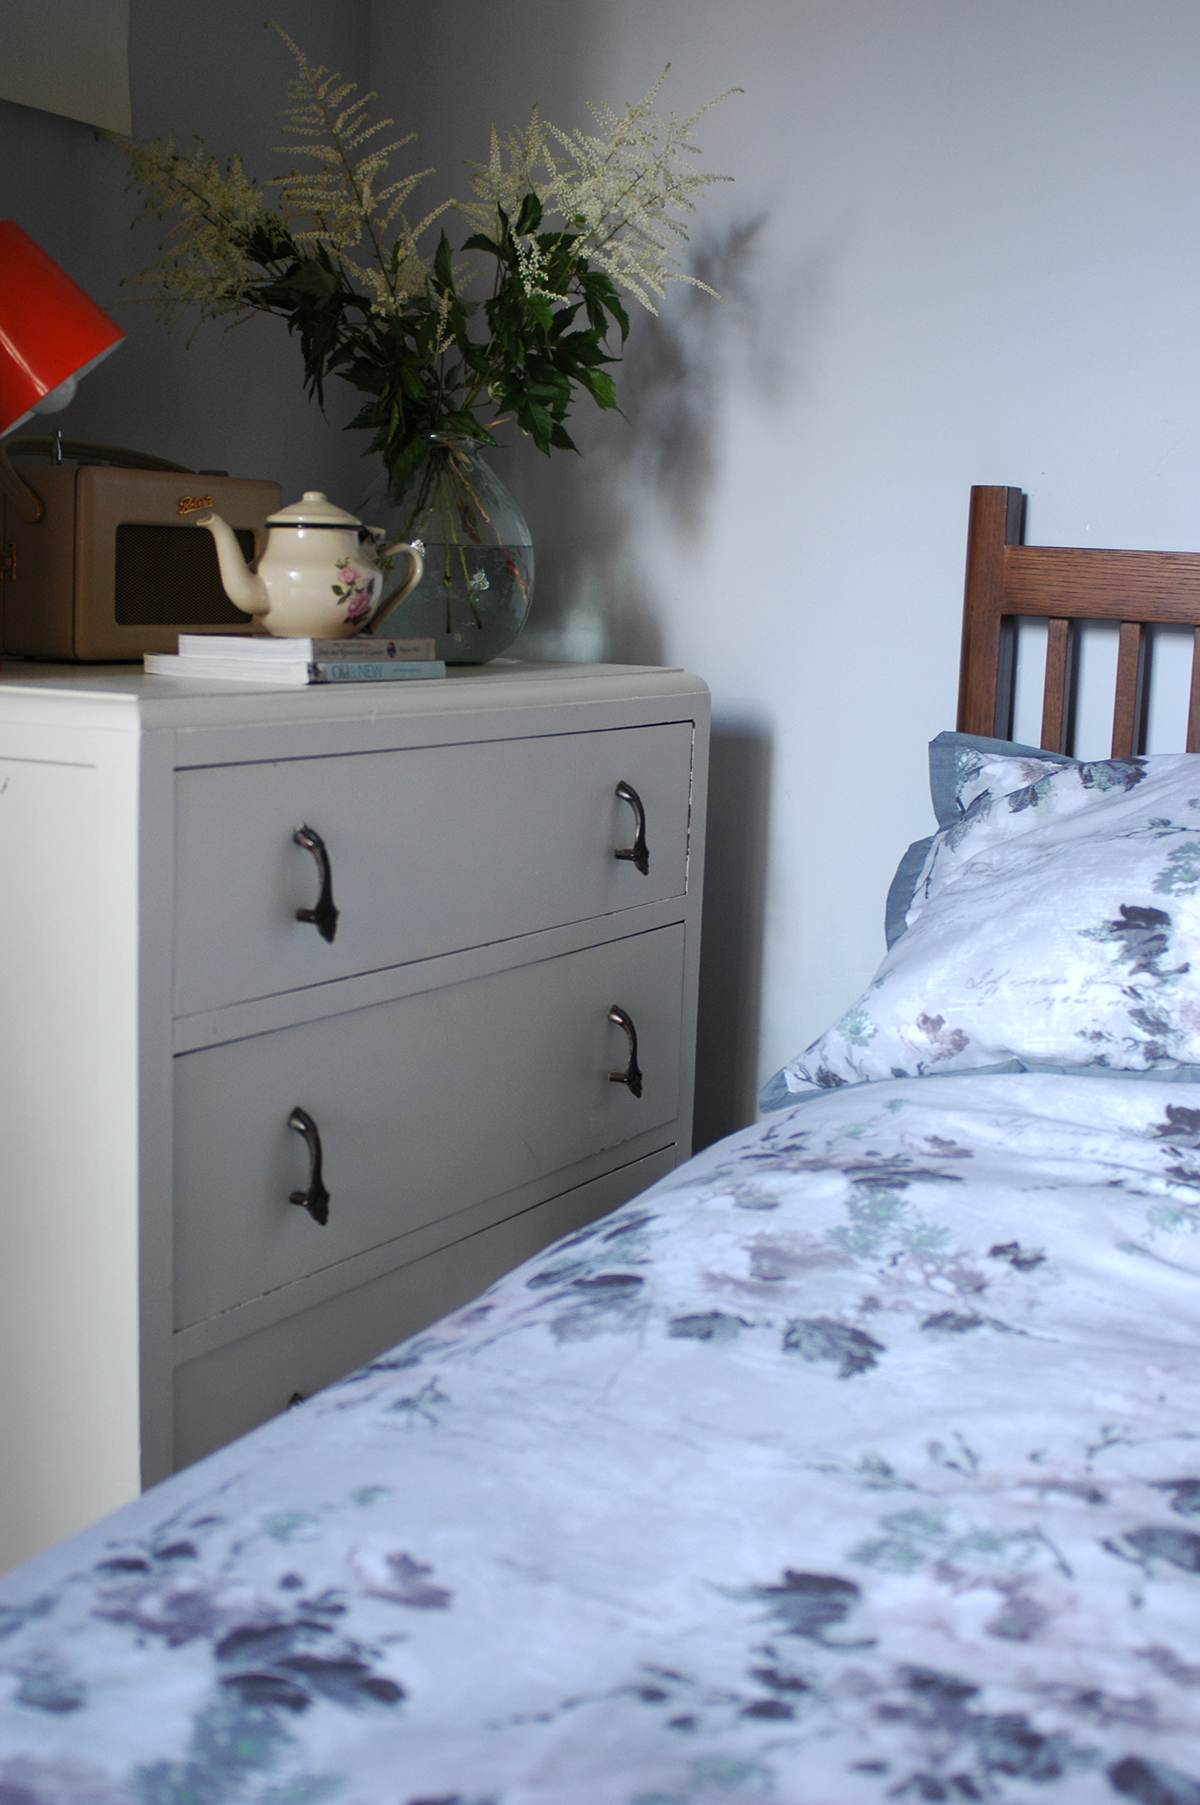
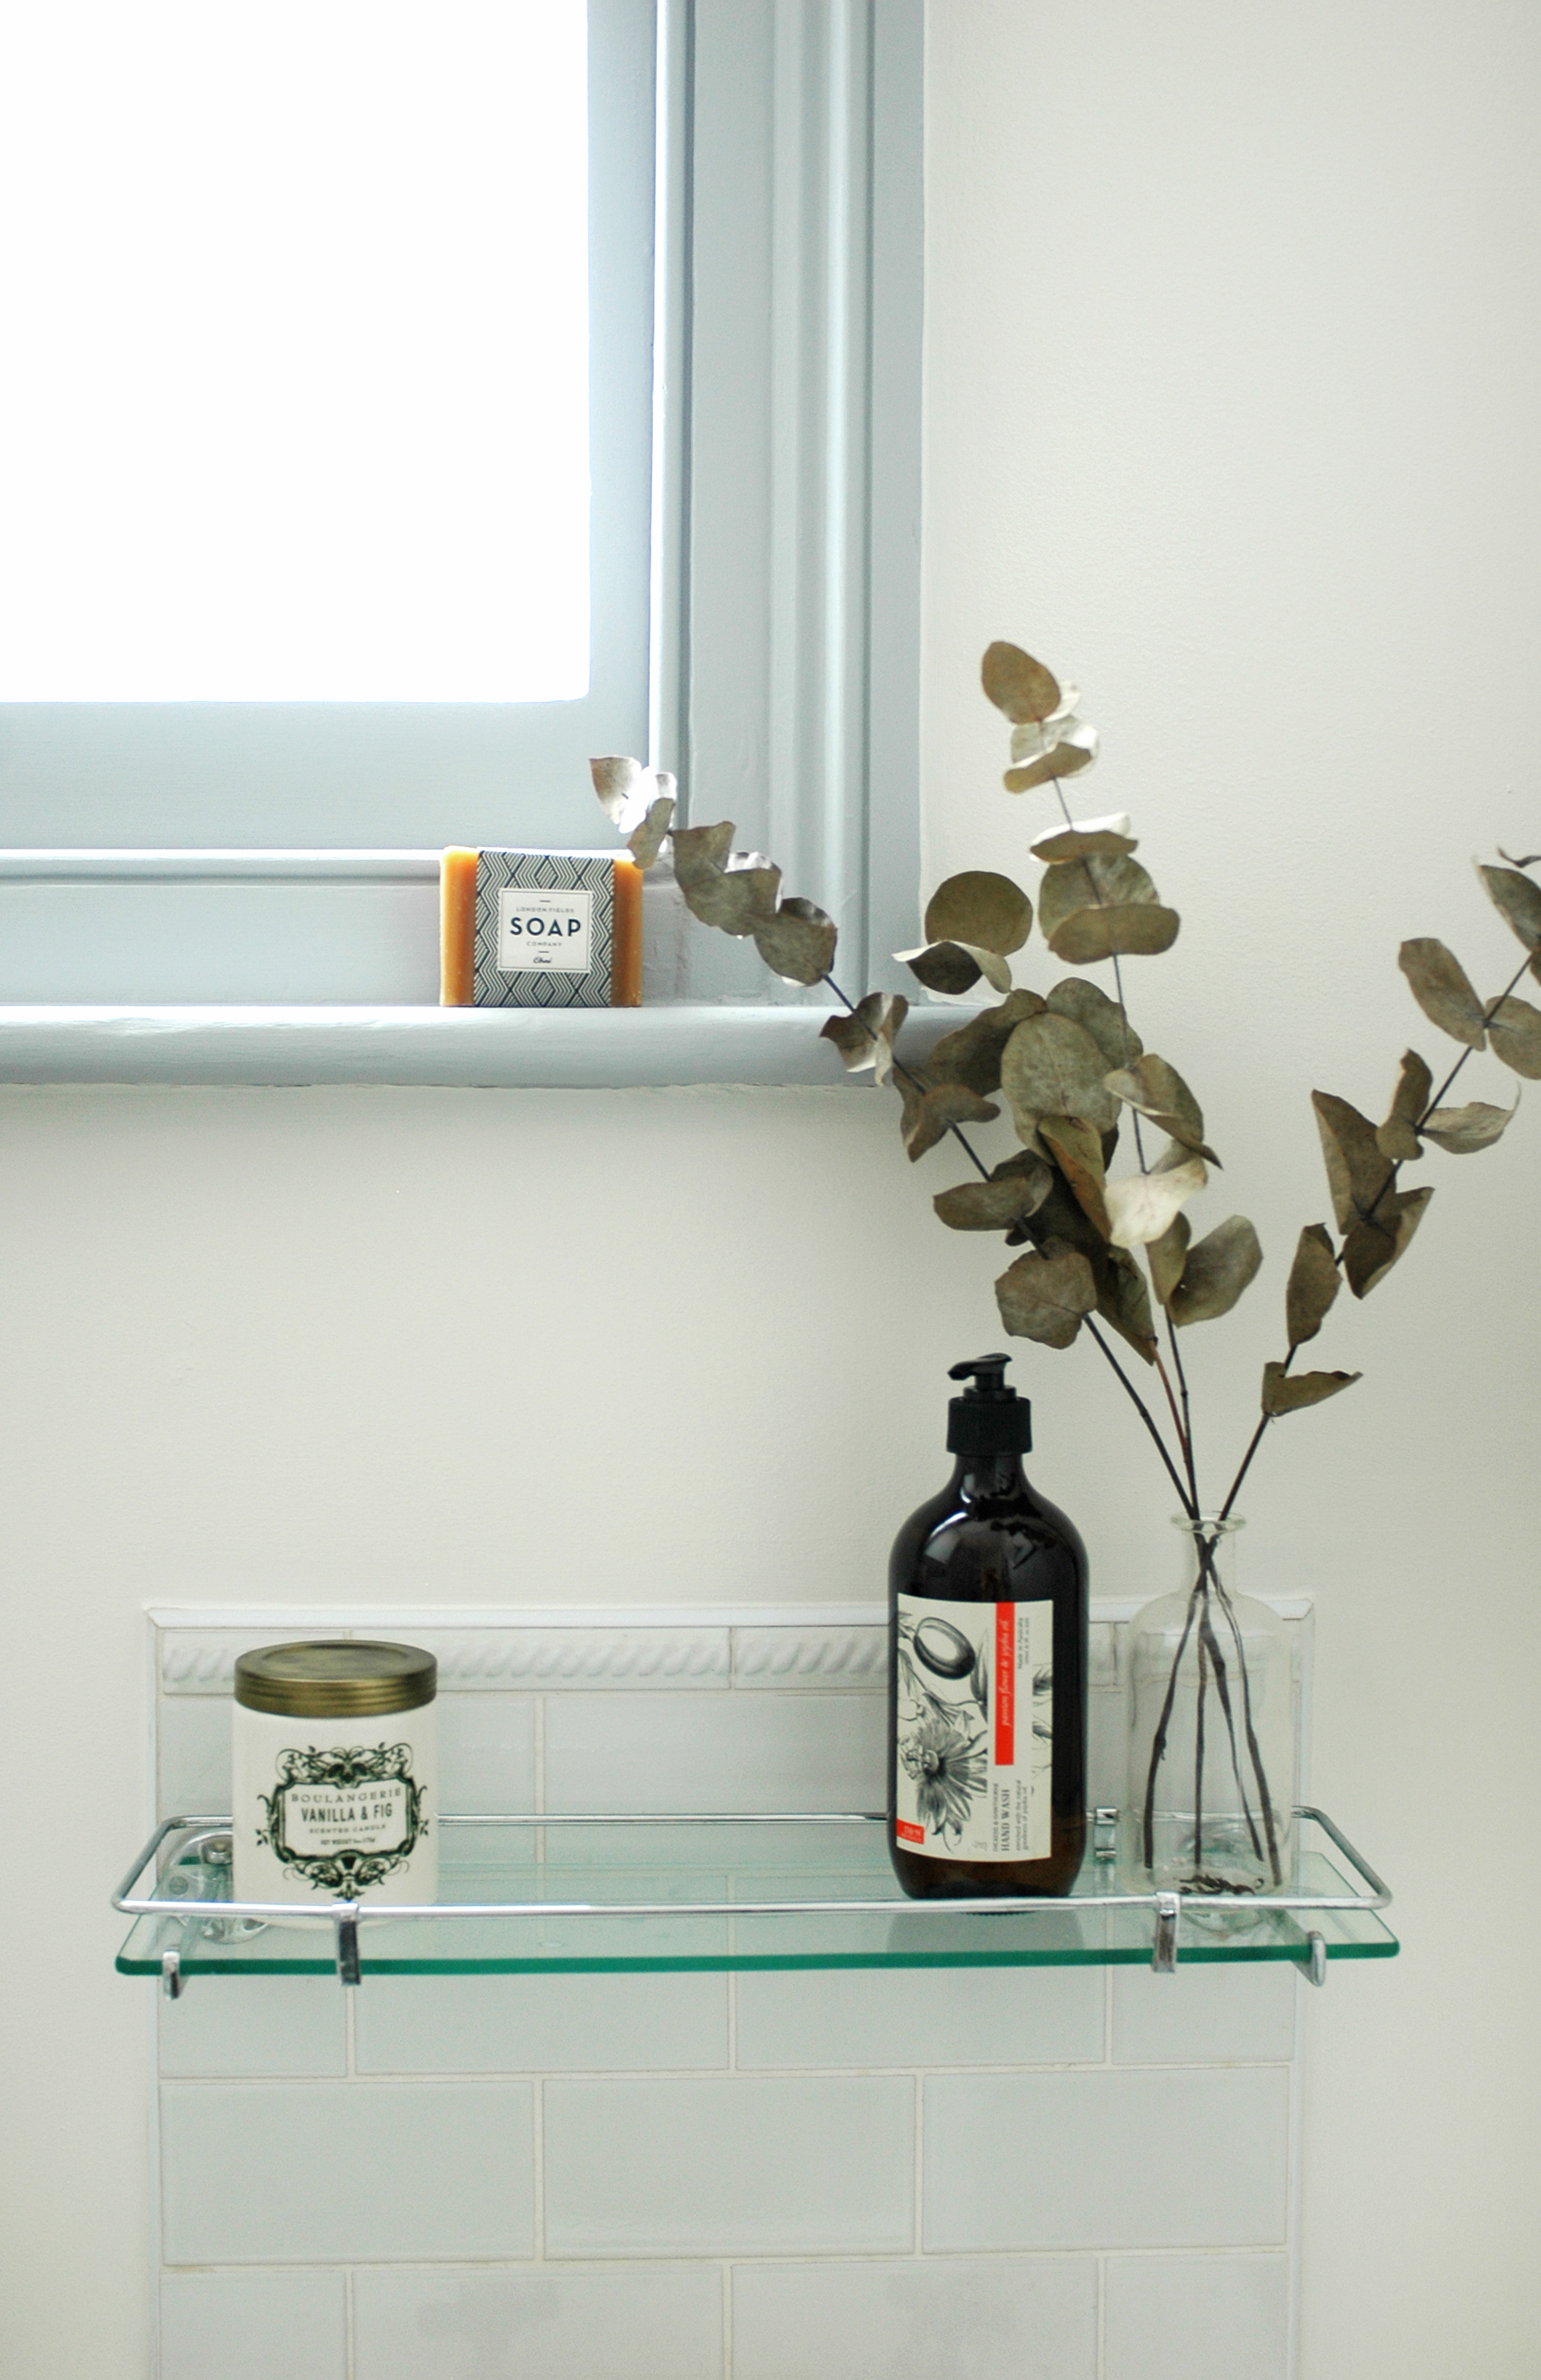
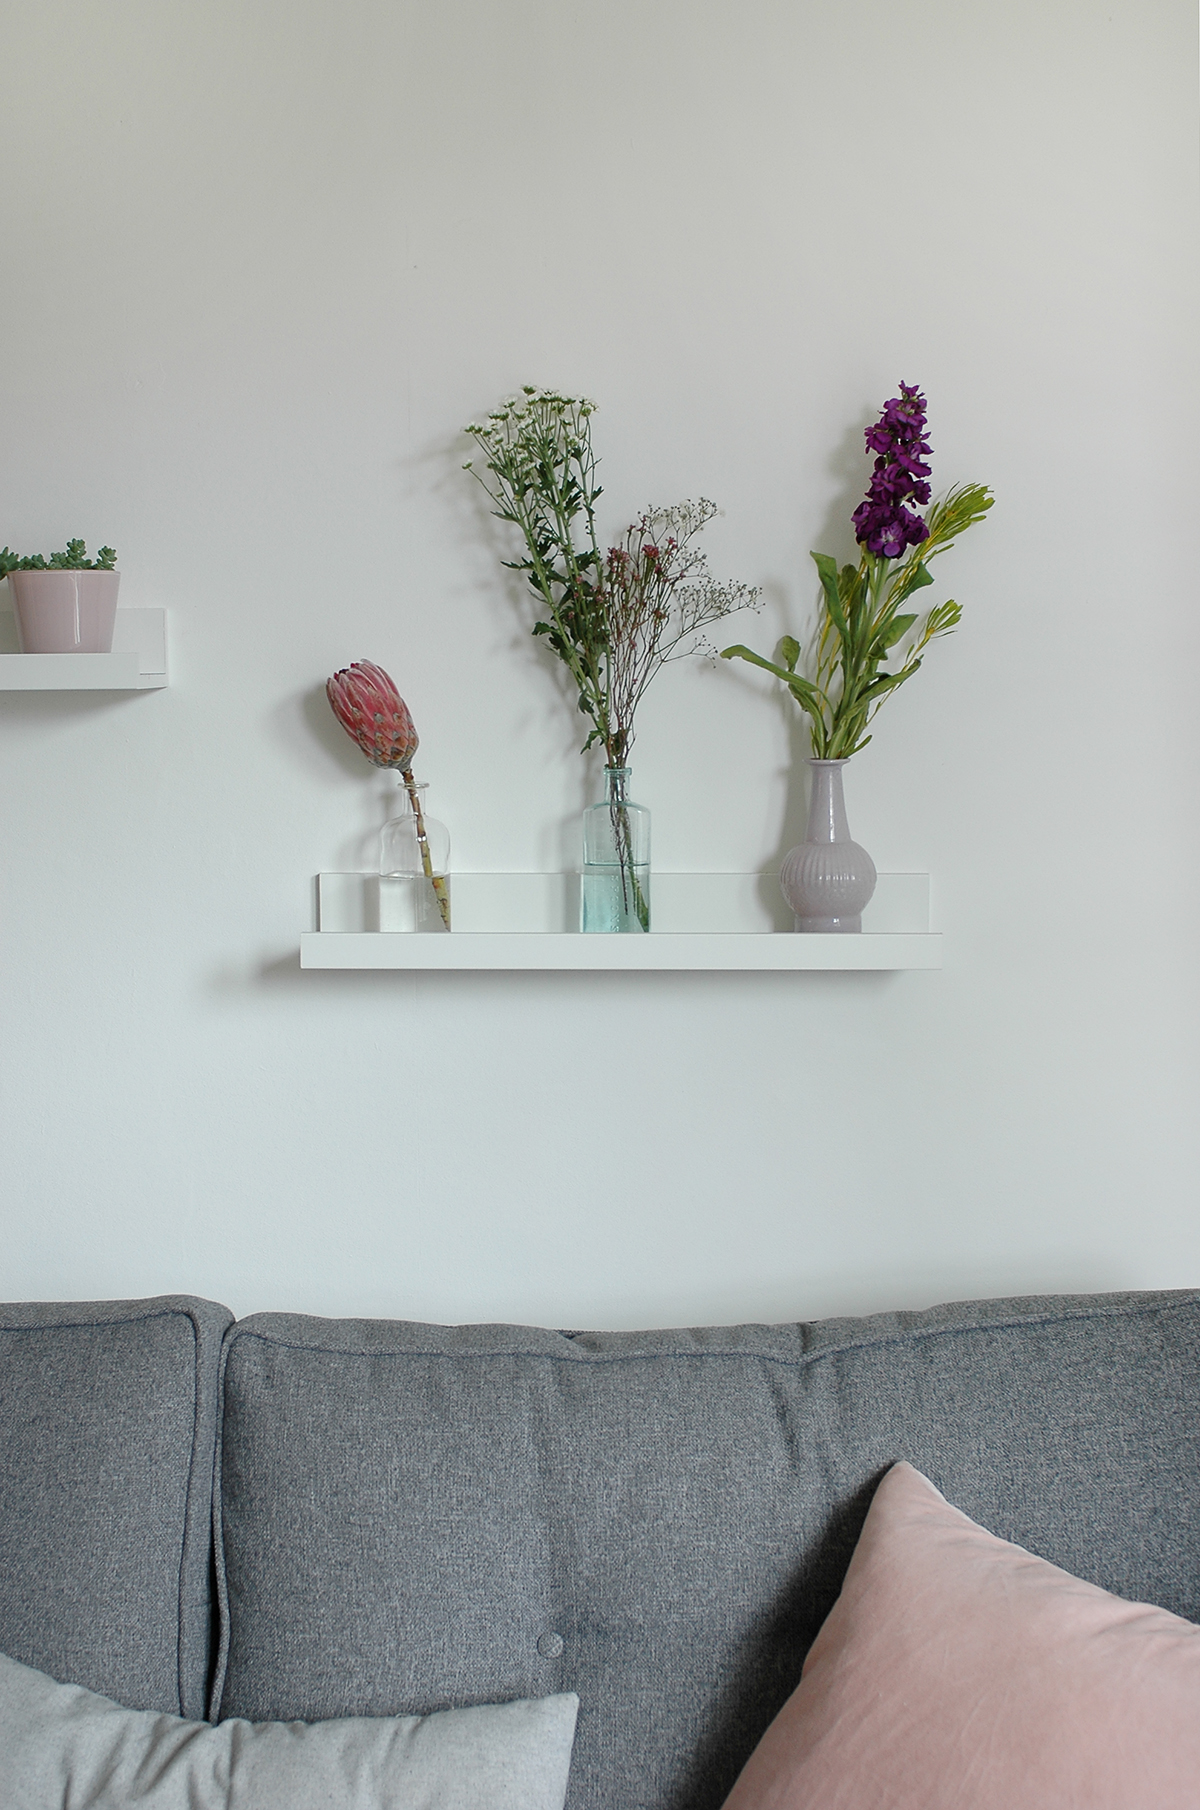
Filling your home with flowers sounds extravagant, but actually if you are savvy it's quite easy to add a bit of a floral touch to almost every room. The best way I find to do this is to mix and match a couple of bouquets, and you can even add in a few of the cheaper little bunches such as gypsophila and alstroemeria. Splitting up a larger bouquet into lots of smaller vessels, rather than just putting it all in to one big vase, gives the chance to spread the floral love around your space...

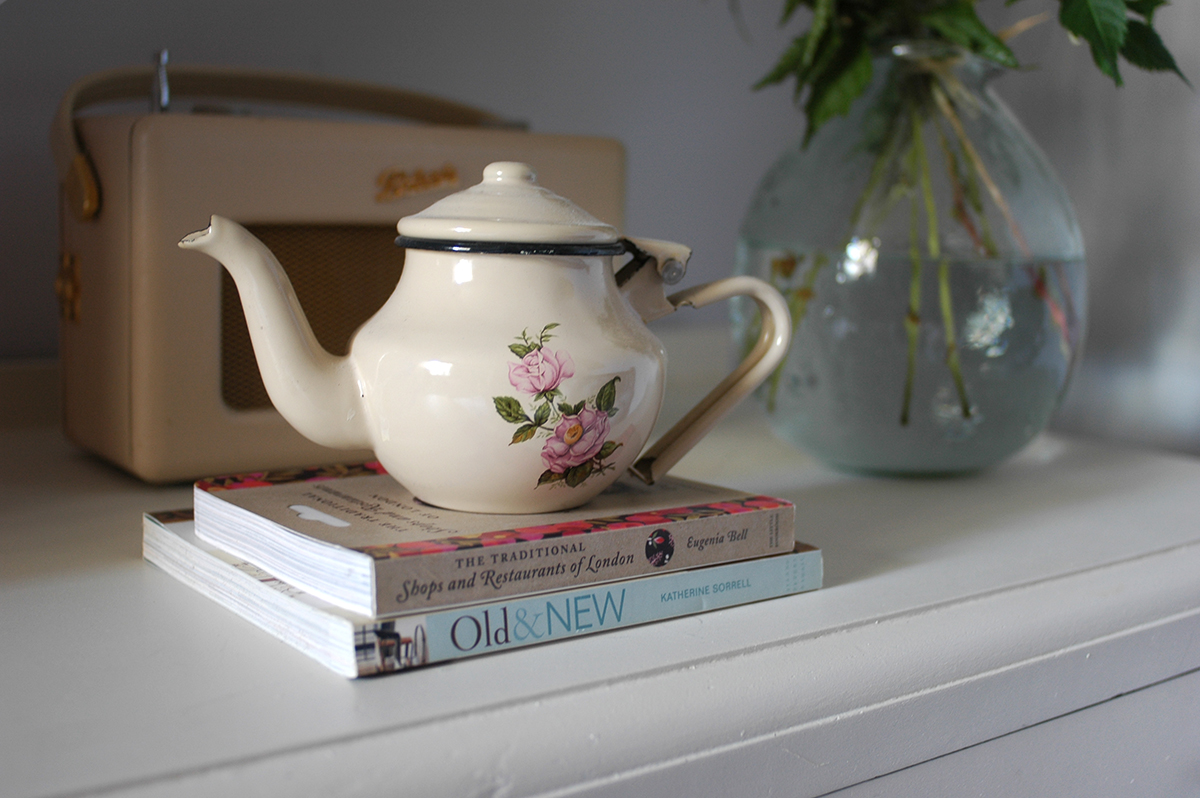
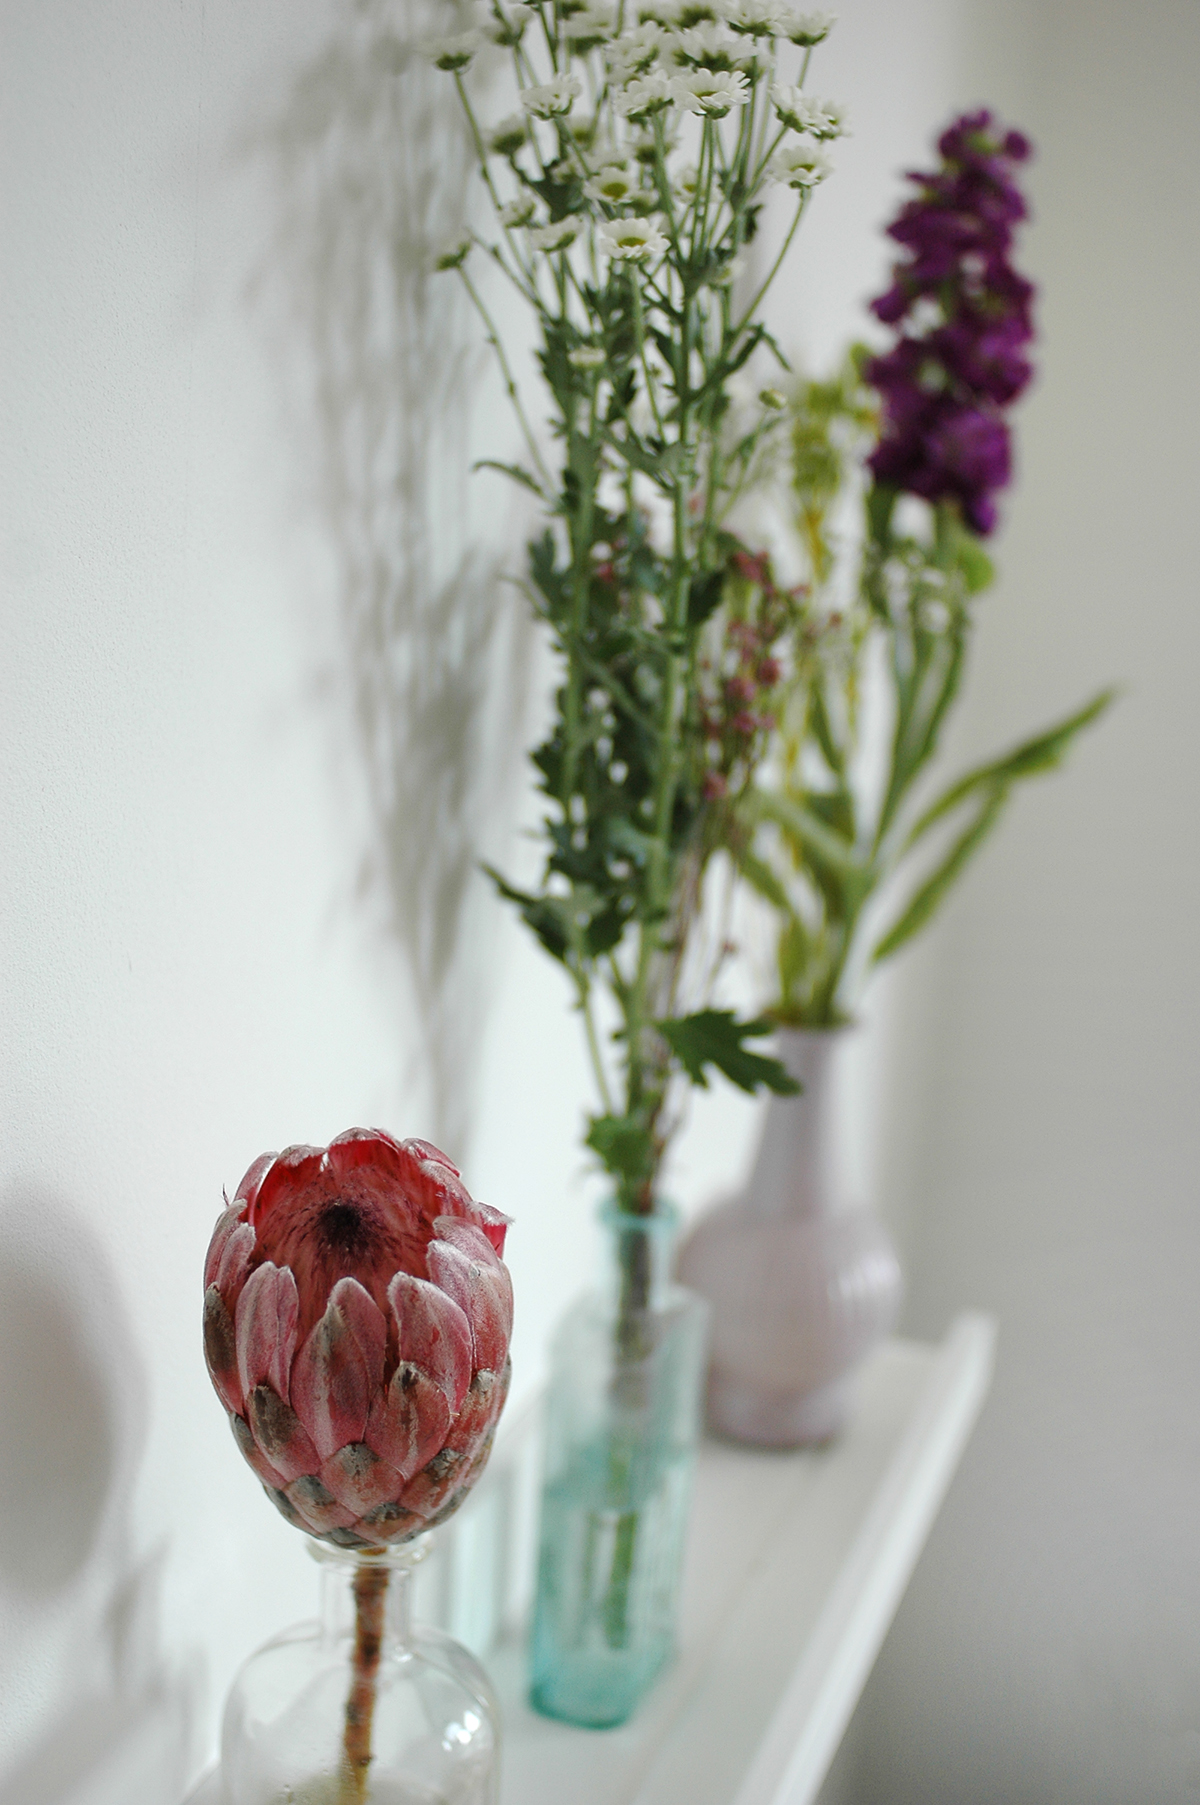
Gathering a range of vessels in different shapes and sizes will help to determine the size of the posies you create, so some will need a good bunch to fill it, while others, like little vintage bottles, look great with just one or two stems....

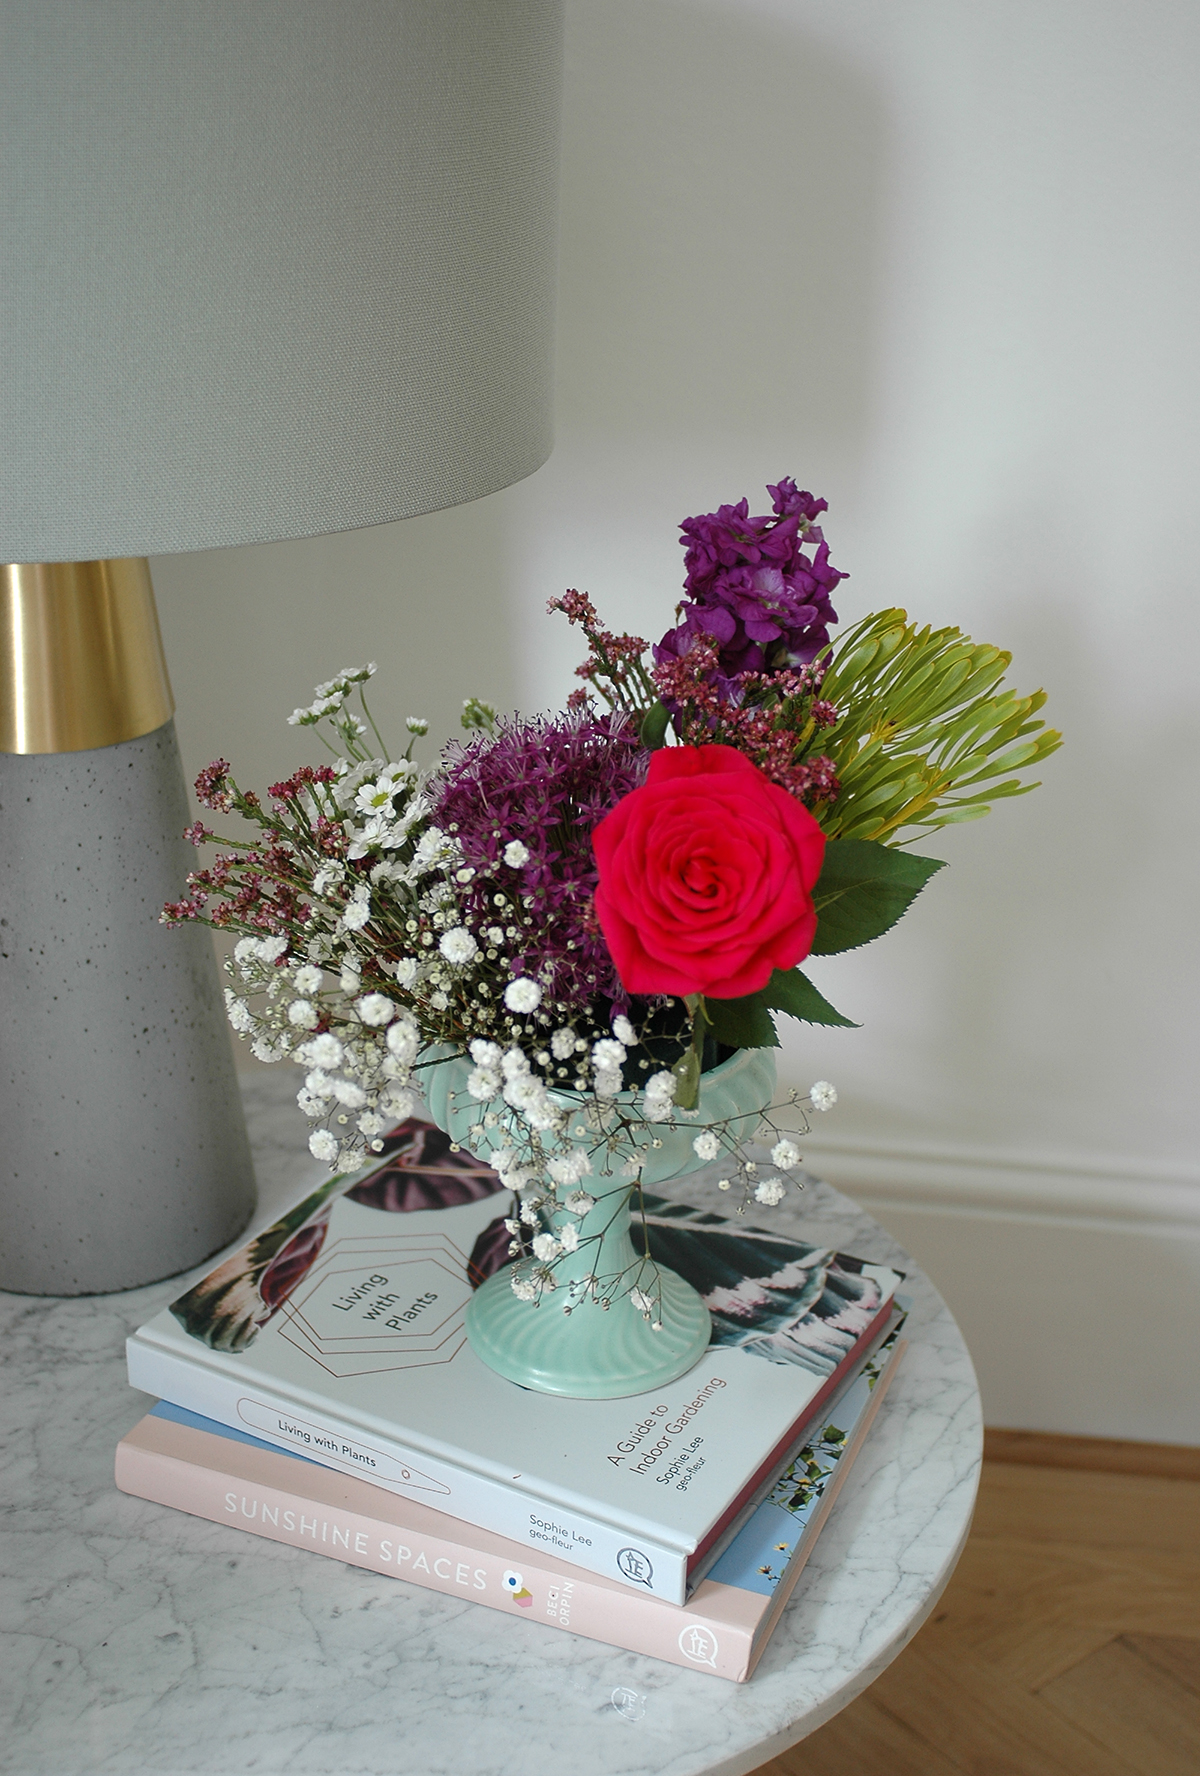
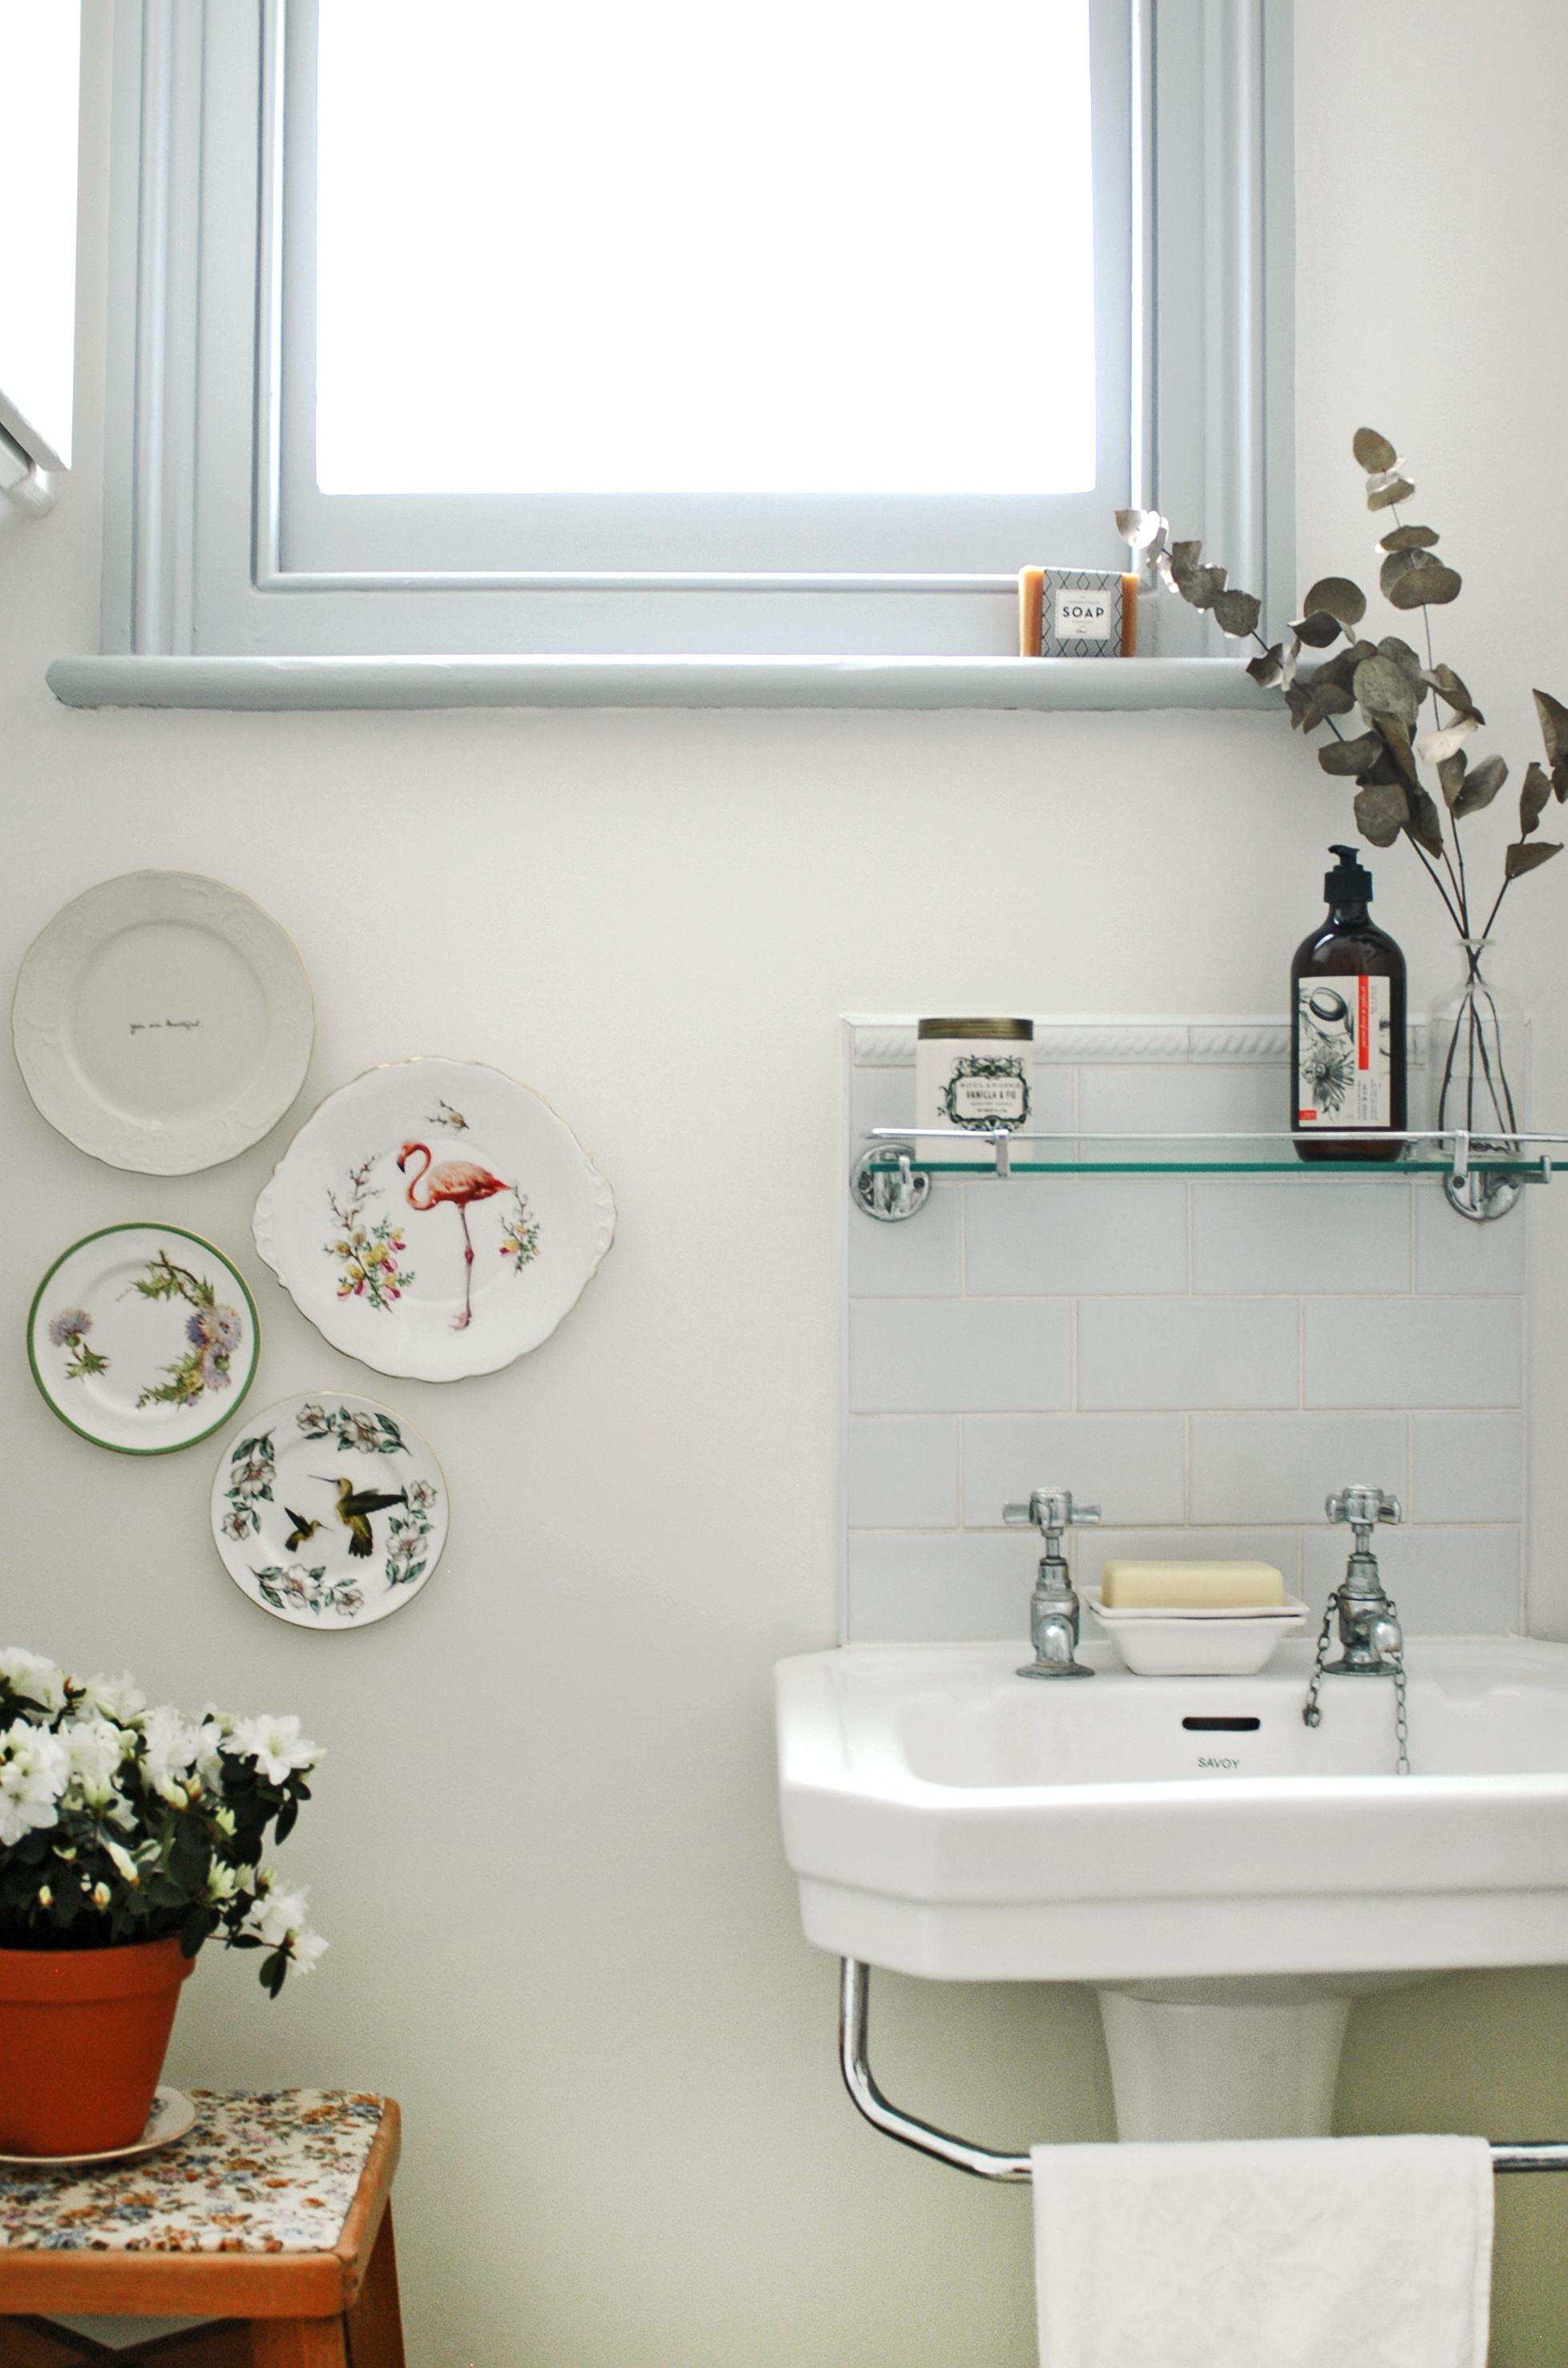
I am by no means a good flower arranger, but I really enjoy playing with flowers in this way, and the more you do it, the better you'll get. The above arrangement was the first time I've ever tried using wet foam bricks. The vintage bowl I've used wouldn't hold flowers in the usual way, so adding a small piece of florist foam to slide the stems into worked perfectly. 

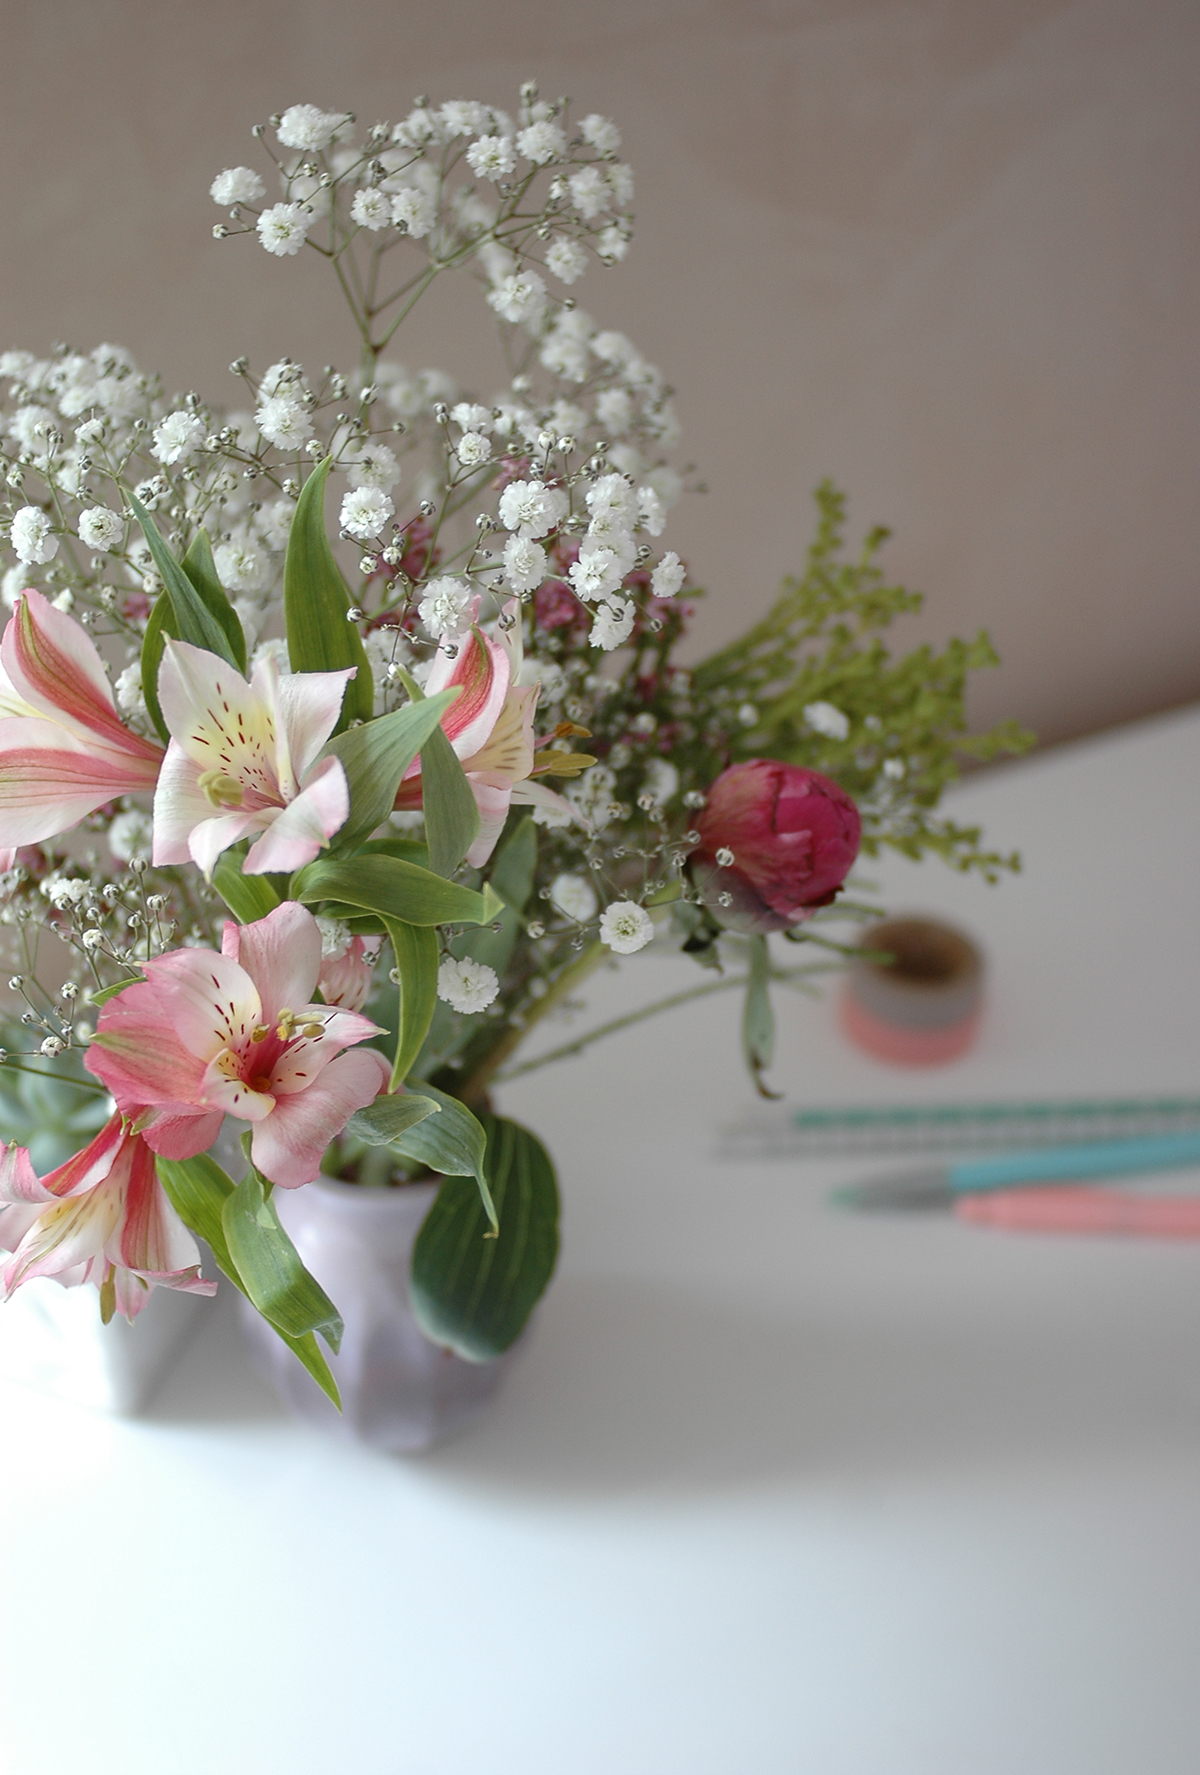
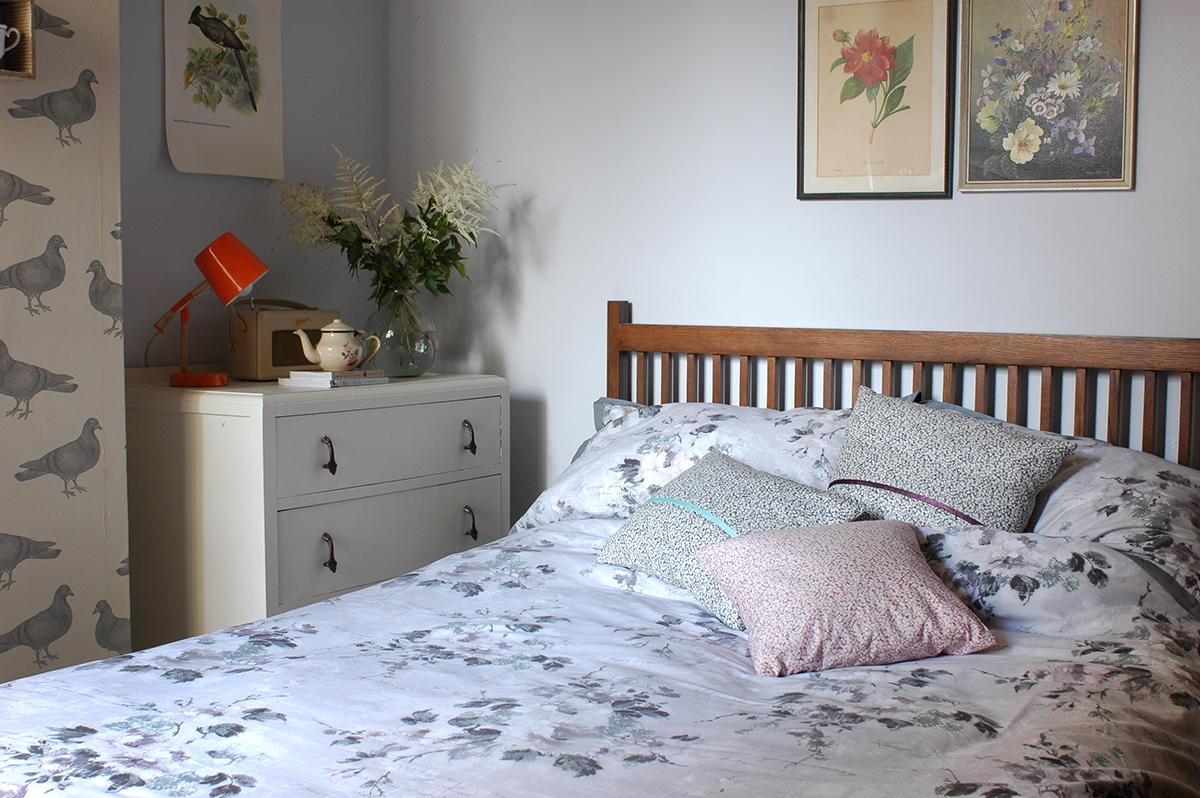
This little desk vase above is mostly just gypsophila and alstroemeria, with some added foliage from a larger bouquet and a single peony, which, when it blooms, will really fill out the arrangement. 

Any left over foliage and flowers can be popped in a vase together, and makes a lovely wild, yet summery display. You can even bulk out your arrangements with foliage from the garden or hedgerows, and simply buy one bouquet to split. You home will be flower filled in no time! 

Thank you to Marks and Spencer for fulfilling my dream of visiting Chelsea Flower Show (!) and for sponsoring this post. 

My tabletop Christmas tree

Space is at a premium in our flat these days (hence our planned move!) and last year we didn't even bother with a proper Christmas tree, opting for a slightly unusual fake 'branch' tree! I did miss a real tree though, and had hoped that we would have moved into our big new house by this Christmas and we'd be back to finding the biggest tree possible! But alas, we are still in our flat, so I had to compromise on size, but thankfully have got a real one this time! 

Literally the only space we have available for a tree was on a table top so we decided to opt for a smallish tree - choosing a medium pot grown Norway spruce from B&Q. While we were browsing the trees, it dawned on us that in fact this was a very sensible idea with a toddler running around! I'm sure by now most of those baubles would have been removed if the tree had have been on the floor! But as it is, Ruby enjoys looking at the tree, but can't reach it! A pot grown tree was also ideal for displaying on a tabletop, I just popped it into this zinc bucket to protect the table, which also concealed the black pot it came in. 

For the decoration this year I wanted to go for something a little different. Pink and grey might not be the colours you immediately associate with Christmas, but I think they actually look fantastic! I selected some pale blush pink baubles, strings of beads and some glittery snowflakes and mixed them with some grey homespun decorations, made from felt and wool. I'm really liking this mix of textures too. 

What you can't really tell from these images is that the lights actually have a bit of a pink glow which works really well with the scheme. I then styled the rest of the table top with honeycomb balls and other paper decorations from Hema, a vintage frame with a Paperchase postcard hanging inside and some vintage candle holders.

I must say, I am totally sold on a smaller table top tree - it doesn't take up too much space and is out of the way of mischievous children and pets! What are your plans for your tree this year?!

** Thank you to B&Q who provided the lovely tree, lights and decorations. 

Decorating with Christmas cards

There are so many beautiful Christmas cards out there these days that it seems logical to somehow incorporate them into your festive decor rather than shoving them into one of those card holders where they are get overlapped and hidden, and not shown off. I wanted to share with you a few of my favourite card designs, but at the same time give some inspiration for how to display them and use some of your favourite cards to actually decorate this Christmas. 

I really urge you to try and buy some independently designed cards this year - Sarah Hamilton's Just a Card campaign highlights the importance of this, so even if it is just one of two for your favourite people, try and support those designer/makers who work so hard for their art. 

There are some discount codes at the bottom of this post for the card designers featured, so make sure you scroll to the end and make use of those!

For this scene I used a twig which I covered in foliage and hung using fishing wire. Then I simply added a mini bulldog clip to each card and hung it from the twig with some festive ribbon.

Card designs (L to R): Thornback and Peel / Katie Leamon / Katie Leamon / Thornback and Peel / Katie Leamon

Other prop details: Snowflake ribbon: Tiger / mini gold bulldog clips: Hema / Deer: Tiger / Spotty tumbler: Howkapow

This one is a bit more playful and colourful, as well as super easy as all you need is some washi tape! Simply sticking some of your favourite cards on the wall and mixing in a few paper decorations and sprigs of greenery, creates a really simple wall display and shows off the cards beautifully.

Card designs (clockwise from top left): Emma Block / Roxwell Press / Emma Block / Roxwell Press / Roxwell Press

Other prop details: Washi tape: Tiger / Paper snowflakes: Hema / Chalk pen (used on mirror): Chakola

How gorgeous are all of these Christmas cards?! If you fancy stocking up, then here are some discount codes to help out: 

Emma Block: Receive 10% off everything except custom artwork on Emma's website using the code: 91MAGAZINE - Click here to shop

Roxwell Press: Get free delivery until 6th December using the code: CRACKER - available for UK shipping only - Click here to shop

Thornback and Peel: Get 15% off everything valid until 14th Dec at Midnight using code: PATCHWORKHARMONY - Click here to shop

Katie Leamon: 10% off everything valid until 7th December using code: PATCHWORK10 - click here to shop. 

Argos collaboration: Transform your room

If you follow me on Instagram you may have seen a few posts way back in August about a styling collaboration I did with Argos? Well, I'm finally able to share with you a little more about the day as well as lots of photos and videos of the process and final result!

So three bloggers, myself, Cate St Hill and Jesse Audubey were each asked to 'transform a room' using items from Argos's range. I was asked to create a child's bedroom, while Cate did a living room and Jesse did a bedroom. Prior to the shoot, I had to select products from the range, working within a budget, that would then be available for me to use on the day. One of the first products that caught my eye was this geometric bed linen, which I thought would be great in a kid's bedroom, not too childish, but still a super fun design. 

I used this as a starting point for the design of the room, picking out items in blues and greens, but then also adding bright yellow accents for a fun element and accessories in grey to keep the look quite sophisticated. While it was a kids room, I wanted it to be a space that could be suitable for either a boy or a girl, and that would also grow with them - so lots of fun but still with a mature aesthetic.

A few days before the shoot, I gathered a few additional props for styling purposes, such as these postcards by The Calm Gallery - I love their designs and thought the colours and graphic typography would work quite well in the room. 

On the day of the shoot, we turned up and were faced with the above! A completely blank canvas. In some ways, this is massively appealing, as you can do whatever you like with it, and in others, it is terrifying, realising that you have to fill it and make it look fabulous! We had 60 mins to transform the room, so we got stuck in, luckily having a little bit of manpower to help with the heavy lifting etc!

While we worked on the space, we were filmed and you can check out this little video here. It was so much fun putting it together and I realised how much I enjoy styling! To be honest, I never really had a finished look completely in my minds eye, it just seems to come together as I went, but I was super happy with how it turned out.

Above is one of the 'finished' pictures I posted on Instagram during the shoot, and lots of people couldn't believe that most of this stuff came from Argos. So I have included links here to all of the products that can be purchased from them... All the products can also be found here

Bed - £109.99 / Bed linen - £11.99 / Twirlywoo toys - £14.99 / Grey throw - £26.99 / Yellow pom poms - £6.99 for 3 / Bedside table - £69.99 / Lamp - £9.99 / Wind up toys - £5.89 for 8
Noahs ark toy - £11.99 / Grey rug - £31.99
Clock - £7.99 / Floor lamp - £49 / Shelving - £49.99 / Green and blue wooden toys - £9.89 set of 3 / Armchair - £199.99

If you are interested, you can read a bit more about the three rooms we transformed and our top decorating tips here. It would be lovely to hear your thoughts on it, I loved styling it (I'd love to do more of this kind of thing!) so do let me know what you think! 

You can see what the other two bloggers created here also, including links to the products. They chose some lovely pieces for their rooms too.

Thanks so much to Argos for inviting me to part of this project! :) 

Munich trip: Day 2

So as I mentioned in the last post about Munich, our second day was spent partly at the beautiful homewares shop Room to Dream. Sabine, the owner was holding a bloggers styling event in association with Danish design company, By Lassen, and as we were in town, invited us along! It was especially exciting for me as Room to Dream is one of the shops I've featured in my book, The Shopkeepers Home, as well as Sabine's beautiful home. I didn't get to attend the shoot of this shop, so it was really great for me to see it in person, and meet Sabine, who is SUPER lovely! 

Below is the item we were given to style. It is the By Lassen Stropp - a twist on the traditional peg or hook, and great for hanging tea towels or holding magazines etc. It was really fun to see how different bloggers used it in their shots. You can see more on Instagram under the hashtag #bylassenstropp

Here is everyone enjoying the day, and lovely Tiffany of Curate and Display shooting her food inspired vignette. 

For mine, I decided to incorporate it into a kids inspired display. I love this Ferm Living mobile. and owl....

It was such a fun day, and if you are ever in Munich (which you should totally visit as its a great city!) then do pop by Room to Dream. And of course, look out for it in the book, Sabine's home is to die for too! x

A circus themed birthday party

If you follow me on Instagram, you may have already seen quite a few posts about Ruby's first birthday. It's been so lovely celebrating this special time, and while she won't remember it, and doesn't really know what's going on, I still wanted to throw a lovely party for her with our family and friends. She will be able to look back on the photos one day, and see the efforts me and her dad put in! haha! 

Her dad took care of the food side while I of course got stuck into the decorating part of the day. I decided to have a bit of a circus theme, but in a subtle way if that makes sense! I love the 'Toot Sweet' range by Meri Meri, so I ordered a few bits and bobs from there, and then scoured the interweb for other things to add. I purchased some paper plates, straws and bunting from Berylune

The little cardboard circus came from Tiger and was a last minute purchase which I think just completed the table, and for just £3! The long candle was also from Tiger. 

I bought the gold '1' balloon from the party shop, Partica, in Kingston and my mum and I made a LOT of paper chains!

As for little Ruby herself, I wanted to her to have a special birthday outfit but without making her look like a clown - literally! :) So this is how she looked on the day... a classy circus baby!

I got the skirt in Mothercare - it is from the Baby K range by Myleene Klass. I had to order the black vest on Amazon - it is surprisingly hard to find a black baby vest! The hairband was from H&M Kids, and my mum and I made the bow tie! I got the fabric from M is for Make, and we put a little wadding inside to give it some structure. We covered some elastic in the pink fabric to go round her neck. It was fastened with velcro, so unsurprisingly she pulled it off half way through the party! 

We had such a lovely day, although I think Ruby found it a tad overwhelming! Bless her! Today is her actual birthday, but we will have a quieter day with her grandparents. Happy birthday my precious little gemstone xxx


Displaying wedding photos

Today is our second wedding anniversary, hurray! Happy Anniversary hubby! A lot has happened in the last two years, namely one little girl named Ruby, so the time has really flown by since we had our big day in France. I did manage to make a photo album not too long after the wedding, but I was unsure how to display some of our images at home. I didn't want anything too naff, and I wanted to capture a feeling of the whole day rather than just one or two images of us. 

So it's taken me this long to finally decide to create a photo grid which shows us at different moments in the day and also captures the style of the wedding, which was of course very important to me! haha! ;) 

I printed the images via Huggleup who are a London based start-up business, who have a website and iPhone app for printing your images. They very kindly printed this set free of charge for me, but it is only £12.50 for the set of 20, which is a total bargain, especially when it comes to wedding photos. They also do stickers, magnets and posters, which are great gifts but also very useful if you are a business owner. I'd love to get some 91 Magazine magnets made! :) 

I like that this idea for displaying our wedding images isn't permanent. If we want, we can add to it, change some of the images, or display them in a completely different way. I can also change the styling too at any point. At the moment, I have added the tiny vintage tin which we had our wedding rings in on the day displayed below. (the tin says 'Keep this for my sake' on the lid - i love it so much) 

What do you think folks? How have you displayed your wedding photos? Would you consider something like this? 

NOTE: Our wedding photographer was the fabulous Jemma Watts of Pearl Pictures, just in case you are currently looking for a lovely and talented photographer for your big day! 

5 tips for a mini bedroom update

Our bedroom has been feeling a little unloved of late. We don't spend that much time in there really, apart from sleeping, and it's easy to just dump things in there or let things pile up. So at the weekend I thought it was time for a little tidy and a bit of refresh. 

I didn't do much,, but it has really made a difference! Maybe I'll even go and spend some time reading my book in there this evening.... So here are my 5 tips for a quick and easy bedroom update!

1. Buy some new bed linen

This has made the main difference in the room. We've had plain white sheets on our bed forever, and while I do like white they seem to go grey and dull so quickly, and I'm always having to replace them. So this time I opted for a patterned set which fits in really well with the other nature related elements in the room. This duvet and pillowcase set is from BHS, and a snip at £35 for the king size version. 

2. Make some new cushion covers

I really needed to refresh the cushions that I had on the bed, so I decided to whip up a few new covers with a bit of Liberty fabric. One of my favourite patterns is pepper, so I choose two colours in this design and used some ribbon to trim the opening. They are just super simple envelope covers, but I'm really pleased with them. 

3. Add some flowers 

For me, displaying fresh flowers in any room makes such a difference. It may seem like a bit of an expense, but all you need is a stem or two in a bottle or vase, so rather than buying a big bunch just pop in your local florists and choose a few individual stems. Also look out in the reduced section at the supermarket, sometimes you can find a great bargain on flowers that only have one sorry looking bloom. 

4. Restyle the bedside tables

This is the area where things can sometimes accumulate: books, handcreams, coffee cups, phone chargers etc. But as this is potentially the first area you see in the morning, and the last one at night, it should be a joy to look at! Give it a little tidy up, add a scented candle or two, those beautiful flowers and maybe tape a cute postcard or favourite photograph to the wall and voila! - a simple pleasure to enjoy every day! 

5. Tidy and clear clutter

As any interiors book or magazine will tell you, the bedroom should be a tranquil, uncluttered space, so if like me, it has started to build up, just take an hour to tidy things away, and discard or put in storage anything that you don't really need or that isn't pretty. It'll make your bedroom a much nicer place to wake up in each day! 

I'm certainly feeling much happier when I go in the bedroom now! If you'd like some more inspiration for your own bedroom, check out my Bedroom Style Pinterest board too! 

Thank you to BHS for sponsoring this post, and for supplying the beautiful bed linen.

xxx

Our bathroom makeover

As I mentioned in my recent 10 ideas for styling a small bathroom post, we have been redecorating our own bathroom, and now that it's all finished I thought I'd share a few snaps of it. It's really tricky getting decent photos in such a small room so this is the best I could do, but hopefully it gives a bit of an idea. 

Of course I forgot to take any decent 'before' shots and only remembered after we'd started preparing the room for painting, but these images show the beige-brown wall colour and white woodwork which has been there since we moved in over five years ago. (excuse the filler!) 

It wasn't actually that bad before, although it was definitely in need of a refresh, it was still liveable. But it was the installation of a new boiler that spurred us on, as we had the new cupboard in the corner built to house it, so this needed painting anyway. 

We decided to brighten the walls in plain white and used Dulux Timeless (it looks quite beige on the website, but actually comes up quite white), which is actually the colour we've used in many of the other rooms in the house. But to add a little bit of interest we painted the woodwork in a lovely shade of grey. This is Dulux Modest Grey in matt finish. I hate gloss paint which I know a lot of people use on woodwork, but I'm really pleased with the finish the matt paint has given - it seems much more modern to me. 

As I said in my bathroom inspiration post, I wanted to add a few simple details in the room to lift it. As it's such a small room, it only needed a select few nice items such as a delicious Anthropologie candle, and a lovely bottle of handwash which I found in TK Maxx. I've went for dried stems of eucalyptus and billy buttons in vintage bottles, and a flowering house plant for a little bit of greenery. (here's hoping I can keep this one alive!) The little bar of soap on the windowsill is from The Future Kept

On the walls, I've hung some of my vintage plates that used to be in the hallway, a new mirror I bought from Rockett St George and in the reflection of the mirror you can see a framed print which was given to us by a friend. 

And that was basically it! A lick of paint, and a few decorative touches and it feels like a totally new room! It might be small, but your bathroom should never be neglected! :) 

A special thank you to Dulux for supplying the paint for this makeover. 

xxx

10 ideas for styling a small bathroom

We are currently redecorating our bathroom, so I've been thinking a lot about the smallest room in our house of late.  When we moved in over 5 years ago, the bathroom was in pretty good nick, although not particularly exciting decor wise. I didn't do much with it to be honest, so now that we are doing it up, I plan to add a few extra touches to make it that little bit more interesting. 

Most of us aren't blessed with the gift of space in the bathroom, so it's often hard to make it look really great. If you can't fit in a wonderful roll top bath or a lovely piece of furniture like a comfy armchair or old set of drawers, what can you do with a small bathroom to give it some style? 

Here are 10 ideas I've been considering for my own bathroom. I will share some snaps of it when it's all finished....

1. Plants - pop one or two plants in the bathroom, either on a window sill, a small table or shelf or hanging from above. There are many plants that will thrive in a bathroom's humid atmosphere. Aloe Vera, ferns, mother-in-law's tongue and some orchids are all great. 

2. Small furniture - if you have a little bit of space, add a small table, stool or chair as an extra surface, and style with plants, bottles, tins etc. 

Image: Frolic blog

3. Dried or fresh flowers - just a stem or two in a bottle or vase won't take up much room and adds a little life and colour. 

4. Hooks - Look out for really interesting wall hooks that can be added to the wall or the back of the door. Not only practical in a small space, but if you go for great design, they will become a feature too.

5. Pictures, plates, mirrors - with limited space the walls are the best place to add interest, so hang artwork, vintage plates and beautiful mirrors. 

6. Stylish shower curtain - most small bathrooms mean your shower is in the bath, so a shower curtain is essential. There are lots of great designs from places like Anthropologie and Urban Outfitters if you fancy something different. 

7. Interesting fittings - I LOVE the sink in the above image! So if you are super tight on space you could always make those essential items the main feature. Wall mounted sinks should also save a little space too. 

8. Great floor tiles - With a small square footage you can splash out on slightly more expensive floors tiles and go for something really striking. 

Image: Rosehip

Image: Rosehip

9. Curtain or blind - Even if you've only got a small window, dress it up with a pretty blind or curtain. You can easily make your own with a piece of fabric, or like this image above, some vintage embroidered linens or hankies joined together. 

10. Luxury hand soap and candles - even if you've only got a tiny shelf, window sill or even just the sink surround to display items, be sure to opt for lotions and potions that come in really lovely packaging. And of course a few delicious candles won't go a miss for those relaxing evenings pampering yourself in your now beautiful bathroom! 

Field of Flowers wallpapers

The colder, darker days are now upon us here in the UK, but there's no reason why the inside your home shouldn't be like a beautiful summers day! And I am loving this range of wallpaper called Field of Flowers, from Coordonnea family run company based in Barcelona.

I love the delicate patterns and pastel shades and think they've got a bit of a vintage feel to them. I also love the styling of these images - I alway think it helps to see a wallpaper in situ, even if just in a lovely image like these, as a swatch on a website or even a real life sample never quite gives the full effect. 

You can purchase these papers from their UK distributor Papermoon for £48. 

www.papermoon.co.uk

New work from Seventy Tree

I am a big fan of Seventy Tree, and in fact we featured designer Kerry Layton's lovely home in issue 9 of 91 Magazine. So I was excited to see Kerry has recently released some new designs and she has teamed up with stylist Charlotte Love and photographer Joanna Henderson to produce some lovely images of her work...

I absolutely love Charlotte's styling - she has also contributed to 91 Magazine in the past with some gorgeous shoots - her work is so fresh and colourful and always fun. I love the painted plants in the above image.

The images really capture the essence of Kerry's work, which is also colourful and fun and often quite graphical. I do think if you are a designer/maker it is definitely worth budgeting for some great photography and styling, as it showcases your work in a way that you might not be able to get across otherwise. As I say, I already love Kerry's work, but when these photos popped in my inbox, I immediately wanted to share them on the blog! Great images = more exposure for your brand! 

Check out the rest of Kerry's new work at Seventy Tree and peruse some more lovely styling and photography on Charlotte and Joanna's websites. 

PS - I will select the winner of the Rewined candle next week, I am taking a few days off first! :)