Guest bedroom plans

I wrote about our plans for our master bedroom nearly a year ago (unbelievably!), but, believably, we have yet to implement any of these plans! :( I’m still desperate to sort that room out, but it has kinda fallen down the list of priorities right now. However, we have actually made a start on the last spare bedroom, which is actually the one that guests stay in, so even though it is used less it seems more important to get done.

spare room before

It really was a horrible room. We hadn’t done anything to it as you really couldn’t polish this turd, it needed to wait until we could give it a complete overhaul. The carpet was gag-inducing, and the walls were covered in a yellow-beige-y painted paper. So, at the start of the summer holidays, I decided enough was enough, and stripped the walls to get things going. We’ve since had some electrical work done in there and this week we’ll have the entire room re-plastered as the walls are a mess and the ceiling had some of that gorgeous textured paper on it!

It is a small room, and the bed can only really go one way, so I’m having to work around it in terms of fitting anything else in there. It also has to be practical in terms of what our guests need when they come to stay - so there will be a narrow set of Ikea drawers which I’m currently painting in Craig and Rose Angelica and a wooden clothes rail, which will both be either side of the door.

Other than that, we are going to have hanging bedside lights, and I’m thinking a small wall shelf on one side of the bed, and possibly a mustard made locker on the other as I know my mum likes to keep some of her bits and bobs here as they visit regularly from N. Ireland. I absolutely love the colour palette of the image above by one of my fave designers/bloggers Marij Hessel of Enter my Attic.

Below is my moodboard which I am roughly working to. We are going to keep the bed; as much as my design eye would love to change it, it is a perfectly good bed, and in fact everyone who stays comments on how comfy it is, so for now, it stays… We plan to rip up the carpet this weekend (the final manky carpet to be stripped from this house! hurrah!) and we will paint the floorboards white to be in keeping with the rest of the first floor. I’m still a little undecided on the walls - I just love the look of bare plaster, so I am almost tempted to do the same thing I did in my office - but then it feels a little weird to do the same thing! I’ve ordered a sample pot of Earthborn Paints Peach Baby, so I shall see when that arrives….

Pink, green and mustard interior mood board

Above: Muuto mustard light fitting, £46, Annabelle; Green pendant light, £29, Made; The Purple Umbrella Print, €23.99 for 60x90cm, Juniqe; Rattan shelf, £48,95, Scandiborn; Green Mustard Made locker, £129, Rose & Grey; Basket, £29, Pea Style; Berber style rug, £99, La Redoute; GRRRL poster, €19.99, Juniqe; Pom pom cushion, £36, Trouva; Earthborn paints

I’d love to hear what you think of the plans! I can’t wait to share the results when it’s all done. (hopefully within the next couple of months!)

Master bedroom plans

When we moved into our house two years ago now, the master bedroom in the loft conversion was in need of immediate attention. We quickly got rid of the dark blue carpet and replaced with white laminate, and we painted over the plum coloured walls with their flower stickers (you can see some before pics in this post) We also had to have a radiator installed as there wasn’t one in there and it was freeeeezing! Other than that, we haven’t had the time to do much else to it, and I’m feeling the itch to get on and make some proper changes. While it is currently a nice, light and airy space, it is far from finished in my eyes, and really not very inspiring.

our bedroom - awaiting makeover

For ages, I’ve had in my head that I want to have clothes rails instead of a wardrobe, massively inspired by this gorgeous bedroom below belonging to Holly of Avenue Lifestyle. I think it’s also inspired by my love of shop design, and it reflects the idea of how clothes are displayed in a store. I’ve had my eye on the rails by The Little Deer (see below) BUT I’ve started to worry that the chances of it looking as beautiful and perfectly curated as Holly’s are incredibly slim. My clothes aren’t as expertly coordinated, and then I have my husband’s excessive collection of garments to consider which he already is not very good at hanging up, or putting away… It could just end up a massive messy clothes pile at one end of the room!

So, the other option (which will be more costly) is to build in some storage. I’d love to echo what we have done in the kitchen with some plywood wardrobes. My thoughts were to build it in under the sloped ceiling and turn our bed 90 degrees… although so far hubby is unconvinced by that idea. We could put them along the wall to the right of the bed potentially… we still need to have that debate! ;) I love this idea below of including a little bench seat.

via Heju

via Heju

via Heju

via Heju

I also came across these amazing plywood lockers online, which I think were made by Woodbasics, but A) they are based in the Netherlands, and B) their website is currently offline. I wish there was someone in the UK making these as I absolutely love them!

top left pic: via My Scandinavian Home; Wallpaper - Ella by Sandberg; Rattan mirror - La Redoute; Rug - The Little Deer; Art print - Hattie Maud, Pendant light - Made in Design; Clothes rail - The Little Deer; Plant - Beards & Daisies; String sh…

top left pic: via My Scandinavian Home; Wallpaper - Ella by Sandberg; Rattan mirror - La Redoute; Rug - The Little Deer; Art print - Hattie Maud, Pendant light - Made in Design; Clothes rail - The Little Deer; Plant - Beards & Daisies; String shelving - John Lewis

Above is a moodboard of the kind of look I’m thinking… so lots of white with wood, texture, pastel shades like pink and peach, with a dash of black to give contrast.

Goodness knows when we’ll find the time (and money!) to get cracking on this room, but at least I’ve got something to aim for! I’d love to hear what you think! ;)

Kitchen makeover plans

It's been in the planning for a while, but we are finally on the cusp of embarking on the biggest project for our new house - the kitchen! It's not going to be quite as big a job as I'd originally planned as unfortunately the costs for what I wanted to do were just out of our budget (£6K to take out half of one wall for a start!) We aren't doing any structural work now, just replacing the kitchen, the flooring and decorating. It'll be a little while before I reveal it on here, so in the meantime I thought I'd share what the plan for it is and fingers crossed it all turns out how I've envisoned it! 

Left: via eBay, Right: via Cantilever Interiors

Left: via eBay, Right: via Cantilever Interiors

If you are a regular reader, you'll have heard me harp on about plywood before, and we have decided to go for plywood door and drawer fronts, similar to the left hand pic above. We have employed a carpenter/builder to custom make these so I'm really hoping they turn out well. The plan is to have open shelving also made from plywood with the wall below the shelving tiled and the wall above it painted in pink! The worktop is going to be like the one in the right hand pic above - thick plywood backed in white formica. 

Left: Pinterest (unsure of source), Right: Tiles Direct

Left: Pinterest (unsure of source), Right: Tiles Direct

I haven't got them in yet, but I think we are going for these chevron tiles. I have tested out SO many pink shades of paint at varying price points, and I was undecided until the other day when I picked up another sample from Wilkinsons, and amazingly when we both looked at it on the wall we both agreed it was just the right shade! 

kitchen renovation design

We'll keep our existing cream Smeg, and our current washing machine and dishwasher. There will be a little utility corner at one side of the kitchen for the washer and dryer which will be nice to have separate from the food prep areas. I have ordered the above hob and extractor from ao.com - which are both designed by Patricia Urquiola - I love the industrial yet simplistic feel of the hob. I found it really hard to find extractors that I liked, but this one really stood out and had lots of great reviews. 

I spent a serious amount of time agonising over the floor. It's quite a big area and leads into our conservatory / dining area. Initially I was looking at tiles, but just couldn't decide on what would work, particularly as it would lead directly from our hallway which we are about to lay some bold statement tiles in.... so in the end, we thought going with a wooden floor would be best. I've earmarked this pale engineered oak, so hopefully that will look nice and light and fresh. 

I want to keep the kitchen quite simple, uncluttered and fresh, but with a little bit of interest on the open shelving with plants, lovely ceramics and artwork, so watch this space! I can't wait to show you when it's done! Do keep an eye on my Instagram for mini updates when it starts in a few weeks! ;) 

Current obsession: Plywood kitchens

Kitchens made from plywood is not a new thing, but it's not something I'd really considered before, but recently I seem to be falling more and more in love with plywood - you can see my office bookcase made from the stuff here and I also wrote a post about plywood bedrooms a while back.

We've been in our new house just over a year now (can you believe it?!) and we've done quite a few of the more straightforward rooms (see my last post for the progress so far), and are now turning our attention to the bigger projects, like the kitchen. I've been mulling over the look I want ever since moving in, and I seem to keep going back to plywood. 

via Dezeen

via Dezeen

I love the pale wood, the simplicity and the rawness plywood has, and it seems to sit so well next to the sleeker, harder surfaces in a kitchen. I have a few problems I am trying to get my head round though: firstly, while I think it's fine to 'DIY it' when it comes to a book case, I don't think doing it ourselves is going to cut it in the kitchen. So I need to find a joiner/carpenter who is going to 'get it' and do a good job, or a company that already specialises in this kind of kitchen. Our budget is small though, so the chances of us being able to afford a company like that in the South East are slim to none.

via Plykea

via Plykea

I have come across a few companies who create plywood cupboard doors to fit Ikea base cabinets, so perhaps this is a more affordable option. Both Plykea  and Custom Fronts seem to offer beautiful designs. My other problem at the moment is trying to plan out the design of the kitchen in terms of layout. We have an awkward chimney breast in the kitchen which would be a nightmare to remove, and well, I just can't seem to 'see' it. Again, I could do with the help of a kitchen designer on this, so I'm thinking I will try Ikea's home kitchen planning service to see where that gets us.

Next problem - what on earth to do with the floor?! We have quite a big area to cover as the kitchen opens out into our conservatory / dining area, and if money was no object, then polished concrete would be AMAZING, but again, £££. The images above seem to have either that or wooden floors, but I'm not convinced we have wooden flooring under the current covering, plus I think we need something pretty hardwearing. I never thought I'd say it, but I am toying with the idea of vinyl flooring, something like this concrete effect vinyl from Atrafloor? What do you think? 

Concrete effect vinyl flooring

They've got some really cool designs, and it's changed my opinion on vinyl flooring, although for the space we need to cover, I'm not sure it would be a particularly cheap option either... I'm also considering tiles - I've got samples of some nice marble effect ones, but I kinda prefer how the marble effect vinyl would create a continual pattern rather than tiles which would break it up. I really don't want to have boring flooring, and love this colourful Terrazzo below too, but not sure if that would be just too busy for a large floor area?! It's a minefield honestly! 

pink marble effect vinyl flooring - Atrafloor
Terrazzo effect vinyl flooring - Atrafloor
sustainablekitchens01.jpg
plywood kitchen - Sustainable Kitchens

Isn't the above kitchen just dreamy? Anyway, I'm desperate to make a start on our kitchen, but I am holding back a little as I am worried about making it doable within our budget....  I'd love to hear what you think! 

Small bedroom makeover

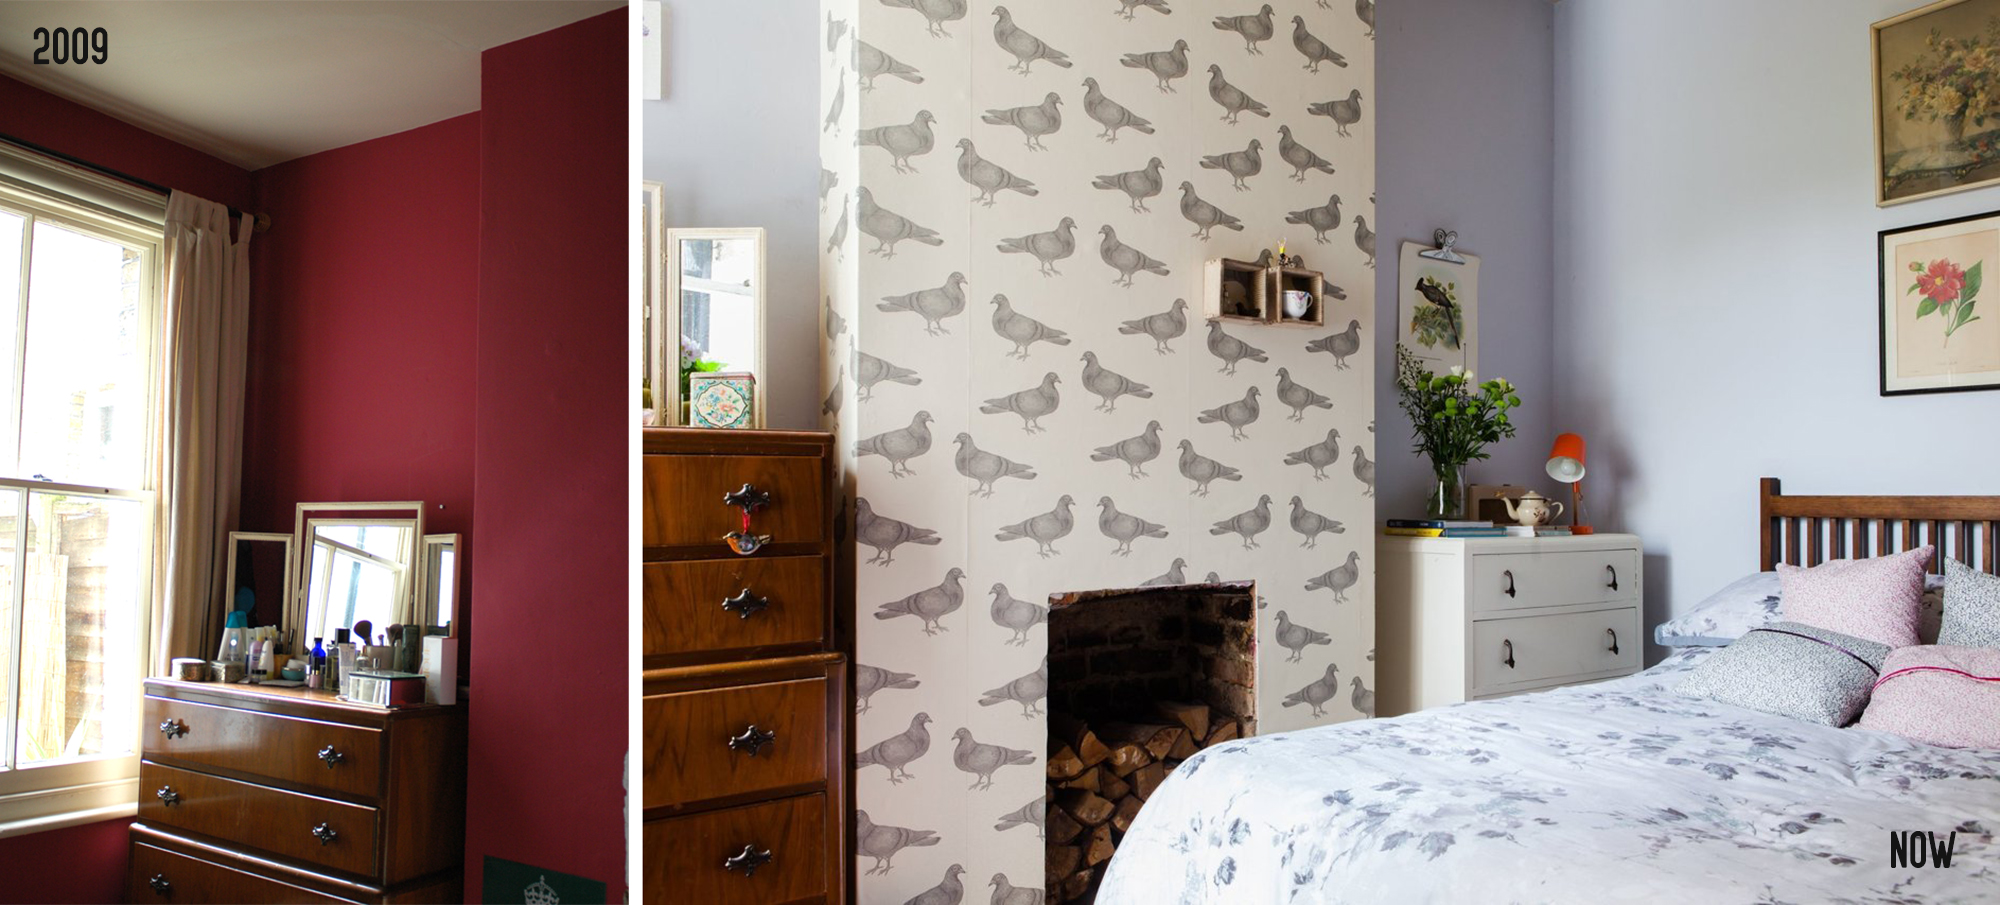
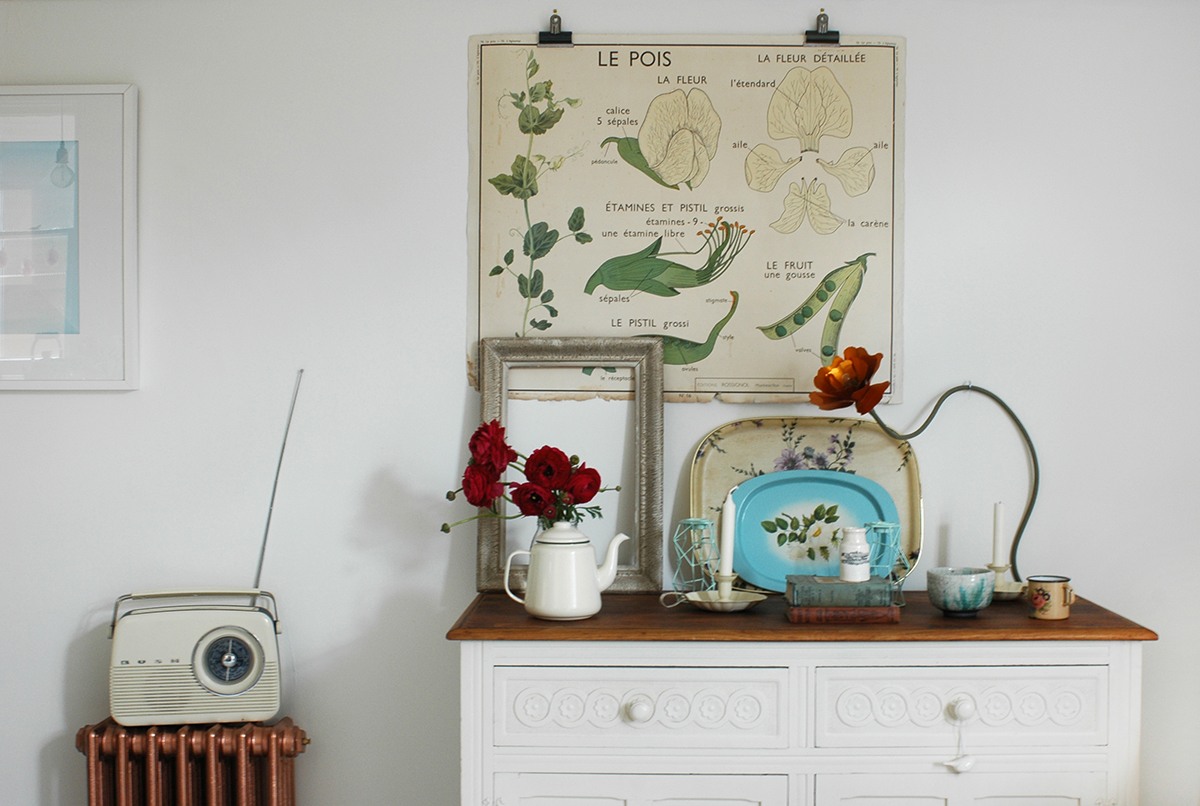
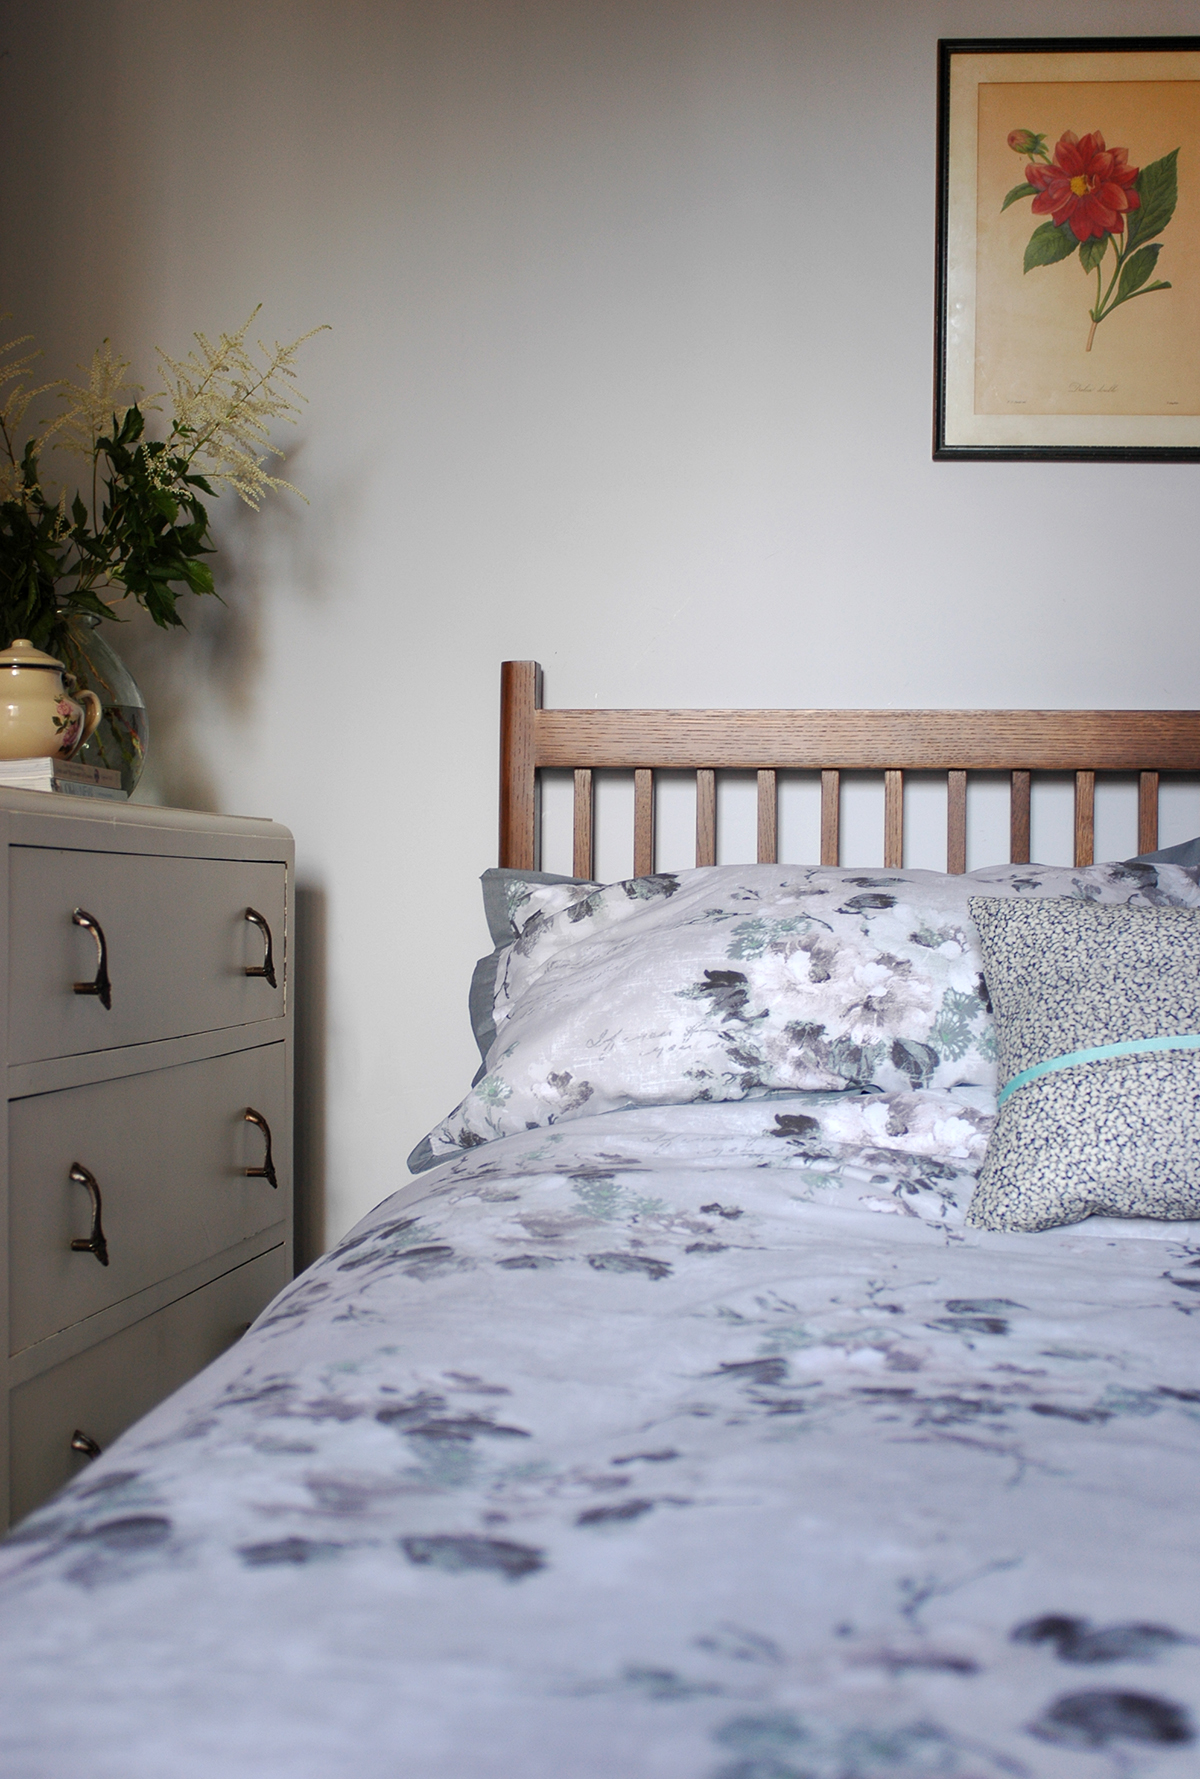
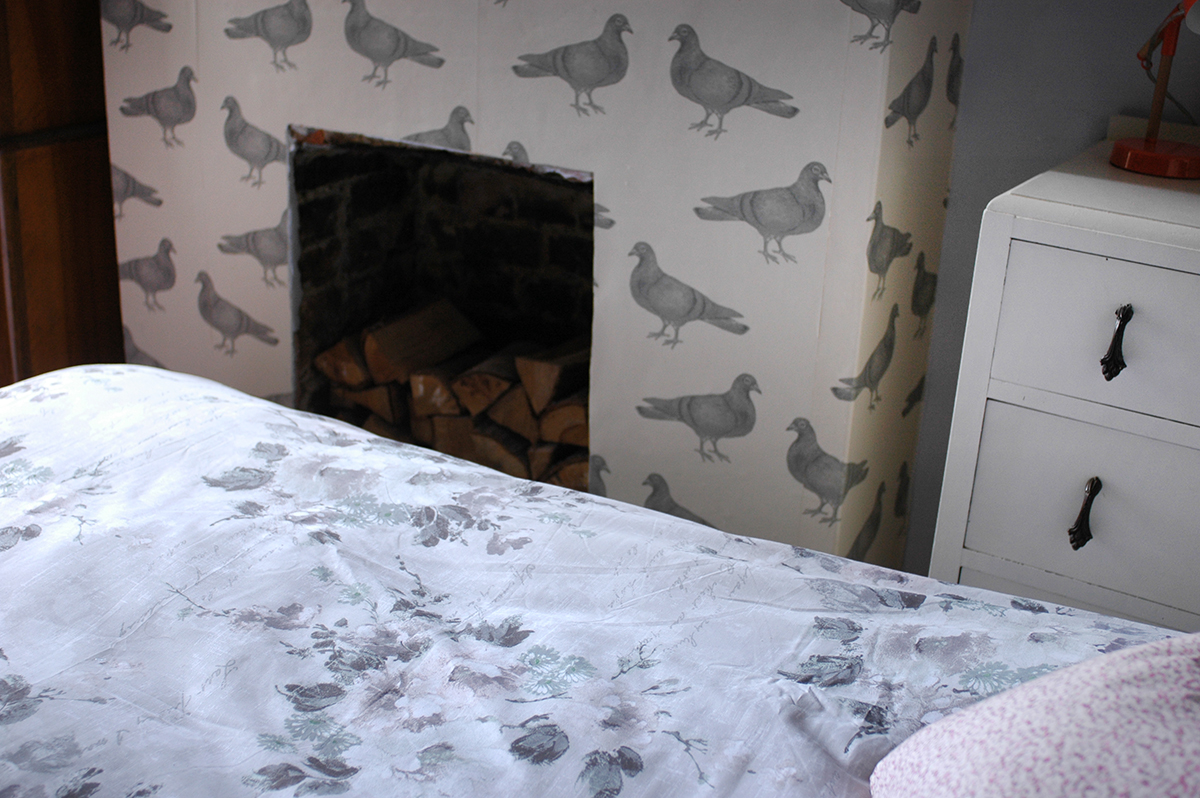
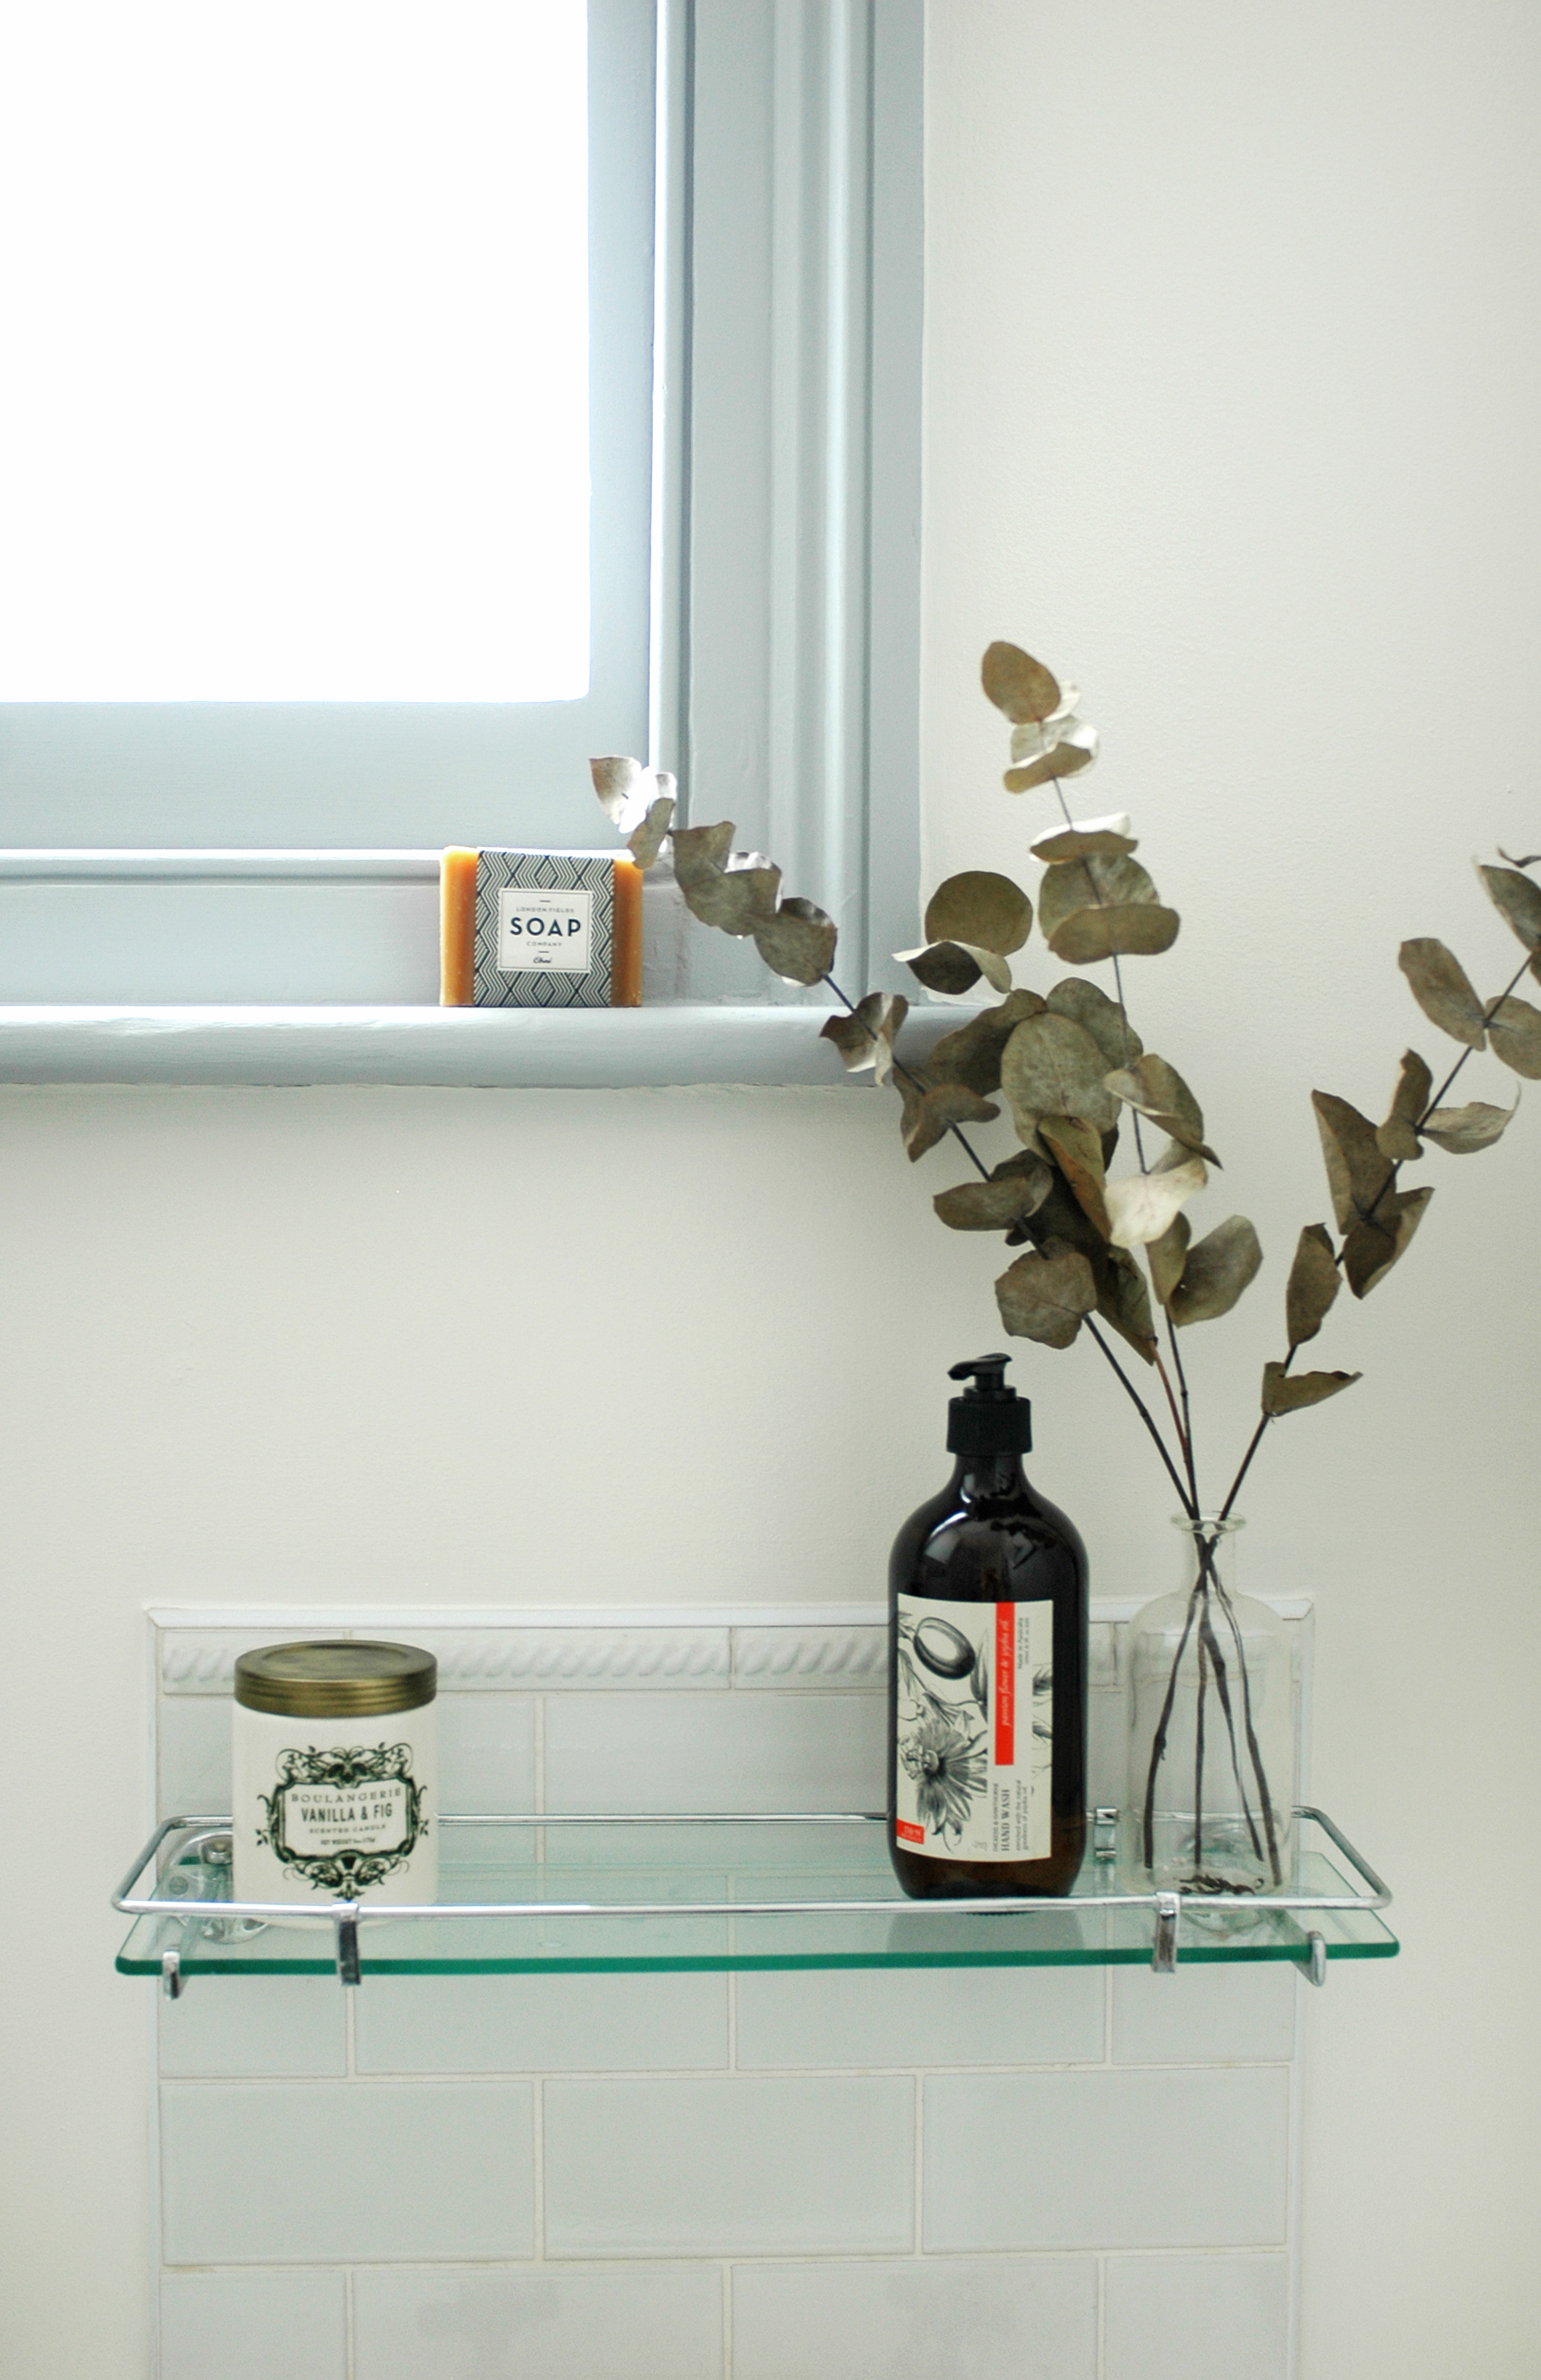
As I mentioned in a recent post, I had given our little single spare bedroom a quick makeover when we first moved in (it had carpet tiles on the floor and a pine bed frame before!) but even after that it was never really how I wanted it to look. So recently, as I had some Farrow and Ball Off Black paint left from painting our fireplaces, I decided to repaint the bed frame in it and update the room with a boho monochrome look with a few botanical touches.  

boho monochrome style bedroom

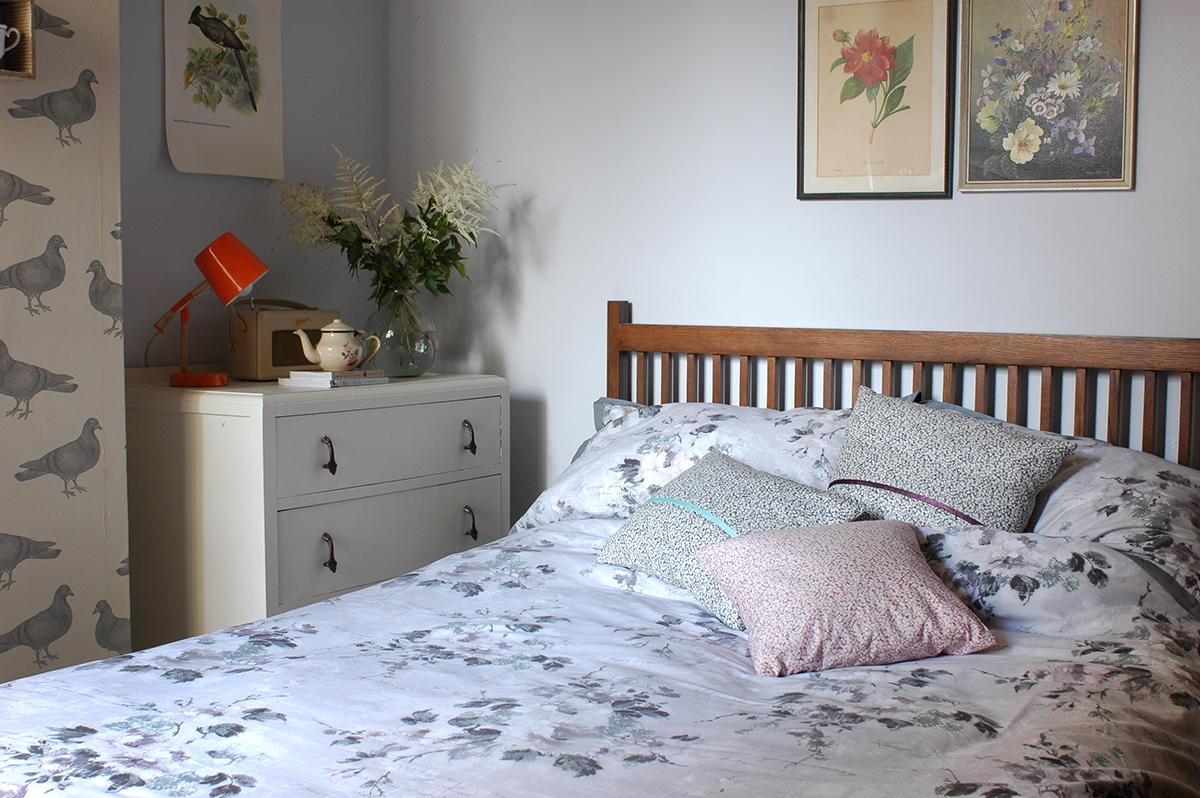
Now I am SO happy with how it looks and love a little glimpse in it every time I go upstairs! I received this amazing HUGE Moroccan blanket from Moroccan Bazaar, along with the first and third cushions on the bed. These helped to set the basis for the room design. If you haven't heard of Moroccan Bazaar, they are a long established company importing Moroccan furniture, lighting and accessories to the UK market. They have a showroom in West London, and supply to the retail and commercial sectors. The berber throw and cushions are handmade using artisan techniques on looms from a 100% natural wool and feel so authentic. The blanket is actually folded in half here so you can imagine how big it is, so would also work well on a double bed or sofa too. 

Boho monochrome style bedroom
Moroccan Berber cushion with pompoms
Moroccan Berber throw and cushions

As you can see, the furriest member of our family is a big fan! I couldn't even bring myself to remove her to take these pics! I think she likes sitting by the window so she can keep an eye on things outside! 

Small bedroom ideas
Monochrome posters by Desenio
small bedroom decor

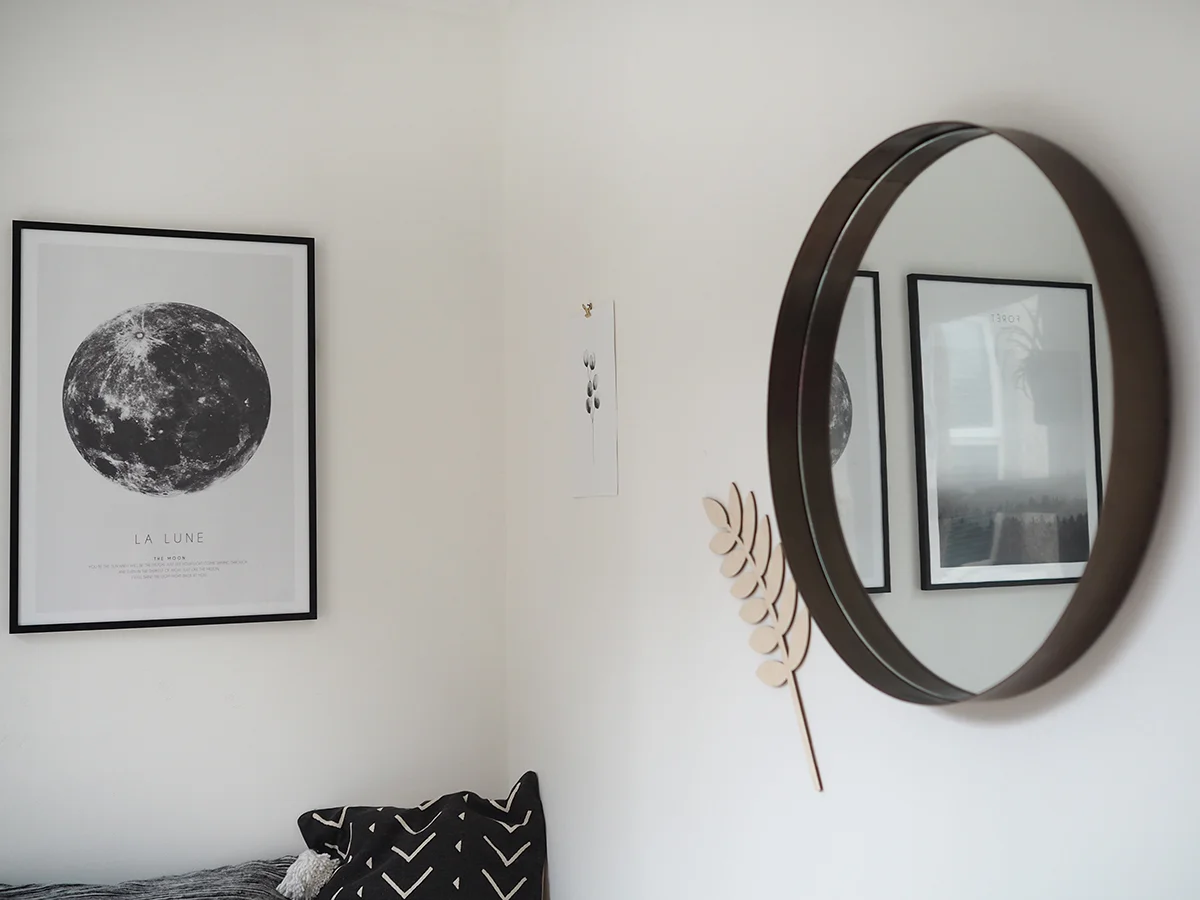
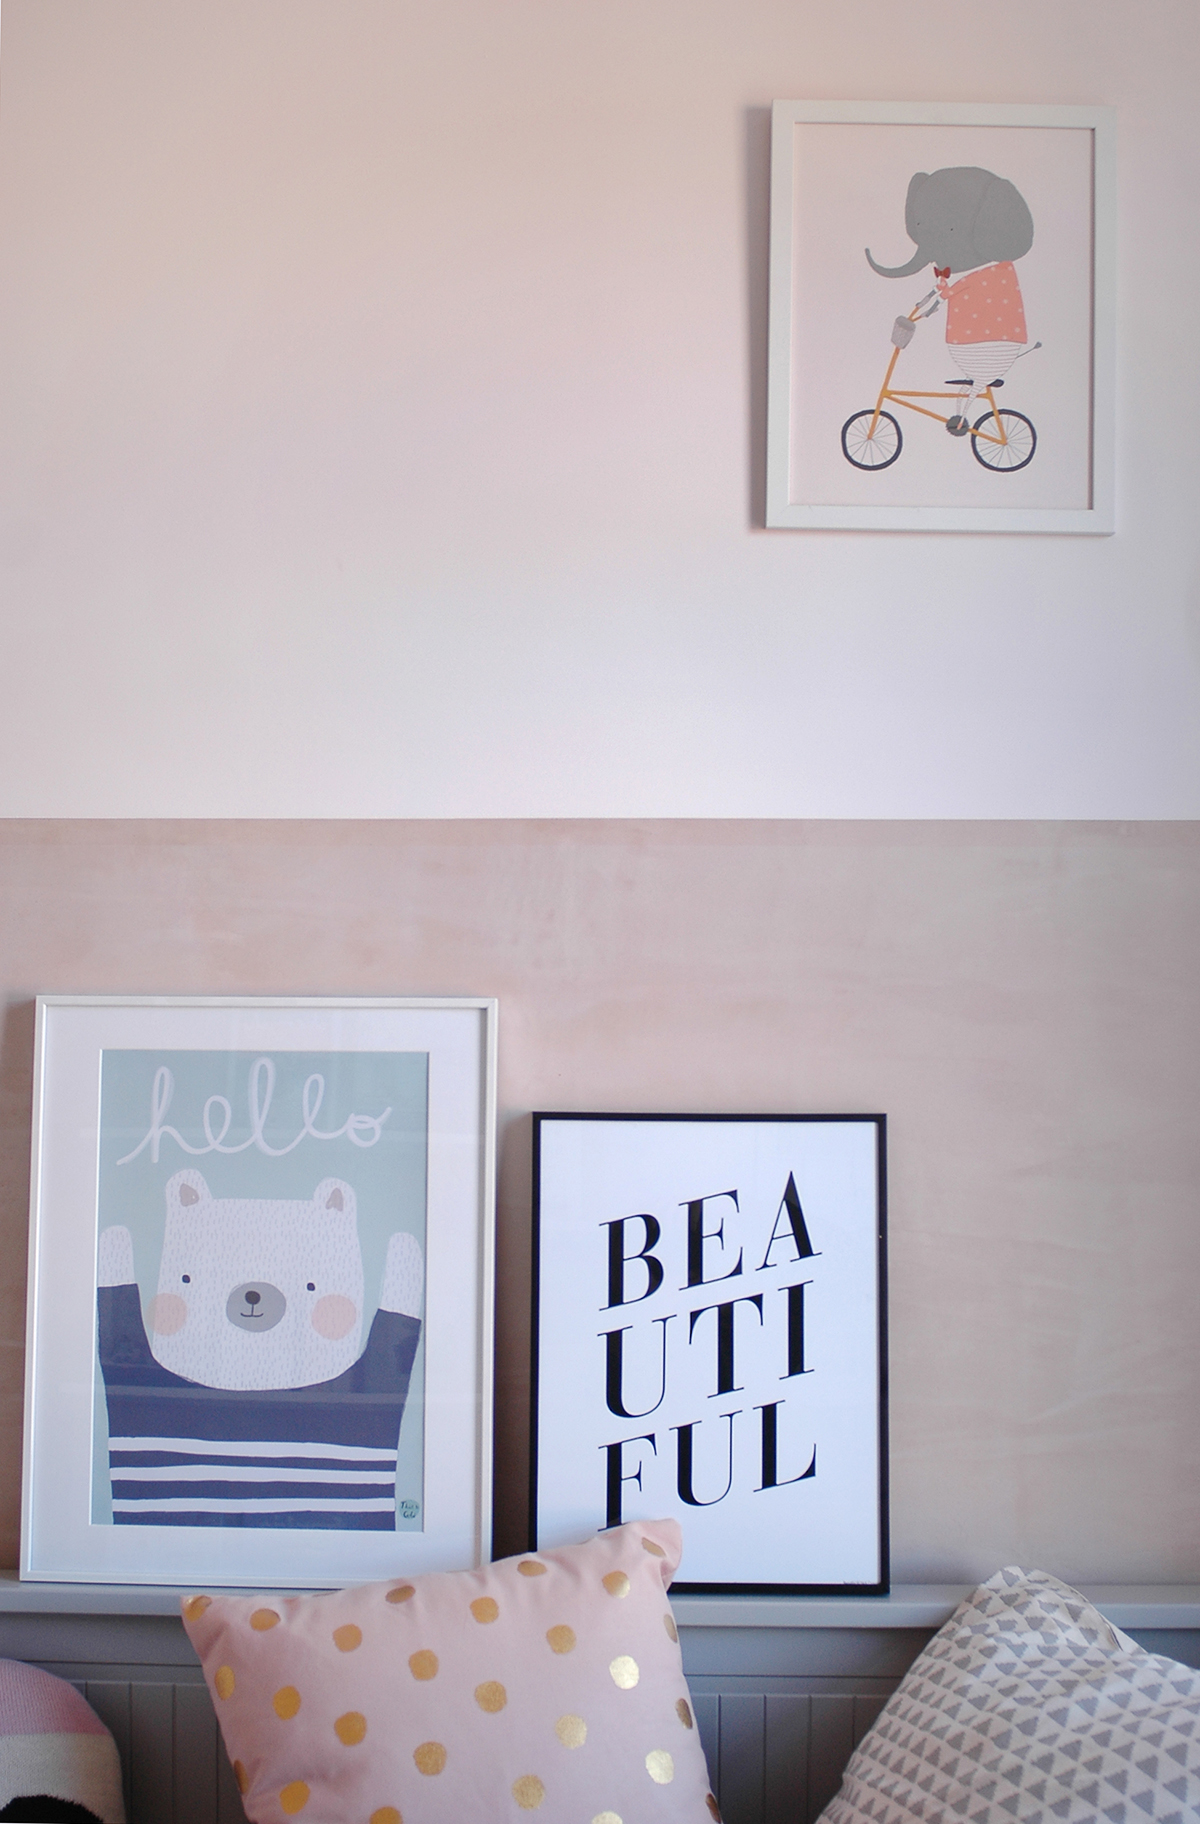
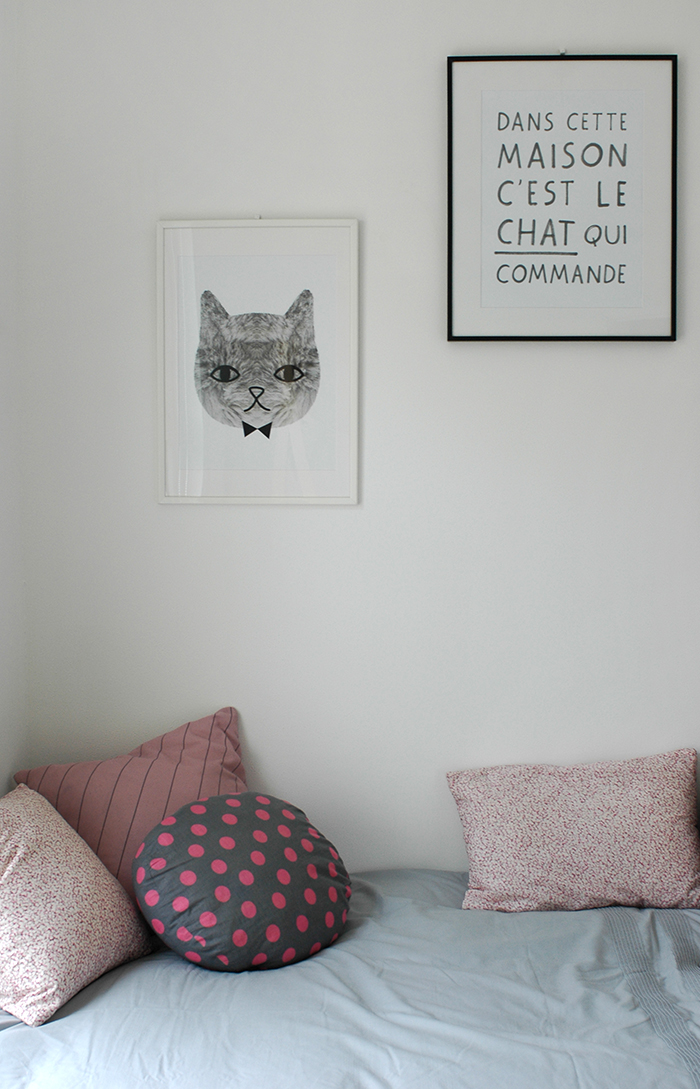
I then simply sourced a few extra details to add to the room. These amazing art prints are from Desenio. I discovered this website a little while ago, and got completely lost in browsing their collection of artwork, which ranges from photography to illustration to typographical prints. It is super affordable with small prints from as little as £2.95. Plus you can choose from a range of frames to fit your print choices. I got the two main posters in 50cm x 70cm with the frames and the little one in the corner at 21cm x 30cm. I've got a special 25% off reader discount for Desenio at the bottom of this post, so do take a peek, there is SO much to choose from! 

boho scandi bedroom
monochrome hanging planter  -Maison du Monde
peperomia plant

The other two cushions are from H&M and the mirror and the hanging planter are from Maison du Monde, and how beautiful is the plywood laurel leaf by LaLa Loves Decor? I love mixing artwork with items like this on my walls. The peperomia plant I picked up at the Conservatory Archives pop up in Liberty along with the stripy plant pot.  

boho scandi bedroom
boho scandi decor
small bedroom ideas
boho monochrome bedroom

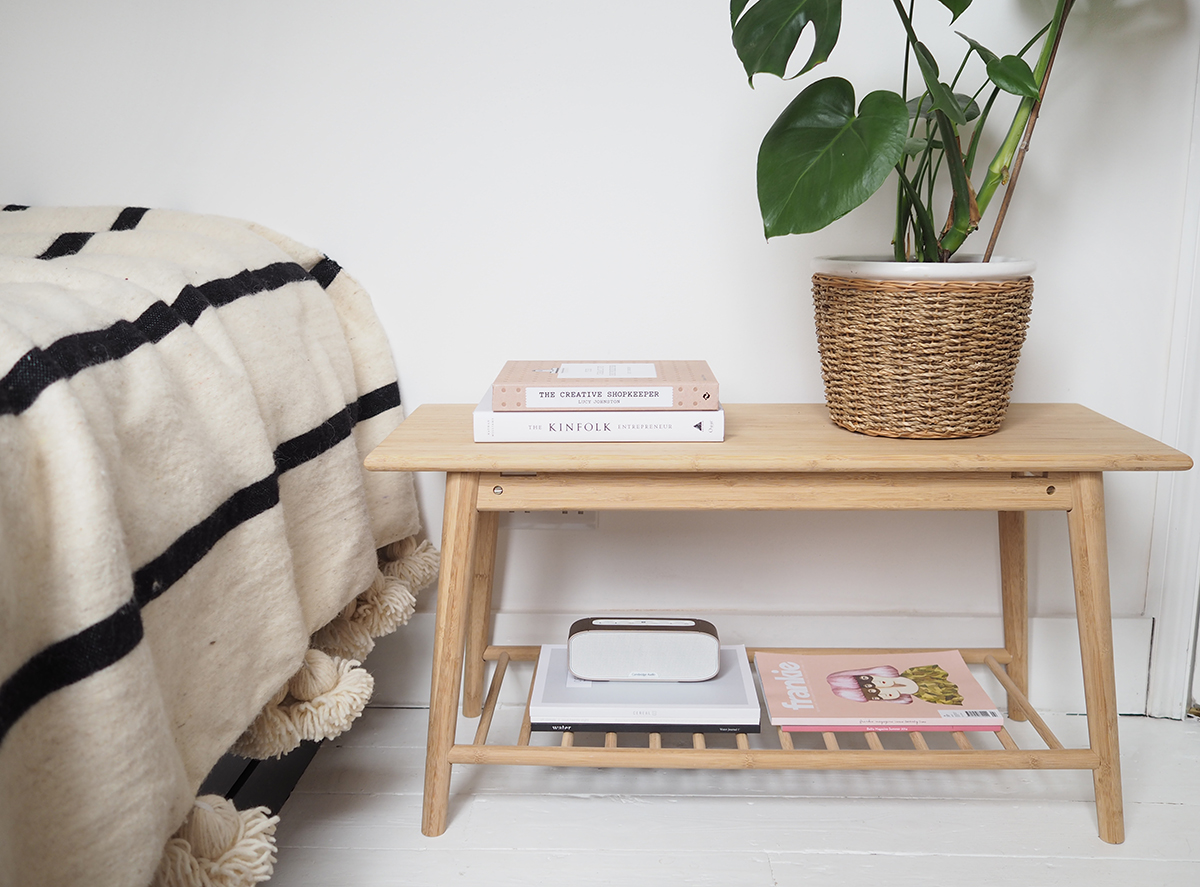
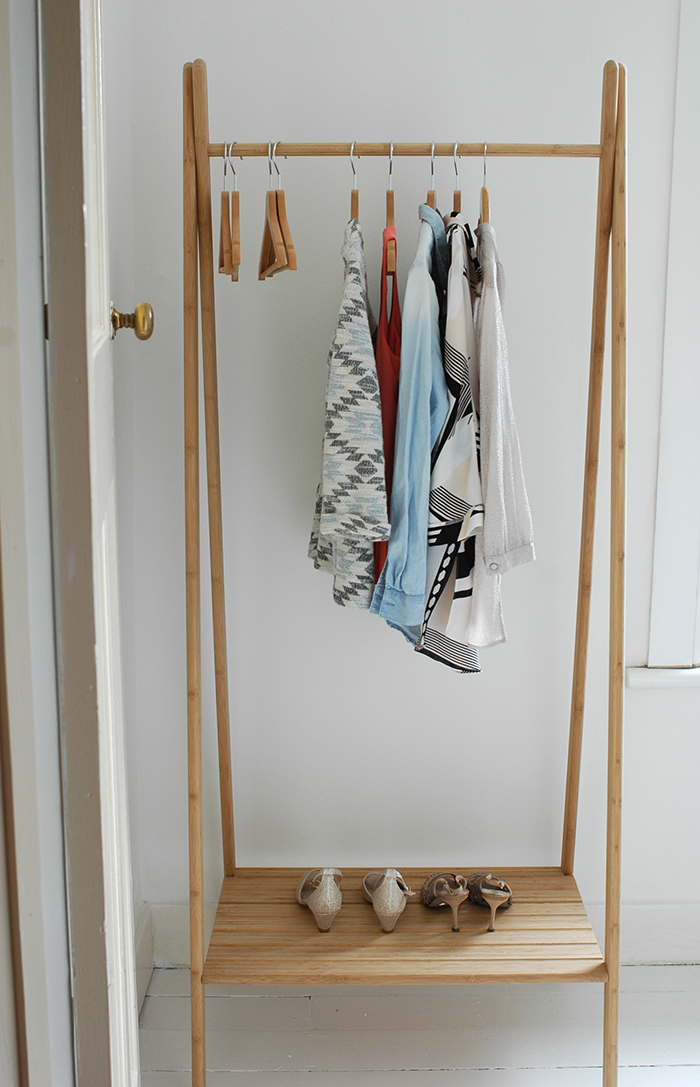
As it's such a small room, we don't have much other furniture in there - just this table and a clothes rail, both made from bamboo, from Cox and Cox. Oh, and the final touch was this beautiful curtain from Urban Outfitters which ties in perfectly with the pom pom details on the cushions. I kinda wish we could just magic this room bigger and made it our own bedroom! It feels like such a cosy little spot to go and have some time to yourself, catch up on some magazine reading and hang out with Claude, who is now a permanent resident in here! I'd love to hear what you think! And as promised, here is the discount code for Desenio to treat yourself to some gorgeous artwork....

Discount code "patchworkharmony” gives 25% off posters* between 3rd - 5th October. 
*Except for handpicked/collaboration posters and frames.

Boho monochrome small bedroom style

*Thank you so much to the brands who provided complimentary items to assist with this makeover - Moroccan Bazaar, Desenio and LaLa Loves Decor. I truly love what all of these companies have to offer and hope you do too! 

Small bedroom ideas

We are so lucky to have five bedrooms in our new house. We honestly couldn't believe it when we viewed the house and saw all the rooms! We have 4 bedrooms on the first floor and then our bedroom is in the loft which is quite spacious, but the other bedrooms are all relatively small. One I use as my office, which isn't too bad in size, then Ruby's room (which we've just finished decorating, so I'll share it on here soon!) and then we have two other rooms - one double and one single. Both of these rooms haven't really been 'done' yet. Well, the single room I gave a mini makeover when we first moved in, but I'm about to give it another one as it really was a quick fix. So, as they are both pretty small, I've been gathering some inspiration for how to make them work as well as possible, so I thought I'd share with you.... 

I loved Teri's guest bedroom makeover (although it's now her new baby's nursery!) - I love how she's made use of the wall space behind the bed for adding interest, and the string of lights is a space saving lighting idea. The little basket by the bed is handy for hiding away bedside essentials like tissues, medication etc. 

Small shelves by the bed are a great alternative to a bedside table as are small stools, and you can utilise window sills for adding decorative touches like plants if possible. Or you can install larger shelves up high for storage like the image above - can you believe this bedroom is actually in a cupboard?! (see below!) 

Generally, I feel using light colours in a small room is best, but as a few of the images here demonstrate, it can look great with a darker shade. I'm actually planning to use a dark paint in the single bedroom, although not on the walls! I will reveal when it's done! I like how they've used a long, thin bench in the above shot to hold a lamp, some books and plants.

Both of our spare bedrooms have *just* enough room for a clothes rail, so we've added one in each. They take up much less room than an actual wardrobe, although they obviously look best if your clothes are all perfectly coordinated like in these pics! The hanging tree branch is actually one you can purchase on Etsy, but I reckon you could totally DIY it. You could spray a branch with white or even gold spray paint and hang from the ceiling with some strong rope. 

I also like what Holly of Avenue Lifestyle has done in her bedroom - by adding the shelving it gives you extra storage space for clothing - just pop smaller bits and bobs in some nice baskets and boxes and it keeps it all looking tidy and uncluttered.

I honestly don't think there is any real need for a huge bedroom, generally all we do is sleep in there! In fact, a friend of mine told me she is planning a 'room swap' - moving her bedroom into her small office space, meaning she can use the larger bedroom as her work studio. It totally seems to make sense to use the bigger space in your waking hours and for working and then using the small space for sleep time. What do you think? 

In other news, I'm starting a newsletter! I'm planning to share my TOP BUYS with you via an email newsletter, which I will send out occasionally with my favourite finds for the home from independent and high street stores. If you would like to receive this then please do just register your email address here

Designing a toddler bedroom

Our upstairs is currently in a bit of chaos as we have moved Ruby out of her bedroom and into the (tiny) spare room, while we gutted it and prepare to have it plastered this week. Not only is the room going to look completely different, it's also going to be a bit of a milestone as we move Ruby into a bed for the first time. (You can read my recent post on sourcing children's beds, there's some lovely ones out there) Today, I thought I'd share with you my plans for the room - it's quite a small space, so we have to be quite clever about what we put in there and how.... 

We haven't hung any wallpaper in the new house yet, but I have just ordered the above paper from Photowall to go on one wall of the room. It is designed by Swedish illustrator and pattern designer Cathy Nordstrom, and I am pretty much basing the room around these colours.

My obsession with plywood continues, and I'm hoping the hubby will have a go at constructing a similar toy box to the one in the above image, with some casters on the bottom, so it's moveable. 

Flexa Play bed, £171, Smallable

Flexa Play bed, £171, Smallable

After reviewing all the possible beds from my previous post, I think I'm going to go for the Flexa Play pink bed. This will hopefully satisfy Ruby's dreams of a pink bed and should compliment the wallpaper. You may recognise that this is the same design as the play table we have in the living room play area - I'm so pleased with that little table & stool - it's so well made and sturdy and super easy to put together, so I'm hoping the same will apply to the bed. 

Garland, £9.50, This Modern Life /  Wooden stacking toys, £29.50, Sarah and Bendrix / Tipi wooden wall shelf, £40, Storage basket with tassels, £40, both Cuckooland / Wire table(plant stand), £8, IKEA / Triangles rug, £49, La Redoute …

Garland, £9.50, This Modern Life /  Wooden stacking toys, £29.50, Sarah and Bendrix / Tipi wooden wall shelf, £40, Storage basket with tassels, £40, both Cuckooland / Wire table(plant stand), £8, IKEA / Triangles rug, £49, La Redoute (currently 25% off!) 

There's obviously some existing pieces of furniture that will go back into the room - I already have that little side table from Ikea (which is actually a plant stand!) plus some vintage grey drawers and a bookcase. But these are a few of the decorative touches I'm hoping to add. 

Miss Kitty doll, £30, Sarah and Bendrix / bed linen, £50.74, Smallable / Cat clock, £25, Red Hand Gang / Light, Snowpuppe / height chart, £17.50, Papermoon / clothes rail & shelf, £68, The Modern Nursery

Miss Kitty doll, £30, Sarah and Bendrix / bed linen, £50.74, Smallable / Cat clock, £25, Red Hand Gang / Light, Snowpuppe / height chart, £17.50, Papermoon / clothes rail & shelf, £68, The Modern Nursery

I'm struggling a little with finding the right bedding, I really love Ferm Living's range, but the pillowcases don't seem to be the standard size (and I've already got a duvet and pillow from Rooi for her bed) 

We don't really have space for a big wardrobe in the room, and most of Ruby's clothes fit in her drawers, but this little plywood clothes rail seems perfect for hanging her dresses, jackets and cardi's, as it can be mounted on the wall, plus it has a little shelf for display too! 

Anyway, I will of course share the finished room on here once it's all done, but do follow me on Instagram for little 'in progress' snippets along the way! :) 

Plans for a bright and airy hallway

When we moved to our new house just over seven months ago, we didn’t have any kind of plan for the renovations. We still don’t! In fact, it all seems to be happening quite organically. As one thing gets done it often seems to lead onto another. For example, we’ve just had an en-suite installed in the loft conversion, but as it needed electrics fed up there, the builder had to lift the (hideous) lino on the ground floor entrance hall to lay the cabling. We now have bare floorboards, and I have kind of started peeling off the textured wallpaper too! So now, despite being a big job, (it would involve doing the stairs and landings too) I can’t stop thinking about what we should do with this area! It always helps me to gather my thoughts and ideas together here, so here’s a little bit about what I’m thinking….

Image via Carla Aston

Image via Carla Aston

Image via SFGirlbyBay

Image via SFGirlbyBay

Vinyl flooring by AtraFloor

Vinyl flooring by AtraFloor

It’s quite a narrow hallway and it feels quite dark, so I’m keen to really brighten it up and make it feel as airy as possible - cue gallons of white paint! With a space so small, it’s necessary to create interest via the walls and floors, and while I love tiled flooring in hallways, I did come across this vinyl flooring by AtraFloor recently which caught my eye, and fed my pink obsession! The other option is to go with painted floorboards and add colour (pink, most likely!) via paint, perhaps on the stairs or inside of the door.

Image via Roomed.nl

Image via Roomed.nl

Image top left via oldbrandnew.com / Mint green ceiling light, £49, made.com / String of hearts art print, £78, Ross and Brown / Arrow hook, £19.60, Urban Outfitters / Oak console Table, £217, Quercus Living

Image top left via oldbrandnew.com / Mint green ceiling light, £49, made.com / String of hearts art print, £78, Ross and Brown / Arrow hook, £19.60, Urban Outfitters / Oak console Table, £217, Quercus Living

As well as being bright and inviting, the entrance hall requires a level of functionality. So, adding wall hooks, shelving, baskets and a sturdy piece of oak furniture like a slim console table with drawers, like the one above from Quercus Living, gives you plenty of storage. I want the area to be clutter free, so adding these allows coats, scarves, keys and other bits and bobs to be tidied away. 

Wooden shelf with hooks, £50, Cox and Cox / Doormat, £16, Oliver Bonas / Faux Begonia tree, £295, Rose and Grey /  Cast iron radiator, price dependent on size, Castrads / Storage basket, £19.99, H&M / Curved mirror, £85, Notonthehighstreet.…

Wooden shelf with hooks, £50, Cox and Cox / Doormat, £16, Oliver Bonas / Faux Begonia tree, £295, Rose and Grey /  Cast iron radiator, price dependent on size, Castrads / Storage basket, £19.99, H&M / Curved mirror, £85, Notonthehighstreet.com

I’m keen to introduce a bit of greenery to the space, but as it doesn’t get a huge amount of light, I’m thinking artwork and artificial plants are the way to go. A full-length mirror is handy for checking yourself out before you leave, with the added bonus of hopefully reflecting a bit of extra light into the hallway. Details like a slim cast iron radiator, gorgeous light fittings and a fun doormat will all add interest.

I’m really liking the idea of mixing natural materials, botanical elements and pops of colour – I’d love to hear what you think!

Disclaimer: This post was sponsored by Quercus Living, but all choices and opinions are my own.

Trend spotting in Milan with DFS

Every now and then, an opportunity comes along that simply can't be turned down. Back in March I received an invitation from DFS to accompany them to the Salone del Mobile furniture fair in Milan. When I worked at the FT on their House & Home supplement, we featured the Salone every year, so I was well aware of the scale and importance of this fair in the interiors world. So it was super exciting to get the chance to see it in person - plus I've never been to Milan, so that in itself was very cool! So hubby took over the childcare reins for 2 days, while I jetted off, all ready for a dose of interiors inspiration!

After meeting up with fellow bloggers Jess of The Only Girl in the House, Ashley of Lazy Daisy Jones and Geraldine of Little Big Bell, we had dinner with the DFS design team, before an early start to hit the fair the next morning. It was fascinating to chat to the people behind the brand and find out about how the sofa design process works and where they get their inspiration. 

A lot of their inspiration indeed stems from attending shows just like the Salone, as well as smaller events throughout the year. They are looking out for emerging trends - sofa shapes, colours, fabrics, design details - it was so interesting to browse the stands with them, hear their thought process and pick up on what things they plan to implement in future designs. 

For me, there were three trends that really stood out throughout the show, with almost every stand I visited having elements of these within them. These were: velvet, marble and botanicals. I'm already very partial to a plant or two, and if you read last week's post, you'll know I've clearly fallen for the marble craze, and well, I may have just ordered myself a few velvet cushions! 

There was also a lot of colour around - and while I'm still loving a bit of grey at the moment, it was hard not to fall for the sumptuous greens in every shade, the luxurious burnt orange hues and the blush pinks that seemed to dominate the fabric choices. 

I was then intrigued to see how the DFS designers translate all of this inspiration into their range. And well, it seems they are one step ahead with this gorgeous lime green velvet sofa from their Topaz range. They also incorporated the marble theme by using the pattern on a striking armchair and footstool. 

This Athena three seater sofa (inspired by another Salone-spotted trend for casual folds and visible seams) appeals to my grey addiction, and by simply adding colour with paint, accessories and that pink velvet Zinc armchair (swoon!), it looks stunning.

It was such an interesting trip - obviously it was amazing to visit Milan and the fair, but I also loved finding out more about the design process behind a brand like DFS. As part of the collaboration I've also been gifted my very own sofa, and I'll be sharing some pics of it soon, along with a peek at our newly renovated living room! You may just spot of few of these trends creeping in! 

If you are in the market for new furniture then I recommend you take a little peek at their sofa range, there are some lovely ones - my faves are the Zinc range which also comes in a velvet fabric collection, the Topaz range and the Betsy range. Thanks so much to DFS for a wonderful trip! 

Sourcing... marble tables

I've been toying with the idea of offering a product research / sourcing / design service recently. It's definitely one of my favourite things - hunting for the perfect pieces of furniture, lighting, art or textiles for a room. I'd love to be able to help other people who perhaps don't have the time to research the perfect bookcase or to bring together an entire room. Over the years I've built a big book of sources for furniture and homewares so I'd love to be able to utilise this. Anyway, my husband has been acting like a 'trial run' client recently, as I search out things for our own home renovation. I generally always run things by him, particularly the bigger purchases, so it often feels like he is the client I am trying to please! For example, this week I've been trying to source a marble side table for our living room, which has been surprisingly difficult, considering how much marble is on trend right now! The brief is:

  • small enough to fit in the designated corner
  • yet large enough to fit our existing lamp on
  • under £200 (ideally well under this!)
  • not too formal

I've put together a list of 15 tables, but I must admit a few have crept over budget! I'd love to hear which ones you guys are loving, perhaps you can help us choose! ;) 

Luxe round side table, £195 - Oliver Bonas

Luxe round side table, £195 - Oliver Bonas

Hex side table, £159 - West Elm

Hex side table, £159 - West Elm

Detroit Square side table, £195 - Graham and Green

Detroit Square side table, £195 - Graham and Green

Round marble coffee table, from £120 - Rockett St George

Round marble coffee table, from £120 - Rockett St George

Bilbao side table, £149 - Swoon Editions

Bilbao side table, £149 - Swoon Editions

Detroit Oval Coffee Table, £250 - Graham and Green

Detroit Oval Coffee Table, £250 - Graham and Green

White stone coffee table, from £135 - Rose and Grey 

White stone coffee table, from £135 - Rose and Grey 

Hexxed Low Table, £564 - Heals

Hexxed Low Table, £564 - Heals

NOTE: I only included the above table as I saw it at the Salone del Mobile in Milan a few weeks ago and LOVED it! I was quite shocked when i saw the price! 

Marcel marble side table, £275 - Graham and Green 

Marcel marble side table, £275 - Graham and Green 

Round white marble side table, £119.99 - Zara Home

Round white marble side table, £119.99 - Zara Home

White marble side table, £95 - Rose and Grey 

White marble side table, £95 - Rose and Grey 

Kasper console table, £279 - Swoon Editions

Kasper console table, £279 - Swoon Editions

Scandinavian style white stone table, £150 - Not on the High Street 

Scandinavian style white stone table, £150 - Not on the High Street 

Heidi side table, £145 - Graham and Green

Heidi side table, £145 - Graham and Green

White Marble Drum Side Table, from £75 - Rose and Grey

White Marble Drum Side Table, from £75 - Rose and Grey

Any catching your eye?! Stay tuned to see which one we go for! Oh, and if anyone reading this happens to be interested in finding out more about my idea for a product research / sourcing service then just get in touch - I'd love some guinea pigs (other than my hubby!) to try it out on! ;) 

Creating a living room play space

You may have spotted over an Instagram a little peek at our living room - where we finally got the parquet floor laid, which has been in the making since well before Christmas! It's a lovely big room - it's actually two rooms knocked together, and as it's quite long it doesn't really work as just a living room. The obvious thing would be to have one half as a dining space, but we are lucky to have another room off this one which we use as a dining / garden room. So the idea for the other half of the living room is to make a bit of a play area for Ruby. The challenge for me though is to create a space that is not only appealing and fun to her, but also is in keeping with the rest of the room. I've been gathering a few ideas for how best to do this, along with some items we already have and some I might well be adding in there very soon... 

via Your DIY Family

via Your DIY Family

ABC paper storage bag, £14, Nubie / Mountain cushion, £26, This Modern Life / Ferm Living jute rug, £45, Future and Found / IKEA PS cabinet, £70, IKEA

ABC paper storage bag, £14, Nubie / Mountain cushion, £26, This Modern Life / Ferm Living jute rug, £45, Future and Found / IKEA PS cabinet, £70, IKEA

Height chart, £34, Hello wall hook, £38, both This Modern Life / Play table, £85, Olli Ella, Mini Kubrick armchair, £179, Made.com

Height chart, £34, Hello wall hook, £38, both This Modern Life / Play table, £85, Olli Ella, Mini Kubrick armchair, £179, Made.com

Top right: via Cup of Jo / Play kitchen, £100, John Lewis / Keep the Wild in you decal, £16.50, Violet and Percy / Stripy storage bag, £13, Southwood Stores / Face cushion, £35, This Modern Life / Alphabear A2 print, £14, This Modern Life / Black an…

Top right: via Cup of Jo / Play kitchen, £100, John Lewis / Keep the Wild in you decal, £16.50, Violet and Percy / Stripy storage bag, £13, Southwood Stores / Face cushion, £35, This Modern Life / Alphabear A2 print, £14, This Modern Life / Black and Yellow beanbag, £50.74, Smallable / Sea grass basket, £19, Oliver Bonas

Basically, I'll be trying to keep the decor quite neutral, with black, white and grey, with a few splashes of colour added in. There is a still a playful, childlike theme and of course her toys will fill the storage items, so hopefully it will be a lovely space for her to play in. 

Watch this space for when I share a full room reveal! ;) 

My office makeover reveal

I'm so excited to finally have this room complete and ready to share with you! One of the things I looked forward to most about moving to our new house, was having a workspace again. For so long I'd worked in the corner of our living room, cramped and messy - and of course that usual thing of never feeling separated from work as it's right there, a few feet from the sofa. So now, having this space is fabulous, and in fact, it is currently my favourite room in the house!

DSC_3412_1200.jpg
Day bed: Ikea / Vintage pendant light: V Interior / Curtain: H&M / Pirate cushion by Lucky Boy Sunday/ Spotty cushion: Rigby and Mac (via Trouva) / Triangle cushion: H&M / Throw: Oliver Bonas / Elephant print: Petit Pippin / Bird plate:…

Day bed: Ikea / Vintage pendant light: V Interior / Curtain: H&M / Pirate cushion by Lucky Boy Sunday/ Spotty cushion: Rigby and Mac (via Trouva) / Triangle cushion: H&M / Throw: Oliver Bonas / Elephant print: Petit Pippin / Bird plate: Donna WIlson via Moonko / Hello bear print by Aless Baylis / Beautiful print: John Lewis

When we moved in, this room slightly resembled a cave - a cave with a Statue of Liberty mural. Clearly someone had taken some time to paint this on the wall, but as you can imagine it wasn't quite to my taste! Here's a couple of 'before' pics. I worked in here for the first few months, and to be honest found it quite depressing (her stern expression didn't help!), so just before Christmas I bought a wallpaper steamer and started stripping the walls. 

IMG_0789_700.jpg

The walls weren't in great shape so I decided that I would get the whole room re-plastered, so I would have a nice base to work with.  We also pulled up the horrible carpet which you can't really see here (it was grim), and my dad painted the floorboards white for me. 

Around the same time Dulux had got in touch with me about doing a makeover collaboration for their Lets Colour magazine - perfect timing! So I agreed to complete the room by the end of March and shoot it for the magazine. It really helped to give me a deadline to get things done! 

Desk: Habitat / Chair: Voga / Floor lamp: Barker and Stonehouse / My Daily Melody print: Audrey Jeanne

Desk: Habitat / Chair: Voga / Floor lamp: Barker and Stonehouse / My Daily Melody print: Audrey Jeanne

I wanted to do something a bit different in the room, seeing as it is my creative space. I selected Dulux's Jasmine Shimmer in Light & Space, and painted the ceiling and half the walls in this gorgeous soft pink colour. I was a bit unsure how it was going to pan out, but I am so chuffed with the result. The pink looks so lovely next to the earthy tone of the bare plaster. 

One of my aims with the room was to have lots of storage for all my books and magazines, and I desperately wanted some plywood display shelving to perch my current favourites on. My lovely hubby set to work creating this! Homebase cut the plywood to size for us and delivered it as it wouldn't fit in our car, and then we simply added the pink painted ledges (also in Jasmine Shimmer).

Bookcase: Ikea

Bookcase: Ikea

Magazine rack: La Redoute / floor lamp: Barker and Stonehouse 

Magazine rack: La Redoute / floor lamp: Barker and Stonehouse 

Vintage pendant light: V Interior / Vintage cupboard: Goose Home & Garden

Vintage pendant light: V Interior / Vintage cupboard: Goose Home & Garden

Sheepskin rug: Barker and Stonehouse 

Sheepskin rug: Barker and Stonehouse 

I then added further storage with an Ikea bookcase, a magazine wall rack and my vintage cupboard. The Ikea day bed also has amazing storage in the three drawers, and the drawer on my Habitat desk is useful for hiding away paperwork that tends to build up.

pink plant pot: Anthropologie / Belly basket: Olli Ella 

pink plant pot: Anthropologie / Belly basket: Olli Ella 

Window cushion: Donna WIlson

Window cushion: Donna WIlson

Mini wall hanging: Kate Housley 

Mini wall hanging: Kate Housley 

Monstera print: The Lovely Drawer / Bear print: Seventy Tree

Monstera print: The Lovely Drawer / Bear print: Seventy Tree

Then it was just a case of adding a few finishing touches, some of which I already had, and others which I had fun sourcing! I've put the sources in the photo captions where applicable, although some don't seem to be available any more I'm afraid.

As of tomorrow, I am no longer doing the part time job I've been doing for the past 15 months, and I am back in the world of freelance. I've bought myself a sparkly new laptop and I feel re-energised to get to work on lots of lovely projects this year (if you need a writer, editor, blogger, picture editor etc - do get in touch!). It definitely helps to be able to work from this lovely new room that's for sure!  

Thank you to Dulux for supplying the paint for decorating this room. Look out for it in their Lets Colour magazine soon! 

Downstairs Loo makeover

So, it's not the most glamourous of rooms, but it is one of the first in our new house to get a full makeover! People keep asking me what our 'plan' is for renovating the house, but to be honest, we don't really have one, we are just doing things when we feel the urge, or when we come up with what we'd like to do in a particular room. With this, it was kind of a needs must job. While it was pretty grotty in there, it wasn't at the top of the list, but just after Christmas we realised that the floor felt really unstable. It appeared that there had been a long-standing leak where the cistern was boxed in. So we decided, if anything, we should do it for safety reasons sooner rather than later. Here is a 'before and after' to get the full effect...! 

As you can see it was pretty rough around the edges - a lot of yellow and a considerable amount of pine for such a small space! It simply needed a complete overhaul so my first task was to source some pretty tiles - naturally!

I'd fallen for some tiles when I was at an event before Christmas, and after posting a pic on Instagram, I managed to find out the supplier and checked out their site. Much to my joy, they came in pink - which I can't seem to get away from at the moment. The tiles are designed by Scandinavian designers Claesson Koivisto Rune, in collaboration with Marrakech Design. They are actually a Swedish company, and while I tried to source a UK supplier to save on delivery, I couldn't, so I bit the bullet and paid the delivery fee from Sweden. So, I'l admit they weren't cheap, BUT I am literally so happy to see them every time I go in there! 

We then opted for simple white metro tiles, painted the walls white and used some grey paint I had left over from a previous project for the window frame and folding door. We got our toilet and basin from Victorian Plumbing, and while we are happy with the items, I was a little disappointed in the service. The delivery came when I was in hospital, and it turned out the sink wasn't there. It took nearly two weeks for them to redeliver it! Not what I needed when I'd just had surgery! 

Anyway, you get over these things... We're really happy with the transformation, it makes SUCH a difference! Below are a few of the little details I've added, some of which were things I already had, such as the plates, plant pot, perfume bottle and mirror, but I've popped the sources for the other bits at the bottom of the post.

Hand towel: House of Rym via The Future Kept

Meraki handwash - Trouva

Light fitting components: Enamel Shades

Gold light pull - Pushka Home

Toilet roll holder - Ferm Living via Scandinavian Design Center

Toilet brush - John Lewis

I'd love to hear what you think! I've got another room makeover coming up next week, so look out for that too. x

Office makeover plans

It's been nearly five weeks since i had surgery after having an ectopic pregnancy, and I'm feeling so much better. Luckily, during this time I've had lots of distractions - Ruby of course, work, and also our home renovations. Our downstairs loo has been done (I will share this soon) and our bedroom has made quite a bit of progress. The current project is my office. I recently removed all the lining paper which was painted dark blue with a statue of Liberty mural (!), but the walls were in quite a state, so we decided to have them re-plastered. We then took up the horrible carpet and thankfully the floorboards were good so they have been painted white. We've got some more painting to do, which is going to be a little experimental, so I will keep this as a surprise for when i show you the room! Fingers crossed it works out. This gives a bit of a hint to the plans...

Above is some of the furniture and accessories I already have or plan to add. We have the Ikea day bed in there, which is a lovely piece and so practical for when people stay as it extends into a double, but it is quite big. So I've kinda had to plan the rest of the room around the bed! But I think it's going to work ok, and it means the room is multi-functional as both a guest room and office. I'm still searching for a bookcase, but I'm also hoping my hubby is going to make me a larger version of the plywood book display that Artemis of Junkaholique made below... 

I hope to get it all finished in the next month or so, and can't wait to move back in there as it's going to be such a nice room to work in. I'll be back soon with the before and after pics! x

Bedroom makeover & bed upgrade

When we moved into the new house, one of the first things we needed to purchase was a new bed. We needed an additional double for the spare room so my parents could stay. So before we even moved, I'd earmarked this copper bed frame from Made.com for our room, and ordered it as soon as we got the keys. 

As the bed was quite a big spend, I decided to order a relatively cheap mattress and bedding - bad move! I should have taken my own advice and not scrimped on the things that need to do a good job. The mattress was really hard and too thin, and the bedding was too light and flimsy. The hubby wasn't happy and I was kicking myself for my less than satisfactory purchases. But luckily, that was when two fabulous companies stepped in to sort things out. 

Firstly, Sleepbear introduced me to their British-made, latex-topped mattress. A new family run business, Sleepbear have developed a 'one mattress suits all' design, which they believe is the ultimate in comfort, support and a good night's sleep. It seems the pure latex they use within the mattress is key to everything - it contours to your body and it's elasticity allows the mattress to bounce back. Not only that, latex is naturally hypoallergenic, so fends off dust mites, mould and bacteria, and due the materials open cell structure it is super breathable, keeping you cool in the summer and warm in the winter. 

When our mattress arrived and we lay on it, we both literally went 'OH YES!' It was SO different to what we had been sleeping on. You can see in the pic above how substantial it is (and it's lovely design!), and it has 100% kept it's shape since we started sleeping on it. It has a firmness to it, but still feels like you kind of sink into it each night. 

So with our mattress upgrade, it would have been ludicrous to then top it with the flimsy duvet and misshapen pillows we'd been using, so thankfully the lovely folk at Soak and Sleep were able to guide us on making our bed a truly luxurious place. On their website, you can tailor your choice of bedding to what kind of sleeper you are... side, back or front sleeper, cold or hot, allergy sufferer etc. We were advised to go with a pure wool duvet, which, as a natural material is great for temperature regulation - I often go to bed cold, but wake up in the night too hot, so it was perfect. As for pillows, it seems latex is winning out again! Same as the mattress, the latex pillows keep their shape amazingly well, and are hypoallergenic, (as is the wool duvet) which is useful for my asthma. 

Last but not least, the bed sheets. Again, I've always been a bit of a cheapskate when it comes to this, but NO MORE! 100% French Linen is the only way to go! I can't believe I've cheated myself out of sleeping between anything less. It feels amazing, it is breathable, again helping with temp control, and there is no need to iron it! added bonus! I'm totally in love with this Blush Pink set I went for, I can't stop looking at it! :) 

Doing this bed upgrade has honestly opened my eyes to how important a good mattress and bedding is. Maybe I'm just getting old, but it feels like a real priority to have a super comfy bed to retreat to after a long, stressful day! 

The entire bedroom has had a bit of a makeover, although it is not complete yet. We are still working out storage options and additional furniture etc. But we did strip off the lining paper that was painted a deep purple and repainted in white, We then got rid of the dark blue carpet and replaced it with this white laminate flooring. As it's a loft conversion, there were no nice floorboards under the carpet, hence the laminate, but I've honestly surprised myself with how pleased I am with it! It has completely transformed the space. I will probably repaint the pink sloping wall, and we need things like a new light fitting, a new door and window coverings, but for now, just making those small changes has made it a completely different room to what it was. Of course I forgot to take any decent 'before' pics (again!) although below is a terrible phone pic from when we viewed the property, and a few 'in progress' ones when I was stripping the walls! 

What a difference a lick of paint and a new floor can make right?! The only furniture I've added to the room so far are the little side tables which I got from Nordic House.

Things are slowly taking shape round here! There's still lots to do, but at least we now have a lovely, comfy place to retire to after days of decorating! Thank you so much to Soak and Sleep and Sleepbear for their help with upgrading our bed - I know I will continue to opt for better quality when it comes to bedding from now on! 

oh, and if you fancy upgrading too, Sleepbear have a £50 off discount code until January 31st, see their website for the code, and Soak and Sleep are in the final week of their sale so take a peek for some bargains! 

Planning a plywood bedroom

So last week I started stripping wallpaper in our bedroom, which is a loft room. It is just lining paper, but painted in a plum shade and quite dark. I just needed to get it off asap! But our actual plan for this room is to panel it with plywood. I'm really loving interiors with raw materials right now, things like concrete and bare plaster, and there's some really beautiful examples I've seen where plywood has been used. I was initially inspired by the home of Mirjam Hart which we featured in 91 Magazine S/S 16 issue, where she has panelled behind her bed, although I think this is actually what they call OSB in the trade, and is a lot rougher looking than plywood. 

Photo: Mirjam Hart / via 91 Magazine

Photo: Mirjam Hart / via 91 Magazine

I LOVE this room above, and am definitely thinking that incorporating colour like this is something I'd like to do. 

I love the natural patterns in the wood in the shot above and how the rawness of the wood contrasts with the pretty pink flowers and the smoothness of the marble table.

There are so many ways in which it can be used, if you didn't want full panelling, a head board, or a bedside shelf is a subtle way of introducing it.

Red online

Red online

And you can of course incorporate storage too via cupboards, drawers and shelving all made from plywood. 

Oh, and I DEFINITELY want one of these in my office for my books and magazines! It looks so simple to make and such a nice way to display your favourite reading material. 

I'm still at the planning / gathering ideas stage with our bedroom, but this little bit of research has certainly inspired me. What do you think of plywood as a wall covering? 

My Evolving Style and Harley & Lola

We are slowly beavering away at our new house, despite a bit of a setback when a drunk driver knocked my hubby of his bike a few weeks back. Luckily he is fine, but the injuries he did receive means he's not been able to do much manual work of late! But my dad has stepped in to help with a lot of decorating and sorting out the garden, so we're getting there slowly but surely. 

I'll admit that my focus has been on the sourcing side of things, which of course I love! A few years back my sourcing techniques would have mainly consisted of early mornings at flea markets and car boots and browsing eBay for bargains. While I still have a love of vintage and a good bargain, I feel a little like my style have evolved greatly of late, and I have found myself quite taken by the Scandi trend and mid-century look, particularly when it comes to furniture. Some of this evolution may be down to laziness and finding that getting things delivered to my door is much easier that rising at dawn to hit the markets! But whatever the reason, I'm spending lots of time online researching furniture, discovering new brands and building wishlists! 

Wycombe bed - £970

Wycombe bed - £970

One brand I've discovered is Harley & Lola, whose furniture and homeware is sourced ethically and they are committed to using recycled packaging wherever possible. I find that when I am not buying vintage - which feels like a form of recycling - that it is a bonus if a company selling 'new' products is willing to put the extra work into how and where they source their ranges from. 

Wycombe mirror - £367

They have a nice mix of styles, from the Wycombe range which is quite Scandinavian, to the Marlow range, which has a bit more of country farmhouse feel to contemporary style pieces in their Kielder collection. 

Kielder bench - £322

It's funny, I almost feel guilty for the evolution of my style, and what I am drawn to. I feel like I am 'cheating' on my vintage roots (!) or that I am being too easily influenced by current trends (which I previously always thought I avoided) But I've decided it's best to just go with it, and buy what I like, after all, tastes tend to change as you get older, and I think we are influenced by trends whether we like it or not! I know I certainly wouldn't dress in the same clothes I wore in my late teens, so my interiors preferences are bound to be different too! 

Anyway, I'm excited to see how our new house progresses and how different/similar it might end up to our last place. I hope you will follow along too! 

Do check out Harley & Lola for more of the above too. 

*This post was written in collaboration with Harley & Lola, but all views, thoughts and choices are my own.*

Quick bedroom makeover

Since we moved into our new house about 5 weeks ago, we've been very busy, but it feels like we've been jumping from job to job - there's just so much to do, and we keep spotting or discovering things that need our attention, so it's hard to stay focused on one thing. But I really felt like I wanted to get at least one room 'done', so the smallest bedroom seemed like the place to start. Of course I forgot to take a proper 'before' shot - it originally had some carpet tiles (!) on the floor that were filthy, but thankfully very easy to get rid of, so this is what it looked like after these were removed.... 

Firstly my dad painted the walls and floor in white so this freshened up the space instantly. The bed on the left was actually left by the previous owners, and fits perfectly along that wall, so for now we've decided to keep it there until we find something else. So in the meantime, I decided to give it a lick of paint. I must admit, I am a bit of a lazy decorator. I wish I could click my fingers and everything was painted! So that is why Annie Sloan's chalk paint was so appealing. I didn't want to spend too long on this room, so the fact there is no need for prep before using Annie's paints got the thumbs up from me. 

I selected four paints from the Annie Sloan range - Paris Grey, Old WhiteScandinavian Pink and Antoinette. I painted the bottom panel Paris Grey, the top panel Old White and then for the drawers I did a little bit of mixing. The left drawer was Old White with a little bit of Antoinette mixed in, the middle drawer is Antoinette on it's own, and then the right drawer I added a little Scandinavian Pink in with the Antoinette. All finished off with a little bit of Clear Wax

I plan to make some new cushion covers and change the bedding as it was a quick fix as we had someone coming to stay, but the little rug is a new addition from Oliver Bonas. I didn't want the room to look overly pastel-y, so added this darker rug to contrast with the paler colours. 

It's such a teeny tiny room, that there isn't much space for furniture, but obviously we wanted something for our guests to put their clothes, so this gorgeous clothes rail from Cox and Cox was the perfect option. it's made from bamboo, which is a sustainable wood, and also looks beautiful. It literally took minutes to construct and I'm loving the simple design. I am tempted to steal it out of here for my own room! 

plant pots from Howkapow

plant pots from Howkapow

prints by Audrey Jeanne

prints by Audrey Jeanne

There's still a few bits and bobs to be added to this room - a bedside table and lamp, a window covering and maybe some shelves, but for now am happy that at least one room in the house feels like us rather than the previous owners! I'd love to hear what you think! 

*Thanks to Annie Sloan and Cox and Cox for helping me out with this makeover.*

Our new home... finally!

So, I know it's been pretty quiet around here of late, but as you may have read in recent posts, we have been waiting to move house for a whole year! We put our flat on the market in September 2015, expecting to have moved by Christmas. We found the house we wanted to buy in the October, but had to wait while the owner found her new home. In the meantime, we lost buyers left, right and centre due to the wait, but eventually got a dedicated couple I think around April. But then the legal problems commenced. I will never own a leasehold property again in my life! It is a nightmare! After months of thinking it might never happen we finally exchanged at the start of September, and completed on the 30th.

While we were desperate to move to a bigger house, it was still sad as we watched the removal guys take everything out of the flat we'd lived for 7 years. So many big events happened in our lives during that time - getting married, bringing our first child into the world and of course I launched 91 Magazine from here - and if you didn't know, this house inspired the magazine's name - as the address was no.91.

We look back and hope we managed to improve that flat while we were there, I particularly loved the kitchen which was our biggest project, and the room that most prospective buyers seemed to love. Here it is just before we left... and yes, we did leave the Smeg behind! :( 

Goodbye no.91, you will always have a special place in my heart! But it definitely felt like the right time for us to move on. We have now been in our new home for a week and it feels great! We have somehow managed to upgrade from a 2 bed flat to a 5 bed semi detached house! The day we viewed it last year I literally couldn't sleep that night thinking about it. The house was a bit of a mess in terms of decor and maintenance, but I loved the space and the flow and just knew we could bring it back to life. When we thought we might lose it, I realised that it would be very unlikely we'd find the same amount of space for the price we were paying. Particularly in an area we liked and that suited us in terms of future schools for Ruby. So we held on and did everything we could to make sure the chain didn't collapse. So, here we are, finally in, and WOW, there is a lot to do! 

Downstairs there is a large knocked through living room, a large conservatory (or 'garden room' as I like to call it!), the kitchen and a downstairs loo. We decided on our second night in the house it was time to start painting. We just couldn't bear to be surrounded by dark, dark blue walls for any longer than was necessary! Dark walls can look great if done well, but I personally find it super oppressive. The room also has a worn red/brown carpet throughout! oh and did I mention the gold fireplace feature walls?! 

We are half way through painting this huge room white (it's taking 3 coats to cover the blue!) and already it feels so much brighter and even more spacious. There's still lots more to do in here - rewiring, flooring, and skimming the artex on the ceiling, but really it's all cosmetic, so shouldn't take too long to transform. 

On through into the 'garden room', I've tried to do a touch of styling and sprucing it up with plants, but there is NO hiding those lime green walls! Oh and yep, they carry on right through into the kitchen.... 

I realised after we agreed to include our Smeg appliances with the sale of the flat that I'd made a big mistake! My husband suggested we just get a cheap fridge to tide us over until we do up the kitchen, but I literally couldn't bear it (I'm such a Smeg snob!!) - but luckily I managed to get this one at a great price as it has a bit of damage. But those lime walls just aren't doing it justice are they?! So I think they are next on our hit list! 

Upstairs isn't quite so bad in terms of colour schemes, except for the room I'm typing from now, which has a questionable mural painted on the dark blue (again!) walls! Above is a small bedroom which I've managed to make passable for now, although what you can't see is the carpet TILES on the floor! 

Ruby's little room isn't too bad either - it just needs decorating and to be rid of the stained carpet. I never thought I'd say this, but I think we may actually go for carpet in the bedrooms. Even though the current ones are a bit manky, we've been quite enjoying the softness under our feet after having hard, cold floorboards in our old place.

This is all I dare show you of the bathroom! It needs complete replacement but it is quite a big room, so lots of scope to make it lovely. For whatever reason this is the only room that's been left with exposed floorboards, everywhere else has been covered with carpet or lino! 

So that's the first peek into our new home. I know it's all going to take a while, so I need to make my peace with that and endure living with things as they are for a while. But I am looking forward to the journey, and making the space lovely again. I hope you'll enjoy following along with me! :) 

Utilitarian downstairs loo

Last Friday we FINALLY exchanged on our house, (a year since putting our flat on the market - that must be a record!) So we've spent much of the week chatting about plans for the new house and debating what we will do with the FIVE bedrooms! I'm excited about living in a house where I will go up the stairs to bed at night - I've only ever lived in a bungalow or in flats - and I'm also weirdly excited about having more than one loo! :) We have the main bathroom and a downstairs loo at the moment, and plan to turn a small room in the loft conversion into a en-suite. We have LOTS to do in the house, the whole place needs an overhaul, so I will share some ideas and inspiration for different areas over the coming weeks. If anything, I find it really helps me to work out what I want, by sharing my thoughts on here! 

Photo via: The Ana Mum Diary

The downstairs loo is always a tricky one. Such a small space, but one that the majority of your visiting guests will get a peek of at some point, so you don't want it to be dull! Wall mounted or corner sinks are usually the only option, although I do love these bucket sinks from Labour and Wait, but there just wouldn't be the space. (maybe for the en-suite?!) 

Photo via Pinterest (no source) 

Photo via Pinterest (no source) 

In such a small space my preference is to go relatively simple but perhaps with one or two unexpected elements. I'm thinking a bit of a utilitarian vibe - industrial lighting, tiles on the floor and tiles halfway on the walls, but then with some fun art on the wall and a small mirror. I would love to find a salvaged door, with frosted glass and perhaps some text on it, which would add interest and also let in a little more natural light. Something like this.  

Photo via The House Directory 

I LOVE these London Underground inspired tiles which Fired Earth did in collaboration with Transport for London, but it was a few years ago and they don't have them anymore. But we could at least recreate the two tone tiles which looks great, or at perhaps have a darker skirting board like in the top image. 

Hooks: Baileys / Hand wash: Southwood Stores / Hanging planter: Ro-Co / Towel: The Future Kept

Hooks: Baileys / Hand wash: Southwood Stores / Hanging planter: Ro-Co / Towel: The Future Kept

And then of course, not to forget those finishing touches - some hooks, a luxurious hand wash, a plant (or two!), either hanging or potted, and a lovely hand towel. A small space, but yet still so much to think about! ;)